Book Image

Buildbox 2.x Game Development

By : Ty Audronis
Book Image

Buildbox 2.x Game Development

By: Ty Audronis

Overview of this book

Buildbox is an “any skill level” development platform to develop video games with no coding experience. It also exports these games to be compiled for any platform (from Windows to Mac to iOS to Android and Blackberry) all using the same graphic user interface. Using an example as a tutorial, we will relate the driving principles and you’ll see how you can implement these principles to develop any games on the platform. We begin by setting expectations and providing a brief overview of the software. But it’s not long before you “dive in” to creating your first video game. You will actually have a playable level (“world”) by the end of the second chapter. Later on, you’ll learn everything from basic graphics creation to advanced world design while you refine your first game, called “Ramblin’ Rover.” All along the way, you will see how certain functions could be used in tandem to create other types of games; hoping to spark imagination. We will follow the principles and process of monetization through ads and in-game rewards. Lastly, we will go through the process of exporting, compiling, and preparing your storefront to sell the games you will eventually create.
Table of Contents (17 chapters)
Buildbox 2.x Game Development
Credits
Disclaimer
Foreword
About the Author
About the Reviewer
www.PacktPub.com
Preface

Collisions and obstacles


We can't wait for you to see your parallax backgrounds, but right now the game is not testable. There is no ground to drive on, and our rover still needs its collision shapes adjusted. If you remember from our previous chapter, collision shapes must be edited in the base object, and not the instance on the game stage. So, let's start with the wheels.

In the asset library, open the Objects section and select the Wheel. In the properties window, you'll see a field called CollisionShape. Click the Edit button for this field.

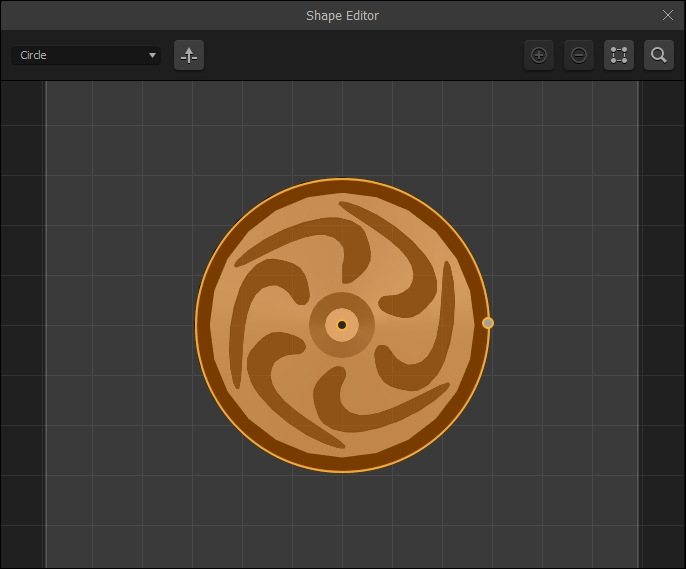
Within the shape editor, you can see that the current collision shape barely covers the axle of the wheel. Let's expand this selection using the handle (a small dot) on the right side of the circle to cover the entire wheel. It should look like the following screenshot:

Since we did this with the master object for the wheels (and not the two instances of the wheels on our stage), both wheels are affected by this new shape. Now the wheels will actually...