

This section will define all the main points of each of the different SDKs available to us, and we will build our first program with them. This will be in a step-by-step and very in-depth tutorial design sort of way, since this is a lot of information to package and condense into a small section without needing to reiterate the information in later chapters.
It is now time to set up a Unity3D project for each of the different SDKs that will serve as the basis for later chapters when we use each of them to build an application or a game. Let's start with Vuforia, since it is the simplest one to set up:
- We now need to register with Vuforia. Navigate to https://developer.vuforia.com/vui/user/register in order to go to the registration landing page. If you live in a country in which Google is blocked, you should use a VPN, because the registration page uses the Google-powered reCAPTCHA and you can't continue without it:

Registering on Vuforia
- Once you can log in, navigate to the
Developtab; alternatively, follow this link: https://developer.vuforia.com/targetmanager/licenseManager/licenseListing. - You will see two main items,
License ManagerandTarget Manager. The License Manager will allow you to create a free Development Key or purchase a Development Key. We want to create a free one. Click onGet Development Key. Enter a name for the app, which you can change at any time. I shall call mineVuforiaIntro:

Adding a Vuforia key
- Now, we have our key with Vuforia. In order to see the license key, we need to click on the name of our app:

Vuforia key info
- This next page gives us two very important pieces of information:
License KeyandUsagedetails. TheUsagedetails tells us how many Cloud recognitions, Cloud databases, Recognitions used, Cloud targets used, VuMarks generated, VuMark databases, VuMark templates, and VuMarks we have used or currently have remaining:
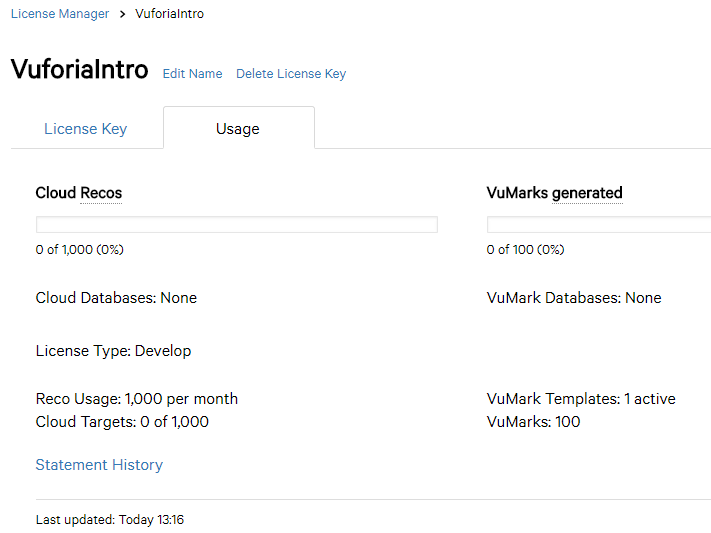
- The
License Keydetails tell us our key (which is easy to copy to the clipboard), the type of key it is, the status of the key, the date it was created, and the history of the key.
Now, we are ready to set up Vuforia and get the demo project working appropriately.
As stated previously, Vuforia is fully integrated into Unity3D as of 2017.2, and is a dream to work with once you learn the basics of the SDK. Vuforia is made to strictly deal with the graphics portion of AR. It can recognize images and objects, and it has the ability to interact with the real world, because it uses computer vision. Since Vuforia is built into Unity3D, we will do the installation of Unity with Vuforia all in one go.
If you don't have Unity3D installed on your computer now, let's go ahead and do that:
- Navigate to http://www.Unity3D.com and download the latest Personal edition (or one of the others, if you are a high roller) installer for Unity:

- When you get to the components section of the installer, make sure to select all the platforms you want to support. I typically select
Android Build Support,Linux Build Support,SamsungTV Build Support,Tizen Build Support,WebGL Build Support, andUWP (Universal Windows Platform) Build Support. There is one additional one you need to make sure you select, and that isVuforia Augmented Reality Support:

Vuforia Unity installation
Now that Unity3D has been installed, let's create a brand new Unity project:

- Once the project has loaded, we can take a look at some of the additional editor items we have access to now. In the toolbar at the top of the Unity Editor, we will see
File,Edit,Assets,GameObject,Component,Window, andHelp:

GameObject,Component,Window, andHelphave additional items added to them. Looking atGameObject, we can see that the additional item isVuforia. Inside theVuforiaitem, we haveAR Camera,Image,Multi Image,Cylindrical Image,Cloud Image,Camera Image,VuMark, and3D Scan:


Camera Imagealso has some additional items, so we should also be familiar with those options. The options available areCamera Image BuilderandCamera Image Target:

Before we go any further, we should know exactly what these options do and how they look when added to the project prior to the license being applied.
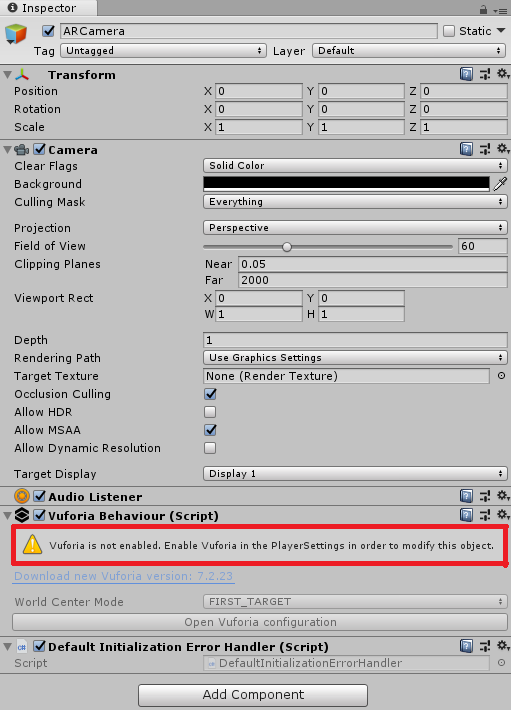
AR Camera replaces the standard camera, as it has the base camera component and Audio Listener components. We also see that it has two scripts attached, Vuforia Behavior and Default Initialization ErrorHandler:

Imageis what allows you to add a trackable object into your AR project and serves as the basis for allowing you to have a mount point for bringing models into the camera feed.Multi Imageallows you to add multiple trackable objects into your AR project and serves as the anchor for bringing models into the camera feed in real time.Cylindrical Imageis an anchor for images wrapped onto objects that are cylindrical in shape.VuMarkis a custom barcode made by the Vuforia team. It allows you to encode data into it as well as act as an AR target like the Image, Multi Image, and Cylindrical Image.Cloud Provideris a direct link to your cloud database for specialized AR-designed branding. It is supposed to be used for publications (catalogs, magazines, newspapers, and so on), retailers (product visualization and in-store traffic generation), advertisers (multi-branded content, coupons, and promotions), and product recognition (wine labels/ bottles, cereal boxes, and so on).Cloud Image Targetis what allows you to add a trackable object into the AR project and serves as the anchor for the app to send the recognized data to the cloud database to retrieve the information and display it as you wish.Camera Image Builderis what allows you to define a target image to be stored in a database for retrieval and usage in an AR application.Camera Image Targetserves as the anchor for which to use the self-defined target image to display what you want on screen when recognized.
The next set of items to talk about is in the Component toolbar. The special components lie within the AR, Scripts, and XR portions of the Component window, as marked in the following screenshot for reference. In order to use them, you have to have a GameObject in the scene and add the component from the toolbar to it. We have World Anchor, Tracked Pose Driver, Spatial Mapping Collider, and Spatial Mapping Renderer available. We should do a deep dive in so that we can know exactly what these items do:

World Anchoris a component that represents a link between an exact point in the physical world and the parent GameObject of the World Anchor. Once added, a GameObject with a World Anchor component remains locked in place to locations in the real world.Tracked Pose Driveris a component that applies the current Pose value of a tracked device to the transform of the Game Object.Spatial Mapping Colliderallows for holographic content (or character) interaction, such as physics, with the spatial mapping mesh.Spatial Mapping Rendereris a component that gives a visual representation of Spatial Mapping surfaces. This is useful for visually debugging surfaces and adding visual effects to the environment.
It should be noted that there are items related to Vuforia in the Scripts section, however, we will not cover those here. But, just for the sake of making sure that the items are listed, they are as follows:

Background Plane BehaviourCloud Reco BehaviourCylinder Target BehaviourGL Error HandlerImage Target BehaviourMask Out BehaviourMulti Target BehaviourObject Target BehaviourProp BehaviourReconstruction BehaviourReconstruction From Target BehaviourSurface BehaviourText Reco BehaviourTurn Off BehaviourTurn off Word BehaviourUser Defined Target Building BehaviourVideo Background BehaviourVirtual Button BehaviourVuforia BehaviourVuforia Deinit BehaviourVu Mark BehaviourWireframe BehaviourWireframe Trackable Event HandlerWord Behaviour
In the Inspector pane, we have Vuforia Configuration. The following is a screenshot of it; next, we will define what it does:
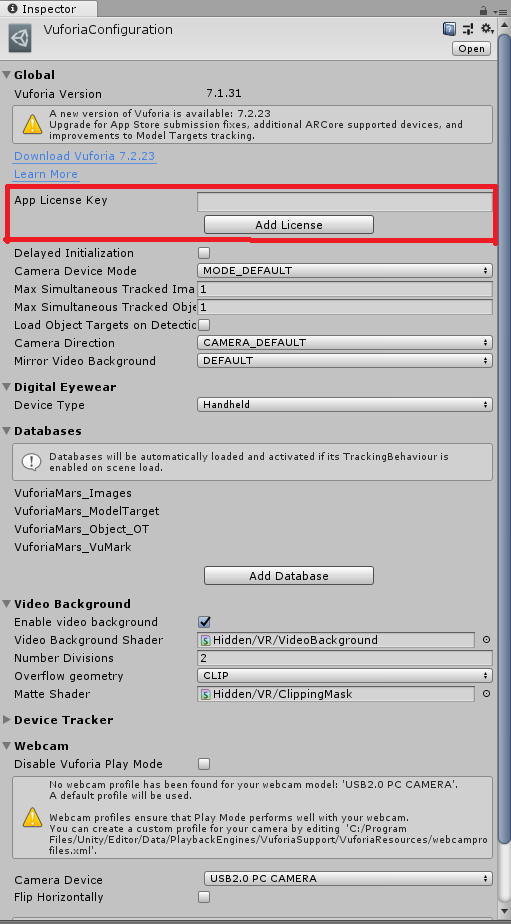
Vuforia Configuration allows you to enter your License Key. Clicking on Add License will load the Vuforia Developer landing page. It also allows you to specify what you want Vuforia to be configured to work for, such as a HUD, smartglasses, a webcam, or a smartphone.
Note
I also want to note that Smart Terrain Tracker has been deprecated and will be removed in the next release of Vuforia. If you are reading this book and that screenshot does not look the same, you now know why and should not be worried.
Since we are here, let's go ahead and add our app key to Vuforia (see Vuforia Add License for its location):
- You should create your own app key, since my app key will not be valid by the time of the release of this book. After copying and pasting your key into the license key box, just press the Return/Enter key and you are done:
- Since we are testing on PC and if you have a webcam that works for said PC, make sure that the
Camera Deviceselects the proper webcam for usage:

- Next, we need to go into the Unity Player Settings and fix some options. Navigate to
Fileand click onBuild Settings. TheBuild Settingsbox should appear. Make sure you change the project type to build toAndroid, and then click onPlayer Settings:

- Vuforia does not support
FAT device filterorAndroid TV, so we need to change those two options.Device Filter, which is located inOther Settings, needs to be changed toARMv7, andAndroid TV Compatibilityneeds to be unchecked. - Now, we can finally build our "Hello World" AR application for testing to make sure Vuforia and Unity3D are working well together. If you haven't done so already, remove the regular camera component from the
HierarchyPane and replace it with theARCamera:

- The next step is to add the Vuforia Image to the scene, which is also known as the
ImageTarget:

- We now need to download and add a 3D model to the scene. So, let's go with the easy route and just add a sphere to the scene with the x, y, and z scale set to
0.3. Take extra special care to make sure that the sphere is a child of theImageTarget. This is very important:

- The next step is to navigate to
Editor |Vuforia|ForPrint|ImageTargets, and print out on a piece of papertarget_images_A4ortarget_images_USLetter:

- Once you have it printed, we can begin the final portion of the test, which is to run the program and hold the printout of the drone in front of the webcam:

The text in this screenshot is not important. It shows a sphere that appears on the camera feed when the image is recognized.
ARToolKit is a bit more difficult to set up and get started with.
Note
ARToolKit has been depreciated and is now part of the Daqri Vos API. which you can view at https://developer.daqri.com/#!/content/developThis section has been kept in for incase you want to utilize ARToolkit from the github link https://github.com/artoolkit/arunity5
There are two different ways you can get ARToolKit in a project and ready to develop with. The first option is the easiest, and that is through the Asset Store: https://assetstore.unity.com/packages/tools/artoolkit-6-unitypackage-94863. This is the latest version of ARToolKit in the Asset Store and it will be imported directly into Unity for you. The other option is to go to the main website of ARToolKit: https://github.com/artoolkit/artoolkit5. This allows you to get additional tools and the actual SDK, along with the Unity Package.
For installation into Unity3D, we will go with the second option, since it is less intuitive than the first option:

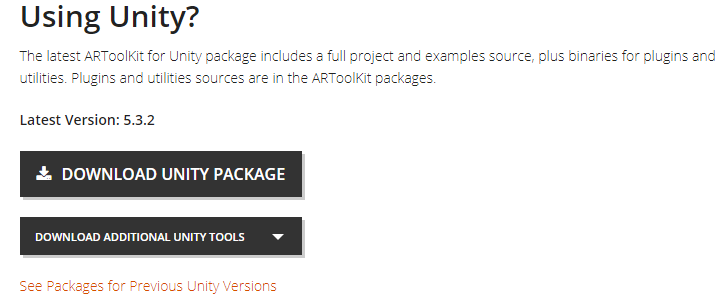
- Navigate to the main website for ARToolKit and click on
DOWNLOAD SDK. The macOS, Windows, iOS, Android, Linux, Windows 8.1, and Source Dependencies don't need to be downloaded, but they can be if you want to go deeper into how ARToolKit works under the hood or if you want to use it in a non-Unity capacity. Instead, head toward the bottom of the page and click on theDOWNLOAD UNITY PACKAGEbutton:
Note
Unless you are doing something more involved, you don't need the additional Unity tools at the present time if you are on a macOS, but if you are on a PC, I suggest getting the Windows Tools, since ARToolKit needs them to debug on PC without using the Android Emulator or testing on Linux.
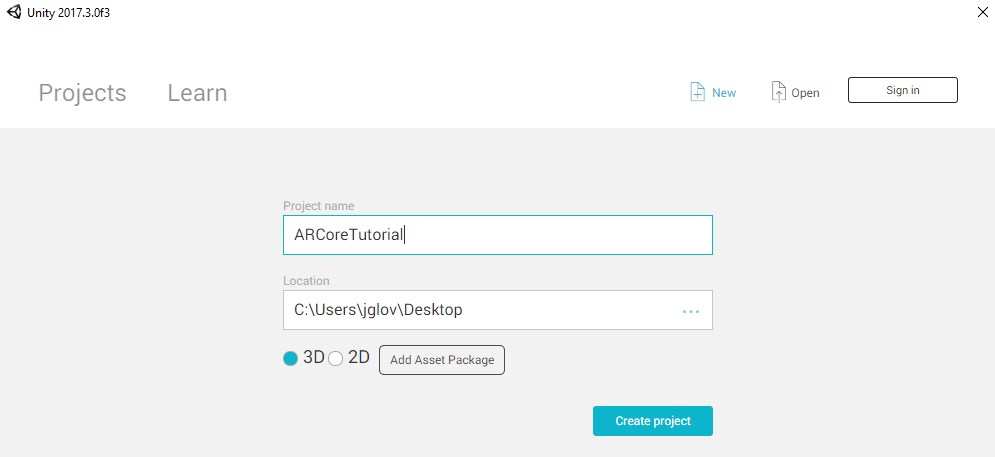
- Now that the package has been downloaded, we need to open Unity3D and create a new project. I will call mine
ARToolKitIntro. Keep the settings as default for simplicity's sake:
- Now, we need to import the Unity Package into Unity. This is pretty straightforward. Right-click the
Assetsfolder, highlightImport Package, and selectCustom Package:


- You will see three folders after the import is complete (
ARToolKit5-Unity,Plugins, andStreamingAssets):

Inside the ARToolKit5-Unity folder, there are the Example Scenes, Examples, Materials, Resources, Scripts, Changelog, and Readme files and folders:
- Inside
Scripts, we have anEditorfolder with the features shown in the following screenshot:

- Inside the
Editorfolder, we have the following:


- If you look at the menu bar at the top of the Unity Editor, you will see an additional toolbar item:
ARToolKit. The drop-down menu shows several options:ARToolKit for Unity Version 5.3.2,Download Tools,Build,Support, andSource Code:

SupporthasHome Page,Documentation, andCommunity Forums:

Source CodehasView ARToolKit SourceandView Unity Plugin Source:

The basics are out of the way, so we can begin building our "Hello World" with ARToolKit:

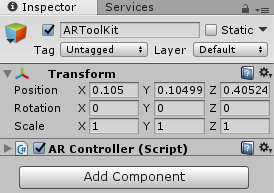
- The
ARControllerscript handles the creation and management of AR tracking. It automatically adds a camera at runtime and is controlled by the user layers that we provide. - With this latest version of ARToolKit, the basic user layers are provided for you already:
AR background,AR background 2, andAR foregroundforUser Layer 8,User Layer 9, andUser Layer 10, respectively:

- The
AR Controllerscript has aVideo Optionsdrop-down menu:

- Since we have so many different options for video, we need to set it up properly:
- If you get errors in the console of the Unity Editor, then you don't have the latest version of ARToolKit with the version of Unity we are using in this book.
Since I am building for Windows, I will go to the first option of Video config and input the following:
 <?xml version="1.0" encoding="utf-8"?>
 <dsvl_input>
 <camera show_format_dialog="false" frame_width="1280" frame_height="720" frame_rate="29.97">
 <pixel_format>
 <RGB32 flip_v="true"/>
 </pixel_format>
 </camera>
 </dsvl_input>
Now, since my computer does not presently have a webcam attached to it, I get an in-game error message, but the code compiles and runs as expected. If you have a webcam attached and it is recognized appropriately, you should have a direct feed from your webcam.
This concludes the Hello World for ARToolKit; we will be revisiting this one later on for more in-depth and fun usage of this SDK.
ARCore and ARKit are fundamentally very similar, but you can't compile ARKit on a Windows environment, which is what I'm presently using. Not to worry; when we get to ARKit, I will be using a macOS to give you a proper view and feel of how things are when using it.
That being said, it is now time to take a deeper look at ARCore.
ARCore was made by Google and is currently in the early preview stages; it hasn't even reached release 1.0 yet, so there are bound to be many changes, some of which could be extremely damaging to existing apps or games.
There are two ways to get the SDK preview for Unity. The first is through a Unity Package file (https://developers.google.com/ar/develop/unity/quickstart-android) and the other is through GitHub (https://github.com/google-ar/arcore-unity-sdk). Now, since I have been having an issue with downloading from Amazon Web Services lately, I will use the second link:

It is key to remember that, if you don't have a Samsung Galaxy 8 or a Google Pixel phone, you will not be able to run proper tests on your device. However, if you also install Android Studio, you do get access to the Android Emulator:
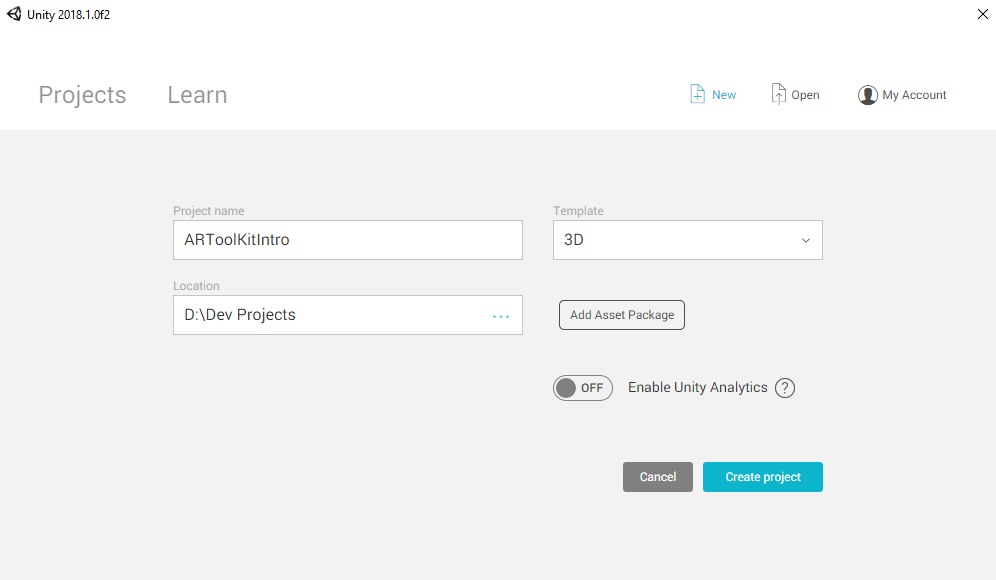
- To begin, create a new project in Unity and call it
ARCoreTutorial:
- We need to change the
Build SettingstoAndroidbefore doing anything else:
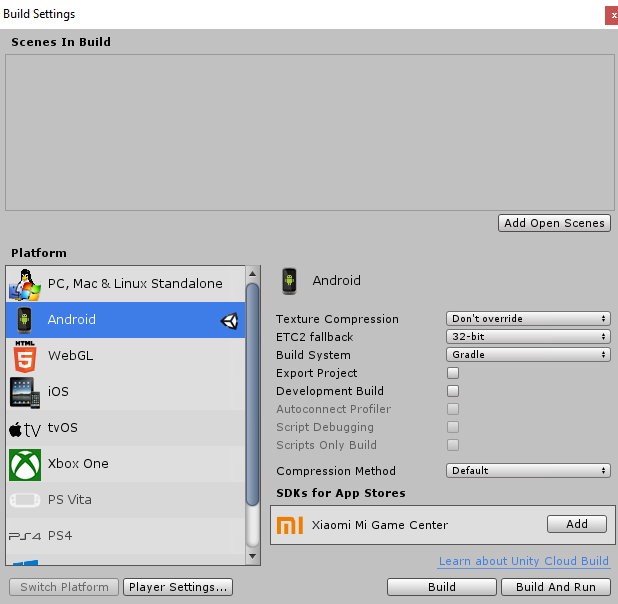
- Other Settings: We want
Multithreaded Renderingunchecked;Minimum API Levelshould beAndroid 7.0 ‘Nougat' API level 24; andTarget API Levelshould beAndroid 7.0 ‘Nougat' API level 24orAndroid 7.1 ‘Nougat' API level 25:

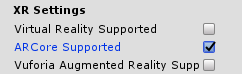
5. XR Settings: We want ARCore Supported to be checked:
6. Next up, we want to unzip the SDK or import the package into Unity3D:

Right away, we should see a DLLNotFoundException for tango_client_api2. This is normal and is well-known by the community. It should not cause any errors at runtime, though; it should be fixed in a later release.
ARKit requires the usage of macOS High Sierra, because of the XCode 9 and above requirement for compiling and making changes to the API itself. So, I would highly suggest having a macOS from late 2011 or newer. I am utilizing a Mac Mini 2011 model with 8 GB of RAM, although the standard 4 GB should be plenty. Unity3D does utilize OpenCL/OpenGL extensively, which requires a GFX card capable of utilizing Metal. 2011 and earlier macOSs do not have this ability natively; this could be circumvented by having an external GPU (Radeon RX 480 is currently the only GPU supported officially for this).
With that out of the way, we can begin with installing and configuring ARKit for Unity3D on our macOS.
There are a couple of ways you can install ARKit:
- We can navigate to the plugin page on the Asset Store (https://www.assetstore.unity3d.com/en/#!/content/92515):

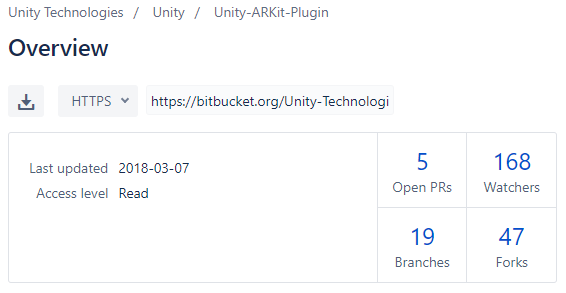
- Or we can download the plugin directly from the Bitbucket repository (https://bitbucket.org/Unity-Technologies/unity-arkit-plugin/overview):
- If we go the first route and install from the Asset Store, we don't have to worry about copying the files into our project ourselves, but either way it is simple enough to do, so take your pick on the method you want to go with and create a new project called
ARKitTutorial:

Next up, we have quite a bit to unpack regarding what is actually in this package:
/Assets/Plugins/iOs/UnityARKit/NativeInterface/ARsessionNative.mm– This is the Objective-C code that is the actual interfaces with the ARKit SDK./Assets/Plugins/iOS/UnityARKit/NativeInterface/UnityARSessionNativeInterface.cs– This is the scripting API that glues the native code to ARKit./Assets/Plugins/iOS/UnityARKit/NativeInterface/AR*.cs– These are the equivalents of the data structures exposed by ARKit./Assets/Plugins/iOS/UnityARKit/Utility/UnityARAnchorManager.cs– This is a utility script that tracks the anchor updates from ARKit and can create the proper corresponding GameObjects in Unity for them./Assets/Plugins/iOS/UnityARKit/Editor/UnityARBuildPostprocessor.cs– This is an editor script that runs at build time on iOS./Assets/Plugins/iOS/UnityARKit/UnityARCameraManager.cs– This is the component that should be placed on a GameObject in the scene that references the camera that you want to control. It will position and rotate the camera as well as provide the correct projection matrix based on updates from ARKit. This component also initializes as ARKit Session./Assets/Plugins/iOS/UnityARKit/UnityARVideo.cs– This is the component that should be placed on the camera and grabs the textures needed for rendering the video. It sets the material needed for blitting to the backbuffer and sets up the command buffer for blitting./Assets/Plugins/iOS/UnityARKit/UnityARUserAnchorComponent.cs– This is the component that adds and removes Anchors from ARKit based on the life cycle of the GameObject it is added to.
Before we build our own "Hello World" example, we should build the UnityARKitScene.unity to iOS to get a taste of what ARKit is capable of, as it demonstrates all of the basic functionality of ARKit in that scene.
UnityARKitScene is included in the plugin as well as a couple of other example projects. We will compile the UnityARKitScene as our Hello World application.
However, before we do that, we need to talk about the file structure, because those who are not well-versed with compiling to iOS will have some serious issues compiling without further clarification. You may have noticed quite a few items that we have not mentioned that are in the plugin, so let's go ahead and discuss what all of them do before moving on.
\UnityARKitPlugin main directory files:
ARKitRemote– Allows you to send remote commands from your device to the Unity3D editorExamples– This directory houses example scripts and scenes to showcase various things you can do with ARKit and this pluginPlugins– Houses the directories required to run ARKitResources– Houses the resource files required for ARKit
Plugins\iOS\UnityARKit\NativeInterface cs files:
ARAnchor– Anchors an object to a location in the world from the camera feed.ARCamera– Tracks the camera's position.ARErrorCode– Error codes.ARFaceAnchor– Face tracking anchor.ARFrame– Returns data about the camera, anchors, and light estimates.ARHitTestResult–Returns any collision results.ARHitTestResultType– Enumeration for the hit test types available.ARLightEstimate– Calculates how much luminosity is in the image or video.ARPlaneAnchor– Anchors a plane to a specific 4x4 matrix.ARPlaneAnchorAlignment– Aligns the anchor horizontally with respect to gravity.ARPoint– A point struct for x and y values as a double.ARRect– A struct that takesARPointas the origin andARSizeas the size.ARSessionNative– Native plugin used to specify framework dependencies and the platforms the plugin should work for.ARSize–A struct that takes a width and height value as a double.ARTextureHandles– A native Metal texture handler for the camera buffer which takes anIntPtr(int pointer) for bothtextureYandtextureCbCrvalues.ARTrackingQuality– Enumeration for tracking qualities available.ARTrackingState–Enumeration for tracking states.Limited,Normal, andNoAvailableare the options.ARTrackingStateReason– Enumeration for the state reasons. Options areExcessive Motion,Insufficient Features, andInitializing.ARUserAnchor– Defines this anchor's transformation matrix for rotation, translation, and scale in world coordinates.UnityARSessionNativeInterface– Native plugin wrapper code.
\Plugins\iOS\UnityARKit\Helpers cs files:
AR3DOFCameraManager– A helper class for 3D objects with the AR CameraARPlaneAnchorGameObject– A class that attaches a GameObject with theARPlaneAnchorDontDestroyOnLoad– Makes sure the GameObject doesn't get destroyed on loadPointCloudParticleExample– Creates a point cloud particle systemUnityARAmbient– A helper function for ambient lightingUnityARAnchorManager– A manager forARPlaneAnchorGameObjectsUnityARCameraManager– A helper class for theARCameraUnityARCameraNearFar– Sets the Near Far distance of the camera appropriatelyUnityARGeneratePlane– Creates anARPlaneAnchorGameObjectUnityARHitTestExample– Tests collisions with various amounts of planes, from few to infiniteUnityARKitControl– A helper class designed for creating a testARSessionUnityARKitLightManager– A helper class for managing the various lighting possibilitiesUnityARMatrixOps– A class for converting a 4x4 matrix to Euclidean space for quaternion rotationUnityARUserAnchorComponent– A helper class for creating Anchor added and removed eventsUnityARUtility– A helper class to do coordinate conversions from ARKit to UnityUnityARVideo– A helper function to render the video texture to the sceneUnityPointCloudExamples– A helper function to draw a point cloud using particle effects
\Plugins\iOS\UnityARKit\Shaders shader files:
YUVShader– A gamma Unlit Shader for rendering TexturesYUVShaderLinear– A linear Unlit Shader for rendering Textures
\UnityARKitPlugin\Resources file:
UnityARKitPluginSettings.cs– Is a scriptable object that toggles whether ARKit is required for the app and toggles Facetracking for the iPhone X.
UnityARKitPlugin\ARKitRemote files:
ARKitRemote.txt– A text file that explains how to set up and use ARKitRemoteEditorTestScene.unity– Test scene that should run when runningARKitRemoteUnityARKitRemote.unity– Scene that should be compiled and installed on an applicable deviceARKitRemoteConnection.cs– Used to send data from the device to the UnityEditorConnectionMessageIds– GUIDs for the Editor Session MessageConnectToEditor.cs– Creates a network connection between the editor and the deviceEditorHitTest– Returns collision data from device to editorObjectSerializationExtension.cs– An extension to convert an object to a byte arraySerializableObjects.cs– Serializes Vector 4 data and a 4x4 matrixUnityRemoteVideo.cs– Connects to the editor and transfers a video feed from the device to the editor
UnityARKitPlugin\Examples files:
AddRemoveAnchorExample– An example program to add and remove anchorsCommon– Has common materials, models, prefabs, shaders, and textures that are used in various projectsFaceTracking– Face tracking example applicationFocusSquare– An example scene where it finds a specific anchorUnityARBallz– An example scene where you play a game with ballsUnityARKitScene– A basic scene with minimal scripts attached to test if ARKit works appropriatelyUnityAROcclusion– An example project that showcases various lighting conditionsUnityARShadows– An example project that handles low lighting conditionsUnityParticlePainter– An example project that lets you paint with particles
Now that we have a fundamental understanding of everything inside this package, let's build our Hello World with ARKit.
The first thing we need to do after we open the UnityARKitScene is to set up the build settings:

- Click on
Build Settingsand selectPlayer Settings. - We want to scroll down to
Identification. TheBundle Identifiershould be set tocom.unity.ARKitHelloTutorial,Versionto0.1, and Buildto10.1. TheAutomatically Signcheckbox should be checked. Leave theAutomatic Signing Team IDsettings blank:

- Build the
UnityARKitScenefor iOS only. Run Xcode inDebugmode. - Only the
Development Buildcheckbox should be checked; everything else should be left as default. - Click
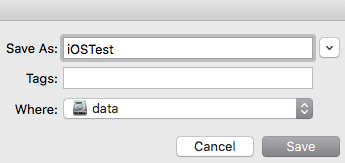
Build. I will save the file asiOSTestin my data drive within a folder callediOS:
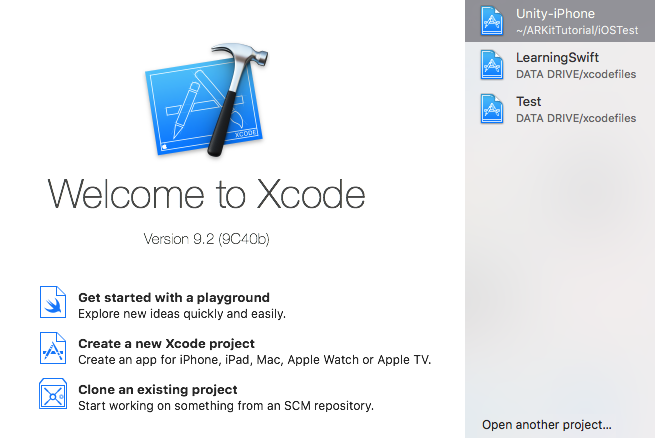
- Let's take a look at the Base project you will see in Xcode:

- The first thing we want to check is the
Identitytab to make sure that these settings are the same as in Unity3D:
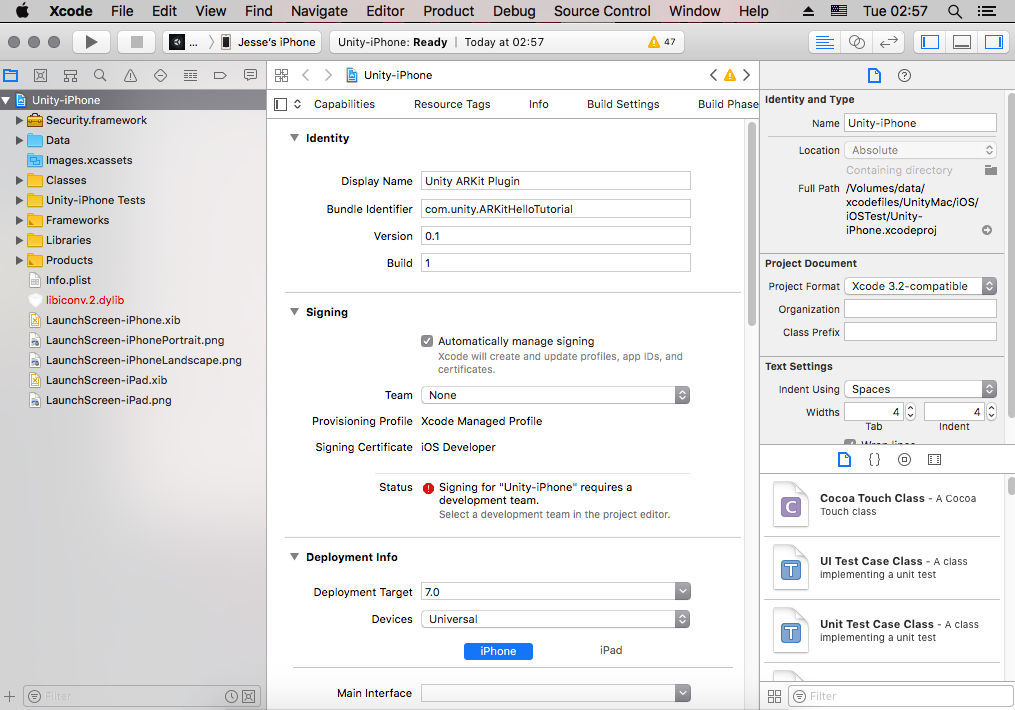
- Now, we need to look at the
Signingsubsection:
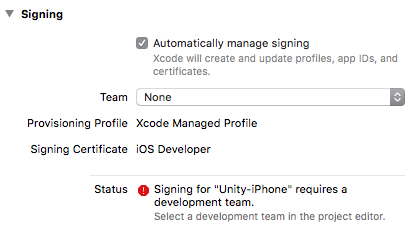
- We need to make sure to add our Personal Team name to it, which you can get by signing in to your Apple Developer account and clicking on the arrow for the team you want to use:

Deployment Infois next. TheDeployment Targetneeds to be changed to11.2. Devices should be set toiPhoneonly. TheMain InterfaceisLaunchScreen-iPhone.xib:
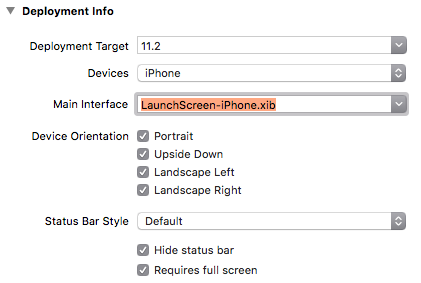

- Next up, scroll down to look at signing, and the values should be already set to the correct ones:

- Now, click on
ProductandBuild:

- The build should have completed successfully with roughly 47 warnings, which is normal:

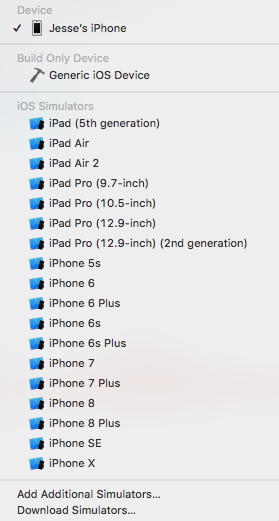
- Now, we can build and test in the simulator. What we want to do is change from the iPhone to one of the simulators in the list, so click on the device list next to your iPhone or whatever device you have:

- You will see a big list of devices you want to use. This will range from simulations of devices to the iOS device you have connected to your macOS:
Congratulations! We have completed this Hello World application.