-
Book Overview & Buying
-
Table Of Contents
Unreal Development Kit Game Programming with UnrealScript: Beginner's Guide
By :

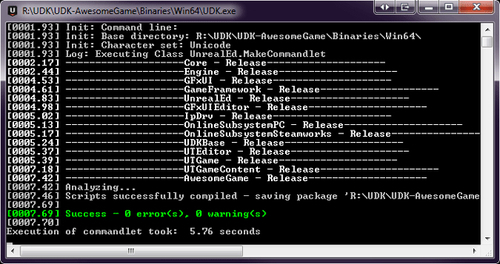
If there are any warnings or errors, look over the code again to make sure everything is spelled correctly and the punctuation is correct. The error message itself should provide a clue as to where to look. It will also give you a line number where the error happened.
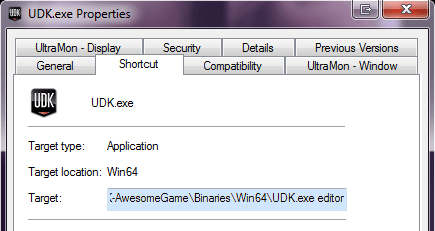
UDK-AwesomeGame\Binaries\Win32 and right-click on UDK.exe. Click on Send To and then Desktop (create shortcut). Right-click on the shortcut it created and click on Properties. In the Target field, add editor to the end without quotes:

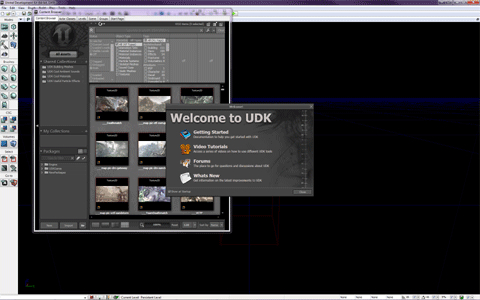
ExampleMap.udk to open it.
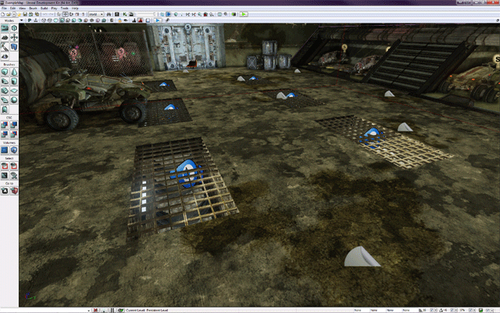
One thing we'll notice immediately is that there seems to be a lot of strange objects floating around the level. These are Actor classes that are normally invisible in game, but have sprites that can be seen in the editor. Remember the sprite we added to the default properties of our AwesomeActor? This is where it gets used.
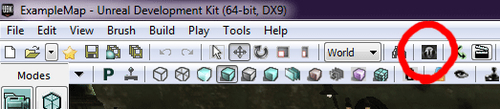
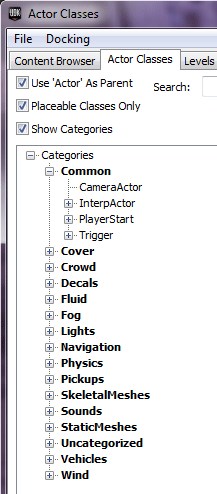
Now let's add our AwesomeActor.


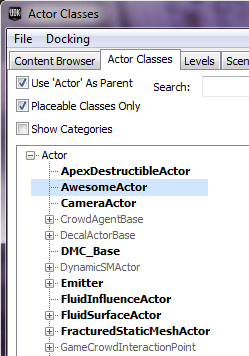
There's our AwesomeActor class!

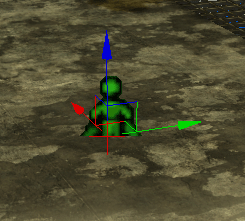
There's the AwesomeActor, showing the sprite that we put in the default properties of our class! Normally these sprites won't show up in the game, but we didn't put any restrictions on the one in our default properties so we'll be able to see it for now.

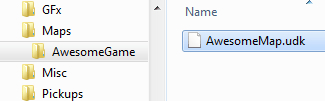
ExampleMap so let's save it in our own folder. Create a new folder in the Content\Maps directory called AwesomeGame, and in the editor save the map as AwesomeMap.udk inside that folder.
So we have our class set up, but is there anything more we can do with it? Usually the first task when learning a new programming language is to make a Hello World program, so let's do that now. Open up our AwesomeActor.uc file in ConTEXT. Let's add some more code.
The first thing we'll do while we're here is make it so our actor doesn't show up in the game but still shows in the editor. We can do this with a simple one line addition to our default properties.
Begin Object Class=SpriteComponent Name=Sprite
Sprite=Texture2D'EditorResources.S_NavP'
HiddenGame=True
End Object
Components.Add(Sprite)
function PostBeginPlay()
{
`log("Hello World! ==========");
}PostBeginPlay
is a function that is run when an Actor is first created, so it's a good place for our Hello World. The log line we put inside that function will output to a text file so we can see that our class is running correctly. So now, our class should look like this:
class AwesomeActor extends Actor
placeable;
function PostBeginPlay()
{
`log("Hello World! ==========");
}
defaultproperties
{
Begin Object Class=SpriteComponent Name=Sprite
Sprite=Texture2D'EditorResources.S_NavP'
HiddenGame=True
End Object
Components.Add(Sprite)
}Before we compile, make sure the editor is closed. The compiler can't delete the old .u file if it's still in use by the editor and we'll get an error.
AwesomeMap.udk.We don't need to do anything to our AwesomeActor, changes we make to our compiled classes automatically affect any of the actors we've placed in our levels.
UDKGame\Logs folder and take a look at the files in there.There should be Launch.log, Launch2.log, and any number of backups depending on how many times the game, editor or compiler has run. When they run, they create a backup of the existing Launch.log file and start a new one. Whenever more than one is run at the same time, as in the case of us running a game window from the editor, it creates a second file called Launch2.log and so on. So, since we were testing our code from a game window in the editor, let's take a look at Launch2.log.
Launch2.log in the UDKGame\Logs folder.[0008.05] Log: Game class is 'UTGame' [0008.24] Log: Primary PhysX scene will be in software. [0008.24] Log: Creating Primary PhysX Scene. [0008.26] Log: Bringing World UEDPCAwesomeMap.TheWorld up for play (0) at 2011.05.19-15.15.52 [0008.28] ScriptLog: Hello World! ========= [0008.28] Log: Bringing up level for play took: 0.193269
Towards the end of the file we can see our Hello World shows up!
Now you can see why we added a bunch of equal signs in our code. It's pretty easy for our logs to get buried with everything else that's going on, so using some kind of unique marker like we did makes them easier to find.
One of a programmer's essential tools are comments. They serve two purposes. First, since they're ignored by the compiler, they can be used to write notes to yourself in your code. Doing this lets you remember what your code does, which can be helpful when you come back to it months later. If you're working with other programmers, writing comments is good programming practice so others can see what your code does.
Second, comments are a quick way to remove sections of your code without permanently deleting it or relying on undo, since you may have to make changes over several days or weeks and repeatedly close and open the files.
There are two ways to write comments. The first way is to write to slash marks, which comments out a line or part of a line:
// This entire line is a comment. SomeCode(); // This is a comment at the end of a line. 4 + 5; // + 6; We've commented out "+ 6;" here to test something.
The second way to write comments is to use a slash and asterisk. This comments out entire sections of code.
/* This line is commented out. This line is commented out as well. The slash and asterisk at the end of this line end the comment. */
Note that these cannot be nested as it will break the code. For example, this works:
/* Commenting out some code.
// Having a double slash comment inside here is fine.
Ending the comment. */While this would not work:
/* A comment.
/* A comment inside a comment like this would not work. */
Ending the comment. */As you're working on your own projects, don't forget to comment your code! It makes it easier to read and understand.
UDKGame directory does a game's level go in?a. Build
b. Content
c. Localization
d. Src
DefaultEngine.ini?a. DefaultEngineUDK.ini
b. BaseEngine.ini
c. UDKEngine.ini
placeable do in a class file?
Change the font size
Change margin width
Change background colour