

The last folder we need for our own games is the one we'll be doing most of our work in as programmers. It's the place we'll be keeping all of our source code.
In the
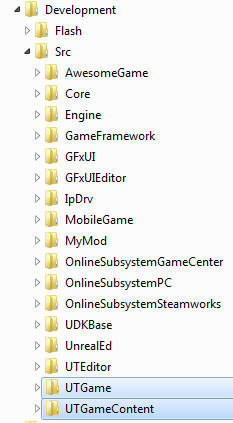
Development\Srcfolder, create a folder calledAwesomeGame. Inside that, create a folder calledClasses. This is where all of our source code will go.
When code is compiled, the final
.ufile's name is the same as the folder, so in our case when we compile a file calledAwesomeGame.u, it will show up in theUDKGame\Scriptfolder. Empty folders are ignored, so let's create our first class so we have something to work with. We'll create a simple class we can place in a level to have the game run the code that we write.Create a text file and name it
AwesomeActor.uc(make sure file extensions are shown in your folders so you don't accidentally name itAwesomeActor.uc.txt).Open the file in ConTEXT and type the following code into it.
Class AwesomeActor extends Actor
   placeable;

defaultproperties
{
   Begin Object Class=SpriteComponent Name=Sprite
      Sprite=Texture2D'EditorResources.S_NavP'
   End Object
   Components.Add(Sprite)
}
Tip
Downloading the example code
You can download the example code files for all Packt books you have purchased from your account at http://www.PacktPub.com. If you purchased this book elsewhere, you can visit http://www.PacktPub.com/support and register to have the files e-mailed directly to you.
Make sure all of the punctuation is correct, particularly the opening and closing brackets after
defaultproperties. The compiler is very particular about those brackets; they have to be on their own lines for anything inside them to work correctly.The first line of our class defines the name of our object and its relationship to other objects in the game. The name of the file has to be the same as the name we type here; otherwise the compiler will give us an error. In this case both are
AwesomeActor. Theextends Actorpart makes ourAwesomeActora child ofActor. In a way the class tree can be seen as a family tree, with classes inside the tree being children of the ones further up the chain.The second line makes it so our class can be placed in the editor. Things like lights, path nodes, vehicles, all of these have placeable in their
.ucfile so the editor will let us place them. Other things like projectiles or explosions wouldn't be set as placeable since they are created while the game is running.The section in the default properties creates a sprite so that we can see the actor in the editor and in the game.
Now, before we compile we need to let the game know about our
AwesomeGamefolder.Open
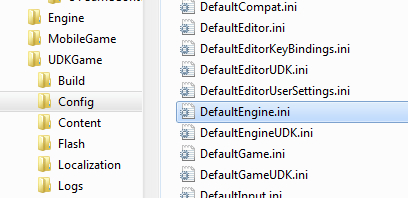
UDKGame\Config\DefaultEngine.iniand add our package AwesomeGame to the end of the EditPackages list.[UnrealEd.EditorEngine] +EditPackages=UTGame +EditPackages=UTGameContent +EditPackages=AwesomeGame
Save
DefaultEngine.iniand close it.
Now we've created a folder for our code to go in called AwesomeGame, which is in the Development/Src folder. In it we've created our first code file, AwesomeActor.uc. We then edited DefaultEngine.ini so the game would recognize our new code package.
The folders in the Development\Src directory aren't automatically detected. The main reason for this is that in some cases we may not want or need the classes inside it. For instance, we may have different folders for a PC project and an iOS project. Both of them would be in the Development\Src folder, but the PC version of our game wouldn't need the iOS code and vice versa. Remember when we went over the directory structure and we talked about the Config folder? That folder contains all of the settings for our game. Let's take a look.
The file we added to, DefaultEngine
, contains things like the game's resolution and texture detail. It also contains the EditPackages list we added to, which tells the game which packages to compile and in what order.
[UnrealEd.EditorEngine]
+EditPackages=UTGame
+EditPackages=UTGameContent
As you can see, the names in this list can also be found as folders in the Development\Src directory:
The list in DefaultEngine.ini
seems kind of short though, doesn't it? Well, much like the class we created is a child of Actor, DefaultEngine.ini also has a parent. If we look at the top of DefaultEngine we can see this:
[Configuration]
BasedOn=..\UDKGame\Config\DefaultEngineUDK.ini
This .ini file is actually based on another one, its parent DefaultEngineUDK.ini. Let's close DefaultEngine.ini and take a look at DefaultEngineUDK.ini's EditPackages list.
[UnrealEd.EditorEngine]
EditPackagesOutPath=..\..\UDKGame\Script
FRScriptOutputPath=..\..\UDKGame\ScriptFinalRelease
+EditPackages=UDKBase
+EditPackages=UTEditor
;ModEditPackages=MyMod
AutoSaveDir=..\..\UDKGame\Autosaves
InEditorGameURLOptions=?quickstart=1?numplay=1
That's a bit better. UDKBase and UTEditor are two more folders in our Development\Src directory. But there are a lot more folders there, so what's the deal? Let's see if we can go higher up the ini tree to find out. At the top of DefaultEngineUDK.ini we see that this file also has a parent:
[Configuration]
BasedOn=..\Engine\Config\BaseEngine.ini
Let's close DefaultEngineUDK.ini and take a look at BaseEngine.ini, which is in the Engine\Config directory.
EditPackages=Core
EditPackages=Engine
EditPackages=GFxUI
EditPackages=GameFramework
EditPackages=UnrealEd
EditPackages=GFxUIEditor
EditPackages=IpDrv
EditPackages=OnlineSubsystemPC
EditPackages=OnlineSubsystemGameSpy
EditPackages=OnlineSubsystemLive
EditPackages=OnlineSubsystemSteamworks
That's better! It looks like all of the folders are accounted for now, except for MyMod which is an empty example folder. And if we look at the top of BaseEngine.ini
we can see that this is the end of the chain, BaseEngine doesn't have a parent.
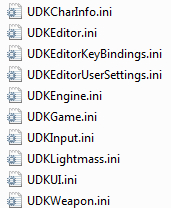
So how does the game use these files? If you haven't run the game or compiled the code when we installed ConTEXT, run the game real quick and exit out of it at the main menu. The first time the game is run, it uses all of the Default and Base ini files to generate the ones the game actually uses in the UDKGame\Config directory:
So the obvious question is why are there so many files? Well, let's take another look inside BaseEngine.ini to see why. About two-thirds of the way down the file we can see a list of system settings:
MotionBlur=True
MotionBlurPause=True
MotionBlurSkinning=1
DepthOfField=True
AmbientOcclusion=True
Bloom=True
bAllowLightShafts=True
Distortion=True
These settings control some of the visual effects in the game like motion blur and bloom. What would happen if we changed them? It would change the game's visual effects of course, but here's another question. While playing the game, in the Settings we're able to revert back to the defaults. If we changed the settings in these files, how would the game know what the default was? The game uses the Base and Default ini files to create the UDK ones, that way the player can change things like the resolution or keybinds, but the game will still have the known safe default settings available if it needs them. It may seem a bit complicated but it's pretty easy to work with. As the game's developer we would work in the Default and Base ini files to make the game work the way we want by default, and the player can change the settings if they want to.
Now that AwesomeGame has been added to the EditPackages list we'll be able to compile it. But why did we have to add AwesomeGame to the very end of the list? The way the compiler works is that it goes down the EditPackages list in order and looks for any changes to the files in the Development\Src directory. If any .uc files are changed it recompiles that package. It's also important to know that any package that our classes are dependent on has to be compiled before ours. As an example, let's take a look at DefaultEngine.ini again. One of the EditPackages listed is UTGameContent
. In the UTGameContent folder we can see a class called UTJumpBoots. If we wanted to make our own jump boot class with UTJumpBoots
as its parent, we have to make sure that UTGameContent
is compiled before our package, otherwise the compiler won't know about that class yet and will give us an error saying our class' parent doesn't exist.