
To be able to get most out of Blender Compositor, it is essential to have a superficial understanding of what Blender can offer. This includes supporting formats, color modes, color spaces, render layers, and render passes.
Blender's image input/output system supports regular 32 bit graphics (4 x 8 bits) or floating point images that store 128 bits per pixel (4 x 32 bits) or 64 bits per pixel (4 x 16 bits). This includes texture mapping, background images, and the compositor. These attributes are available in output properties as shown in following screenshot:
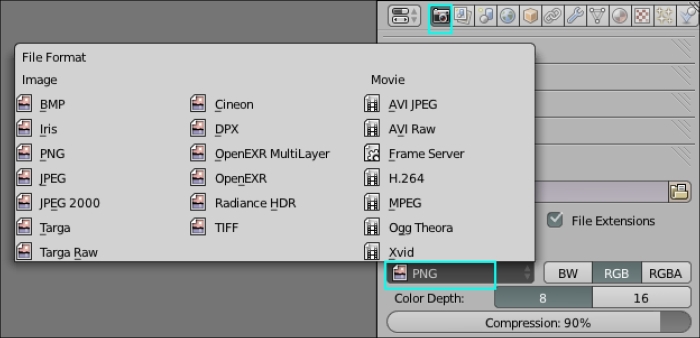
Image color depth, also called bit depth, is the number of bits used for each color component of a single pixel. Blender supports 8, 10, 12, 16, and 32 bit color channels.
The mathematical representation of a set of colors is termed as color space. Each color space has a specific significance and provides unique ways to perform image manipulation. Depending on the task in hand, the color space can be chosen. Blender supports the RGB color space, the HSV color space, the YUV color space, and the YCbCr color space.
The RGB (red, green, and blue) color space is widely used in computer graphics due to the fact that color displays use red, green, and blue as three primary additive colors to create the desired color. This choice simplifies the system's design and you can benefit from a large number of existing software routines since this color space has been around for a number of years. However, RGB is not suitable when working with real-world images. All three RGB components should be of equal bandwidth to generate a color, resulting in a frame buffer that has the same pixel depth and display resolution for each RGB component. So, irrespective of modifying the image for luminance or color, all three channels have to be read, processed, and stored. To avoid these limitations, many video standards use color spaces that provide luma and color as separate signals.
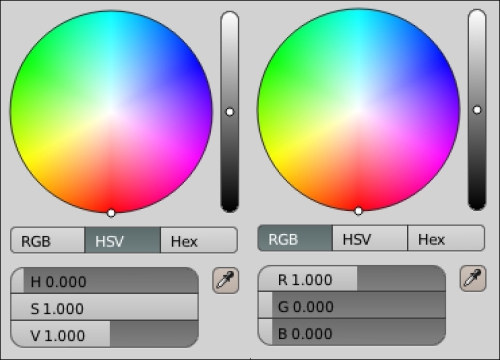
HSV stands for hue, saturation, and value. This color space provides flexibility to be able to modify hue, saturation, and value independently. HSV is a cylindrical co-ordinate representation of points in an RGB color model. The following screenshot shows RGB in comparison to HSV values to attain a red color:
The YUV color space is used by the Phase Alternating Line (PAL), National Television System Committee (NTSC), and Sequential Color with Memory (SECAM) composite color video standards for color televisions. Y stands for the luma component (the brightness), and U and V are the chrominance (color) components. This color space was intended to provide luma information for black and white television systems and color information for color television systems. Now, YUV is a color space typically used as part of a color image or CG pipeline to enable developers and artists to work separately with luminance and color information of an image.
The YCbCr color space was developed as a digital component video standard, which is a scaled and offset version of the YUV color space. Y is the luma component and Cb and Cr are the blue-difference and red-difference chroma components. While YUV is used for analog color encoding in television systems, YCbCr is used for digital color encoding suitable for video and still-image compressions and transmissions, such as MPEG and JPEG.
To optimize render resources and also be able to provide full control at the compositing stage, a CG lighting scene is split into multiple render layers and render passes.
A typical lighting scene consists of two to three characters, props, and one set. To provide an opportunity to re-render only required elements in the scene, each element is separated into its own render layer for rendering. All interaction renders are also separated into render layers. The following list shows a typical render layer classification.
Character 1
Character 2
Character 3
Characters cast shadow
Characters occlusion
Set
Set occlusion
Set interaction with characters
Passes or AOVs (arbitrary output variables) are intermediate computational results that are shown when rendering a layer. All render passes are buffered out when rendering a render layer and written as separate data. These passes can be utilized in compositing to rebuild the beauty of the render layer and also allow us to tweak individual shader/light contributions. The following screenshot shows the Blender internal render engine's Passes panel:

Every render layer in Blender, by default, is equipped with these render passes, but the content in the render passes is based on the data available to the render layer. However, the pass definition and the type of content it stores doesn't vary. All passes that have a camera icon beside them can be excluded from the combined pass data by clicking on the camera icon. This provides another level of control over the content of the combined pass.
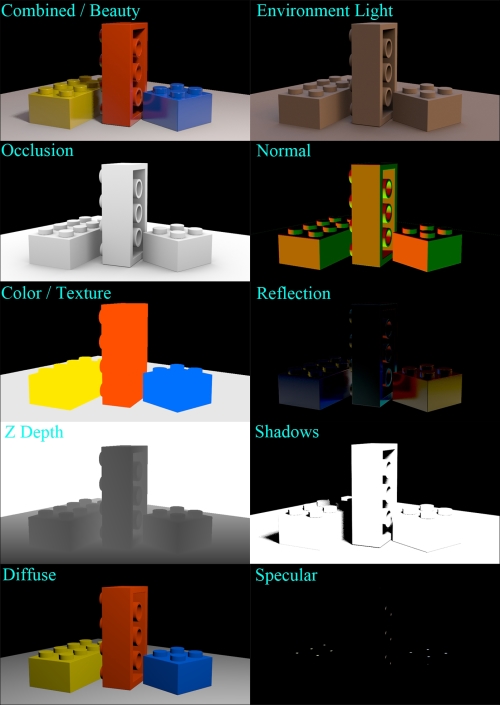
The following screenshot shows outputs of different render passes available, by default, in Blender's internal render engine. Their significance is explained as follows:
Combined: This renders everything in the image, even if it's not necessary. This includes all the options blended into a single output, except those options that you've indicated should be omitted from this pass as indicated with the camera button.
Z (Z depth): This map shows how far away each pixel is from the camera. It is used for depth of field (DOF). The depth map is inverse linear (1/distance) from the camera position.
Vector: This indicates the direction and speed of things that are moving. It is used with Vector Blur.
Normal: This calculates lighting and apparent geometry for a bump map (an image that is used to fake details of an object) or to change the apparent direction of the light falling on an object.
Object Index (IndexOB): This is used to make masks of selected objects using the Matte ID Node.
Material Index (IndexMA): This is used to make masks of selected material using the Matte ID Node.
Color: This displays the flat color of materials without shading information.
Diffuse: This displays the color of materials with shading information.
Shadow: This displays the shadows that can be cast. Make sure shadows are cast by your lights (positive or negative) and received by materials. To use this pass, mix or multiply it with the Diffuse pass.
Environment: This displays the environment lighting contribution.
Reflection: This displays the reflection contributions based on shader attributes that are, participating in the current render.
Refraction: This displays the refraction contributions based on shader attributes that are participating in the current render.
The following screenshot shows some outputs of Blender's default render passes: