Now that we know how to draw with Pygame, it's time to try something more dynamic. Most games, even the most static ones, have some level of animation. From a programmer's standpoint, animation is nothing more than displaying an object at a different place at a different time, thus simulating movement.
Pygame offers a Clock object that manages how many frames are drawn per second. This ensures that animation is independent of how fast the user's CPU is.
We will load an image and use NumPy again to define a clockwise path around the screen:
First, we need to create a clock as follows:
clock = pygame.time.Clock()
Loading an image: As part of the source code accompanying this book, there should be a picture of a head. We will load this image and move it around on the screen:
img = pygame.image.load('head.jpg')Initializing arrays: We will define some arrays to hold the coordinates of the positions, where we would like to put the image during the animation. Since the object will be moved, there are four logical sections of the path: right, down, left, and up. Each of these sections will have 40 equidistant steps. We will initialize all the values in the sections to 0:
steps = numpy.linspace(20, 360, 40).astype(int)
right = numpy.zeros((2, len(steps)))
down = numpy.zeros((2, len(steps)))
left = numpy.zeros((2, len(steps)))
up = numpy.zeros((2, len(steps)))
Setting the coordinates of the positions: It's trivial to set the coordinates of the positions of the image. However, there is one tricky bit to notice, the
[::-1]notation leads to reversing the order of the array elements:right[0] = steps right[1] = 20 down[0] = 360 down[1] = steps left[0] = steps[::-1] left[1] = 360 up[0] = 20 up[1] = steps[::-1]
Joining the sections: The path sections can be joined, but before we can do this, the arrays have to be transposed with the
Toperator:pos = numpy.concatenate((right.T, down.T, left.T, up.T))
Setting the clock rate: In the main event loop, we will let the clock tick at a rate of 30 frames per second:
clock.tick(30)
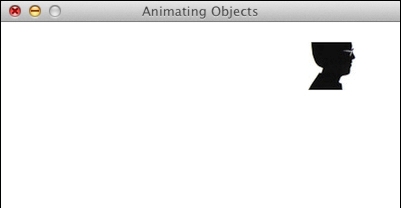
The following screenshot is of the moving head:

Note
You should be able to watch a movie of this animation on https://www.youtube.com/watch?v=m2TagGiq1fs.
The code of this example uses almost everything we learned so far, but should still be simple enough to understand:
import pygame, sys
from pygame.locals import *
import numpy

pygame.init()
clock = pygame.time.Clock()
screen = pygame.display.set_mode((400, 400))

pygame.display.set_caption('Animating Objects')
img = pygame.image.load('head.jpg')

steps = numpy.linspace(20, 360, 40).astype(int)
right = numpy.zeros((2, len(steps)))
down = numpy.zeros((2, len(steps)))
left = numpy.zeros((2, len(steps)))
up = numpy.zeros((2, len(steps)))

right[0] = steps
right[1] = 20

down[0] = 360
down[1] = steps

left[0] = steps[::-1]
left[1] = 360

up[0] = 20
up[1] = steps[::-1]

pos = numpy.concatenate((right.T, down.T, left.T, up.T))
i = 0

while True:
   # Erase screen
   screen.fill((255, 255, 255))

   if i >= len(pos):
      i = 0

   screen.blit(img, pos[i])
   i += 1

   for event in pygame.event.get():
      if event.type == QUIT:
         pygame.quit()
         sys.exit()

   pygame.display.update()
   clock.tick(30)
We learned a bit about animation in this recipe. The most important concept we learned is the clock. The new functions that we used are described in the following table:
|
Function |
Description |
|---|---|
|
|
This function creates a game clock |
|
|
This function creates an array with 40 equidistant values between 20 and 360 |
|
|
This function creates an array of the specified dimensions filled with zeroes |
|
|
This function concatenates arrays to form a new array |
|
|
This function executes a tick of the game clock, where 30 is the number of frames per second |


