The Pygame surfarray module handles the conversion between Pygame Surface objects and NumPy arrays. As you may recall, NumPy can manipulate big arrays in a fast and efficient manner.
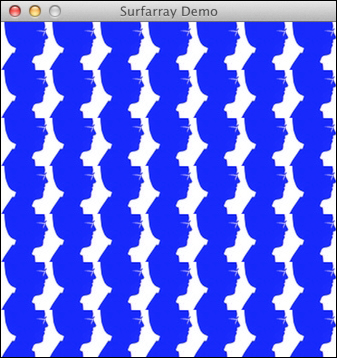
In this recipe we will tile a small image to fill the game screen.
Copying pixels to array: The
array2dfunction copies pixels into a two-dimensional array. There is a similar function for three-dimensional arrays. We will copy the pixels from the avatar image into an array:pixels = pygame.surfarray.array2d(img)
Creating the game screen: A NumPy array has a shape attribute that corresponds to the dimensions of the array. This attribute is a tuple. A two-dimensional array for instance, will have a two-element shape tuple. Let's create the game screen from the shape of the pixels array using the
shapeattribute of the array. The screen will be seven times larger in both directions:X = pixels.shape[0] * 7 Y = pixels.shape[1] * 7 screen = pygame.display.set_mode((X, Y))
Tiling the image: Tiling the image is easy with the NumPy
tilefunction. The data needs to be converted to integer values, since colors are defined as integers:new_pixels = numpy.tile(pixels, (7, 7)).astype(int)
Displaying the array: The
surfarraymodule has the following special function (blit_array) to display the array on the screen:pygame.surfarray.blit_array(screen, new_pixels)
The following screenshot displays the result of the code:

The following code does the tiling of the image:
import pygame, sys
from pygame.locals import *
import numpy

pygame.init()
img = pygame.image.load('head.jpg')
pixels = pygame.surfarray.array2d(img)
X = pixels.shape[0] * 7
Y = pixels.shape[1] * 7
screen = pygame.display.set_mode((X, Y))
pygame.display.set_caption('Surfarray Demo')
new_pixels = numpy.tile(pixels, (7, 7)).astype(int)


while True:
   screen.fill((255, 255, 255))
   pygame.surfarray.blit_array(screen, new_pixels)

   for event in pygame.event.get():
      if event.type == QUIT:
         pygame.quit()
         sys.exit()

   pygame.display.update()
The following table gives us a brief description of the new functions and attributes we used:
|
Function |
Description |
|---|---|
|
|
This copies pixel data into a 2D array |
|
|
The |
|
|
This tiles an array the given dimensions specified as a tuple |
|
|
This displays array values on the screen |


