
In this book, we work with the latest Xcode version (5.1.1 at the time of writing), Cocos2d v3.0.0, and iOS7.
If you are familiar with Xcode, creating a new project should be easy enough to do alone but I would like to explain what the project creation process looks like in Cocos2d v3.
First of all:
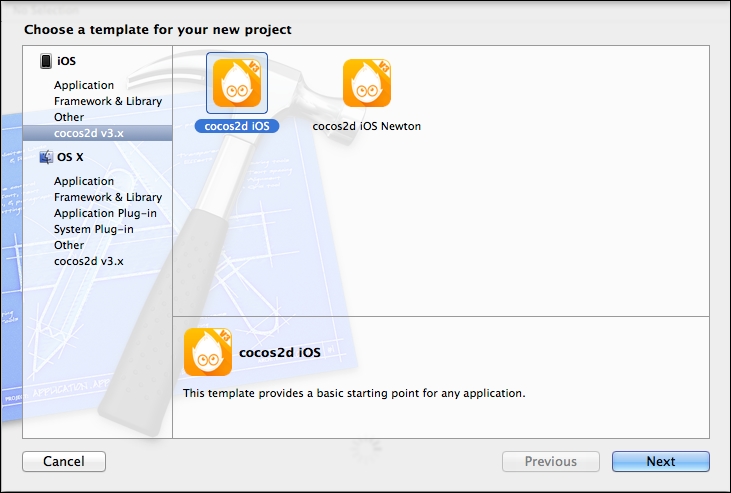
Create a new Cocos2d project in Xcode by selecting File | New | Project….
Click on the cocos2d v3.x template under iOS and you should see the two icons shown in the following screenshot:
Call it
RunYetiRunand make sure Universal is chosen on the Device Family menu before clicking on Next.Select the place where you want your project to be saved and click on Create.
I would like you to focus on the project navigator, the section on the left that contains the folders and files that will give life to our game:
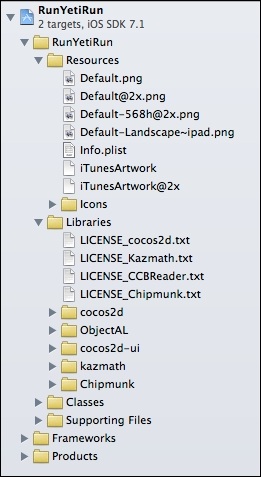
This pane contains a hierarchy of files and folders in your Cocos2d project that does not reflect the real location of the files on your hard drive. In other words, the pane shows the files in your Xcode project and lets you organize these files in a way that is unique to Xcode.
Folders in the navigator are called groups and are used to organize the classes, images, and the rest of the files, but moving them will not affect their real location on your hard drive. In fact, moving files in Finder will mean Xcode won't be able to find them anymore, so we must pay attention when reorganizing our project's files.
At this point, you only need to know about the existence of the Resources and Classes groups. The first of them is where you will place your images, properties, and audio files, and the second, as its name suggests, contains the classes of the project. Let's take a look at the latter:
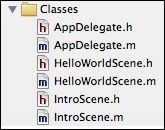
If you have experience working with the previous version of Cocos2d, you should notice that the former HelloWorldLayer class has been replaced by HelloWorldScene and IntroScene, and if you take a look at these classes, you will discover that they inherit from CCScene instead of CCLayer.
Just a quick note: the use of CCScene is mainly grouping nodes in a scene, which was the purpose of CCLayer in Cocos2d v2, but don't worry about it as we will discuss this new feature later in this chapter. For now you just need to know how a new Cocos2d v3 project looks.
In Xcode, look at the project window in the center, where you will see the default properties of the new project:

As you can see, there are three sections on this screen: Identity, Deployment Info, and App Icons, but we will just pay attention to the second one. In this section, you can configure:
Deployment Target: The earlier iOS version that will be able to install and run the game, which is 5.0.
Devices: The family of devices that will be able to install and run the game. It will show the property we chose during the project creation process.
Main Interface: Allows you to select the main XIB file.
Device Orientation: The orientations supported by your game. We want it to be landscape as we are going to develop a horizontal game.
Status Bar Style: The way the status bar will be shown.
We don't need to modify these properties because they meet our requirements, so let's run the project.