

When you launch the application, the scene created in SpriteBuilder will load up by default. We will have to make some minor changes to get access to the MainScene file and load this as default instead.
As of now, both the MainScene.h and MainScene.m files have nothing in them. So, open them up and add the following code in them.
First, open up MainScene.h and add the following highlighted code:
@interface MainScene :CCNode{

CGSizewinSize;
}

+(CCScene*)scene;

@end
Next, in the MainScene.m file, add the following:
#import "MainScene.h
@implementation MainScene
+(CCScene*)scene{
return[[self alloc]init];
}
-(id)init{
if(self = [super init]){
winSize = [[CCDirectorsharedDirector]viewSize];
}
return self;
}
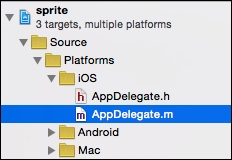
@endThen, navigate to the AppDelegate.m file, which is in the iOS group under Source/Platforms, as shown in the following screenshot:
Change the code in the startScene function as highlighted here:
- (CCScene*) startScene
{

  //Comment or delete line below as shown
  //return [CCBReaderloadAsScene:@"MainScene"];

  //add below line instead
  return [MainScene scene];
}
Now, we have a complete blank project to work with.
If you build and run the project now, you will see nothing but a black screen. To make sure that we are actually ready to draw something and that it will get displayed onscreen, let's add some basic code to change the background color.
Add the following code to the init function of the MainScene.m file:
-(id)init{

  if(self = [super init]){

    winSize = [[CCDirectorsharedDirector]viewSize];

    CGPoint center = CGPointMake(winSize.width/2,
      winSize.height/2);

    //Background
    CCNode* backgroundColorNode = [CCNodeColor
      nodeWithColor:[CCColor
      colorWithRed:0.0f
      green:1.0
      blue:0.0]];
    [selfaddChild:backgroundColorNode];


  }

  return self;
}
In the
init function, after initializing the super init file, we will first get the screen size of the current device. Then, we will have a helper CGPoint variable, which is used to calculate the center of the screen.
Then, we will create a new CCNode and call it backgroundColorNode and call the CCNodeColor class and the nodeWithColor function. In it, we will pass the red, green, and blue values. As I wanted a green background, I have the value of green as 1 and the rest are 0.
Then, we will add backgroundColorNode to the scene.
