Book Image

GameMaker Cookbook

Book Image

GameMaker Cookbook

Overview of this book

GameMaker: Studio started off as a tool capable of creating simple games using a drag-and-drop interface. Since then, it has grown to become a powerful instrument to make release-ready games for PC, Mac, mobile devices, and even current-gen consoles. GameMaker is designed to allow its users to develop games without having to learn any of the complex programming languages such as C++ or Java. It also allows redistribution across multiple platforms. This book teaches you to harness GameMaker: Studio’s full potential and take your game development to new heights. It begins by covering the basics and lays a solid foundation for advanced GameMaker concepts. Moving on, it covers topics such as controls, physics, and advanced movement, employing a strategic approach to the learning curve. The book concludes by providing insights into complex concepts such as the GUI, menus, save system, lighting, particles, and VFX. By the end of the book, you will be able to design games using GameMaker: Studio and implement the same techniques in other games you intend to design.
Table of Contents (17 chapters)
GameMaker Cookbook
Credits
About the Author
About the Reviewers
www.PacktPub.com
Preface
Index

Setting a path


In GameMaker, paths can be used for many things, some of which will be discussed in the following recipes. Before we get started with the recipes, it might be helpful to first learn how to create simple paths and move objects along them.

Getting ready

Before we make a path, let's take a quick look at the tool itself. To open the path editor, click on the icon at the top of the window that looks like a green arrow moving in a serpentine fashion.

This will open a window where you can plot the path, straight or curved, to be used in your game.

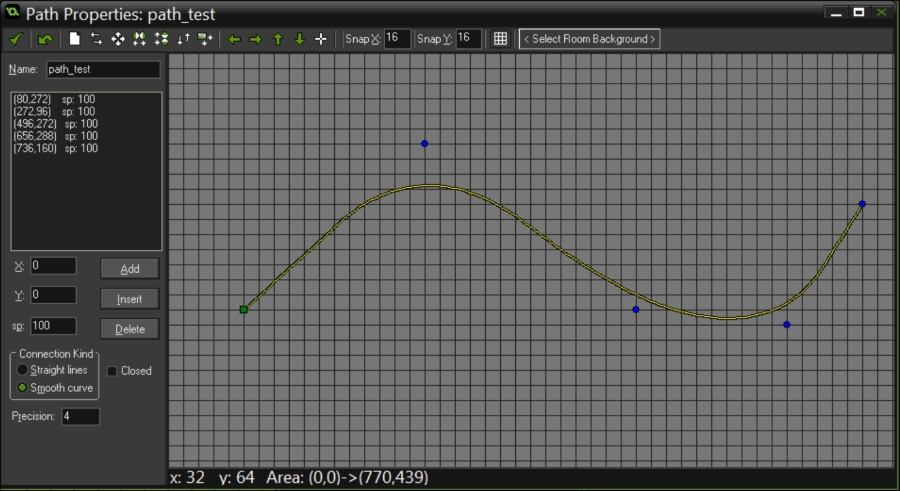
Name the path, path_test.

How to do it

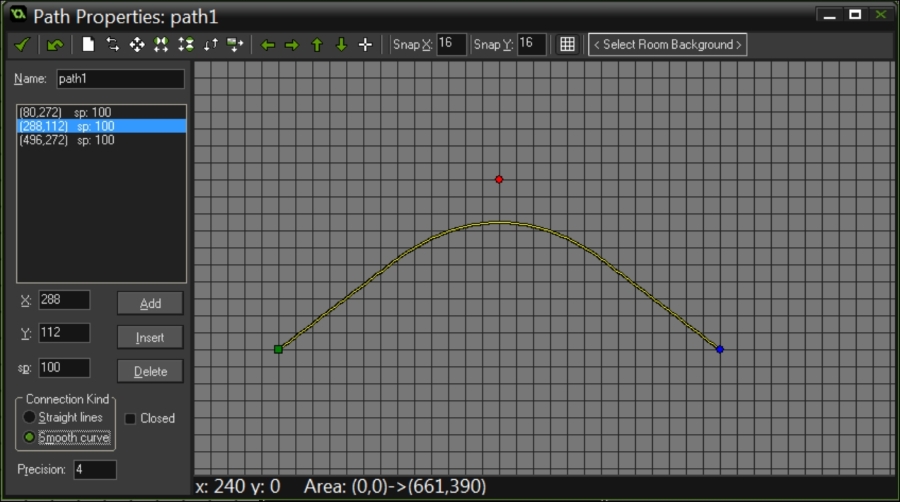
  1. With the path editor open, select Smooth Curve.

  2. Uncheck the box marked Closed.

  3. Click on the grid to place the first point of your path.

  4. Place two more path points along the same x axis.

  5. Now that the second point has turned blue, you can alter the curve of the path. Move this point up in order to create an upwards curve.

  6. Continue with the path by adding more points and adjusting the curves of each section.

  7. Save...