

The collection game is making excellent progress. We now have something playable insofar as we can run around and explore the environment in first-person mode. However, the environment could benefit from additional polish. Right now, for example, the floor meshes appear suspended in mid-air with nothing beneath them to offer support. See Figure 1.50. Further, it's possible to walk over the edge and fall into an infinite drop. So let's add some water beneath the floors to complement the scene as a complete environment.

Figure 1.50: The world floor appears to float and have no support
To add water, we can use another ready-made Unity asset included in the Project panel. Open the Standard Assets | Environment | Water | Water | Prefabs folder. Then drag and drop the WaterProDaytime asset from the Project panel in the scene. See Figure 1.51. This appears as a circular object, which is initially smaller than needed.

Figure 1.51: Adding water to the environment
After adding the Water prefab, position it below the floor level and use the scale tool (R) to increase its planar size (X, Z) to fill the environment outward into the distant horizon. This creates the feel that the floor meshes are smaller islands within an expansive world of water. See Figure 1.52:
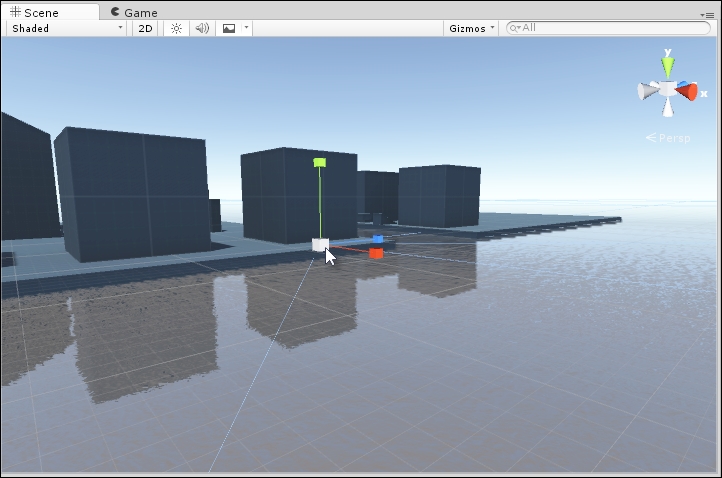
Figure 1.52: Scaling and sizing water for the environment
Now let's take another test run in the Game tab. Press play on the toolbar and navigate the character around in first-person mode. See Figure 1.53. You should see the water in the level. Of course, you can't walk on the water! Neither can you swim or dive beneath it. If you try walking on it, you'll simply fall through it, descending into infinity as though the water had never been there. Right now, the water is an entirely cosmetic feature, but it makes the scene look much better.

Testing the environment with water in FPS mode
The water is really a substanceless, ethereal object through which the player can pass easily. Unity doesn't recognize it as a solid or even a semi-solid object. As we'll see in more detail later, you can make an object solid very quickly by attaching a Box Collider component to it. Colliders and physics is covered in more depth from Chapter 3, Project B – the Space Shooter onward. For now, however, we can add solidity to the water by first selecting the
Water object from the Hierarchy panel (or in the Scene viewport) and then by choosing Component | Physics | Box Collider from the application menu. See Figure 1.54. Attaching a component to the selected object changes the object itself; it changes how it behaves. Essentially, components add behavior and functionality to objects, making them behave in different ways. Even so, resist the temptation to add lots of components to an object without reason and with the view that it makes them more versatile or powerful. It's better to have as few components on an object as necessary. This strategy of preferring relevant simplicity keeps your workflow neater, simpler, and optimized.
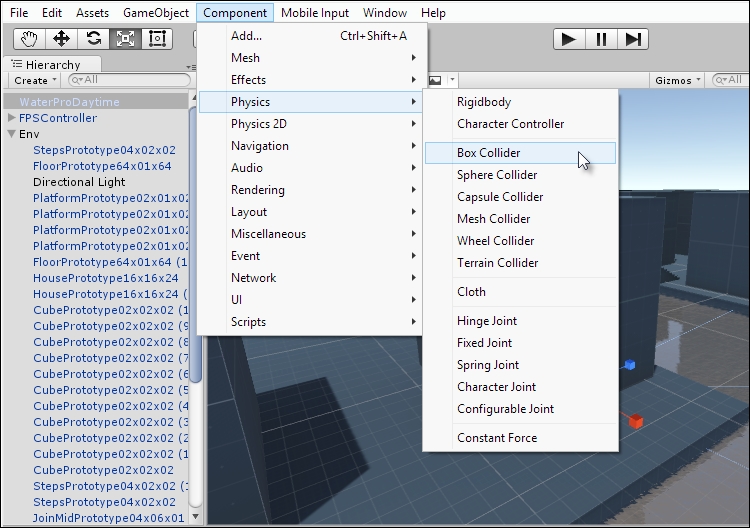
Figure 1.54: Attaching a Box Collider to a Water object
When a Box Collider is added to the water, a surrounding green cage or mesh appears. This approximates the volume and shape of the Water object and represents its physical volume, namely, the volume of the object that Unity recognizes as solid. See Figure 1.55:
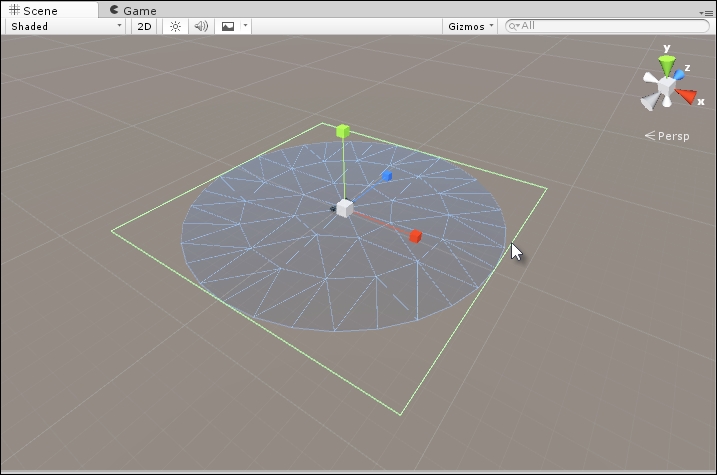
Figure 1.55: Box Colliders approximate physical volume
If you play the game now, your character will walk on water as opposed to falling through. True, the character should be able to swim properly, but walking might be better than falling. To achieve full swimming behavior would require significantly more work and is not covered here. If you want to remove the Box Collider functionality and return the water back to its original, ethereal state, then select the Water object, click on the cog icon on the Box Collider component, and then choose Remove Component from the context menu. See Figure 1.56:
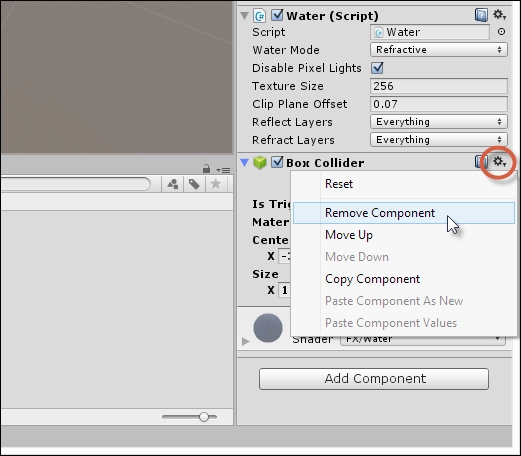
Figure 1.56: Removing a component