Use the project navigator to open up the file named GameScene.swift. Xcode created GameScene.swift to store the default scene of our new game.
What is a scene? SpriteKit uses the concept of scenes to encapsulate each unique area of a game. Think of the scenes in a movie; we will create a scene for the main menu, a scene for the Game Over screen, a scene for each level in our game, and so on. If you are on the main menu of a game and you tap Play, you move from the menu scene to the Level 1 scene.
Tip
SpriteKit prepends its class names with the letters "SK"; consequently, the scene class is SKScene.
You will see there is already some code in this scene. The SpriteKit project template comes with a very small demo. Let's take a quick look at this demo code and use it to test the iOS simulator.
Note
Please do not be concerned with understanding the demo code at this point. Your focus should be on learning the development environment.
Look for the run toolbar at the top of the Xcode window. It should look something like the following:

Select the iOS device of your choice to simulate using the dropdown on the far right. Which iOS device should you simulate? You are free to use the device of your choice. I will be using an iPhone SE for the screenshots in this book, so choose iPhone SE if you want your results to match my images perfectly.
Note
Unfortunately, expect your game to play poorly in the simulator. SpriteKit suffers from poor FPS in the iOS simulator. Once our game becomes relatively complex, we will see our FPS drop, even on high-end computers. The simulator will get you through, but it is best if you can plug in a physical device to test.
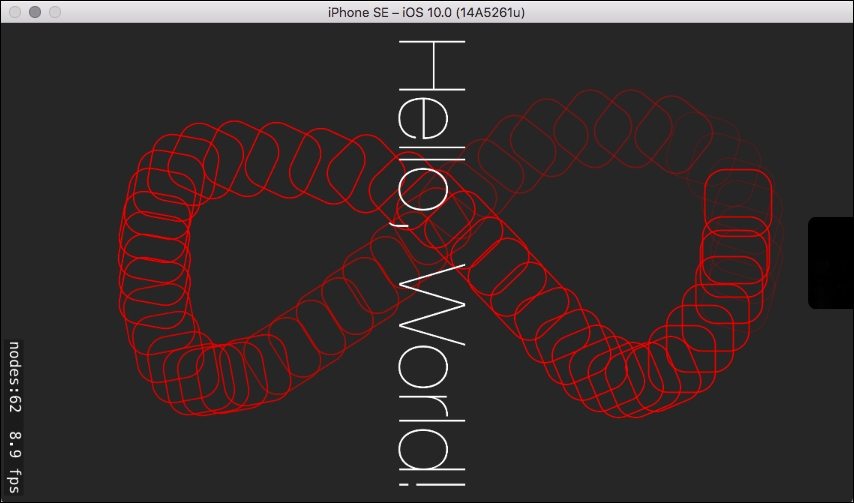
It is time for our first glimpse of SpriteKit in action! Press the gray play arrow in the toolbar (handy keyboard shortcut: command + r). Xcode will build the project and launch the simulator. The simulator starts in a new window, so make sure you bring it to the front. You should see a gray background with white text: Hello, World. Click around on the gray background. You will see colorful, spinning boxes spawning wherever you click:

If you have made it this far, congratulations! You have successfully installed and configured everything you need to make your first Swift game.
Once you have finished playing with the spinning squares, you can close the simulator down and return to Xcode. Note: you can use the keyboard command command + q to exit the simulator or press the stop button inside Xcode. If you use the stop button, the simulator will remain open and launch your next build faster.


