

The basic level has been created in terms of architectural models and layout; this was achieved using only a few mesh assets and some basic tools. Nevertheless, these tools are powerful and offer us a multitude of combinations and options to create great variety and believability in game worlds. One important ingredient is missing for us, however. This ingredient is lighting. You'll notice from Figure 1.34 that everything looks relatively flat, with no highlights, shadows, or light or dark areas. This is because scene lighting is not properly configured for best results, even though we already have a light in the scene, which was created initially by default.
Let's start setting the scene for the coin collection game by enabling the sky, if it's not already enabled. To do this, click on the Extras drop-down menu from the top toolbar in the Scene viewport. From the context menu, select Skybox to enable Skybox viewing. A Skybox simply refers to a large cube that surrounds the whole scene. Each interior side has a continuous texture (image) applied to simulate the appearance of a surrounding sky. For this reason, clicking the Skybox option displays a default sky in the Scene viewport. See Figure 1.35:
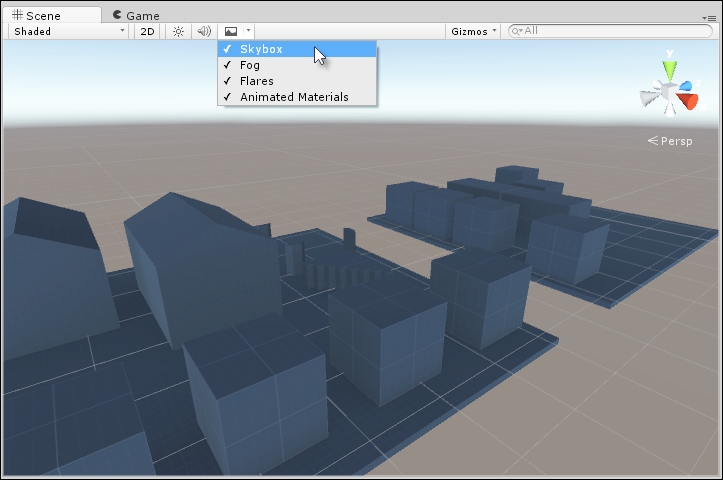
Figure 1.35: Enabling the sky
Now, although the Skybox is now enabled and the scene looks better than before, it's still not being illuminated properly—the objects lack shadows and highlights. To fix this, be sure that lighting is enabled for the scene by toggling on the lighting icon at the top of the Scene viewport. See Figure 1.36. This setting is for display purposes only. It only affects whether lighting effects are shown in the Scene viewport and not whether lighting is truly enabled for the final game:
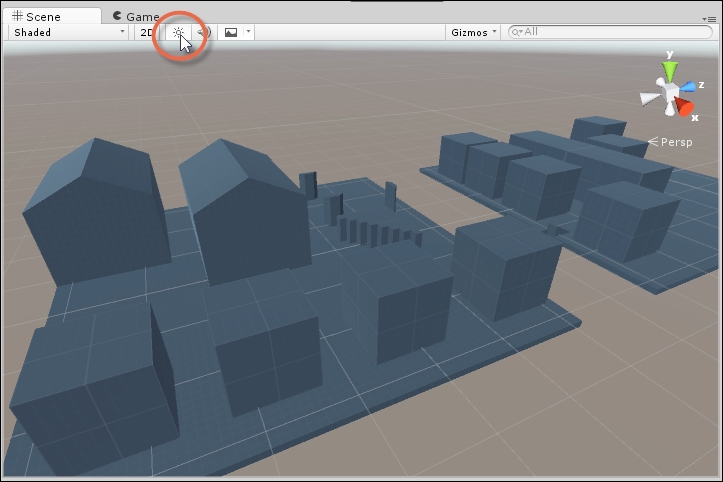
Figure 1.36: Enabling scene lighting in the Scene viewport
Enabling lighting display for the viewport will result in some differences to the scene appearance and, again, the scene should look better than before. You can confirm that scene lighting is taking effect by selecting Directional Light from the Hierarchy panel and rotating it. Doing this controls the time of day, rotating the light cycles between day and night and changing the light intensity and mood. This changes how the scene is rendered. See Figure 1.37:
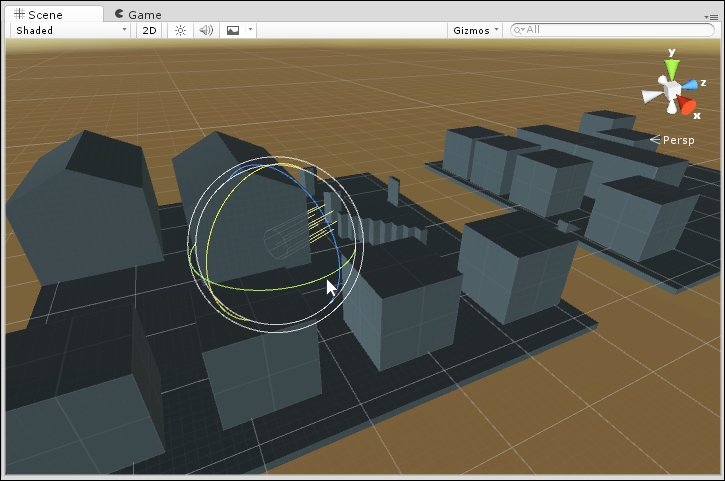
Figure 1.37: Rotating the scene directional light changes the time of day
Let's undo any rotations to the Directional Light by pressing Ctrl + Z on the keyboard. To prepare for final and optimal lighting, all non-movable objects in the scene (such as walls, floors, chairs, tables, ceilings, grass, hills, towers, and more) should be marked as Static. This signifies to Unity that the objects will never move, no matter what happens during gameplay. By marking non-movable objects ahead of time, you can help Unity optimize the way it renders and lights a scene. To mark objects as Static, simply select all non-movable objects (which includes practically the entire level so far), and then enable the Static checkbox via the Object Inspector. Note that you don't need to enable the Static setting for each object separately. By holding down the Shift key while selecting objects, you can select multiple objects together, allowing you to adjust their properties as a batch through the Object Inspector. See Figure 1.38:
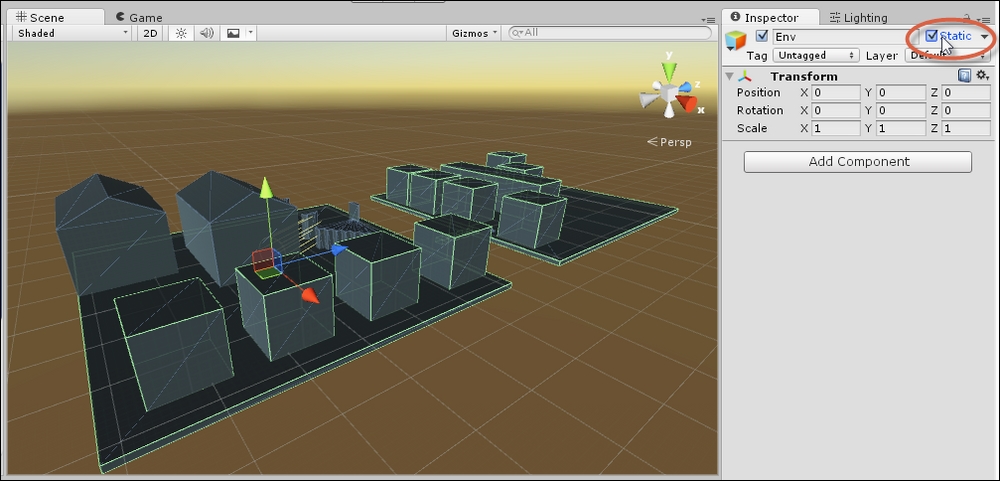
Figure 1.38: Enabling the Static option for multiple non-movable objects improves lighting and performance
When you enable the Static checkbox for geometry, Unity auto-calculates scene lighting in the background—effects such as shadows, indirect illumination, and more. It generates a batch of data called the GI Cache, featuring Light Propagation Paths, which instructs Unity how light rays should bounce and move around the scene to achieve greater realism. Even so, enabling the Static checkbox as we've done still won't produce cast shadows for objects, and this seriously detracts from realism. This happens because most mesh objects have the Cast Shadows option disabled. To fix this, select all meshes in the scene. Then, from the Object Inspector, click on the Cast Shadows checkbox from the Mesh Renderer component, and choose the On option from the context menu. When you do this, all mesh objects should cast shadows. See Figure 1.39:
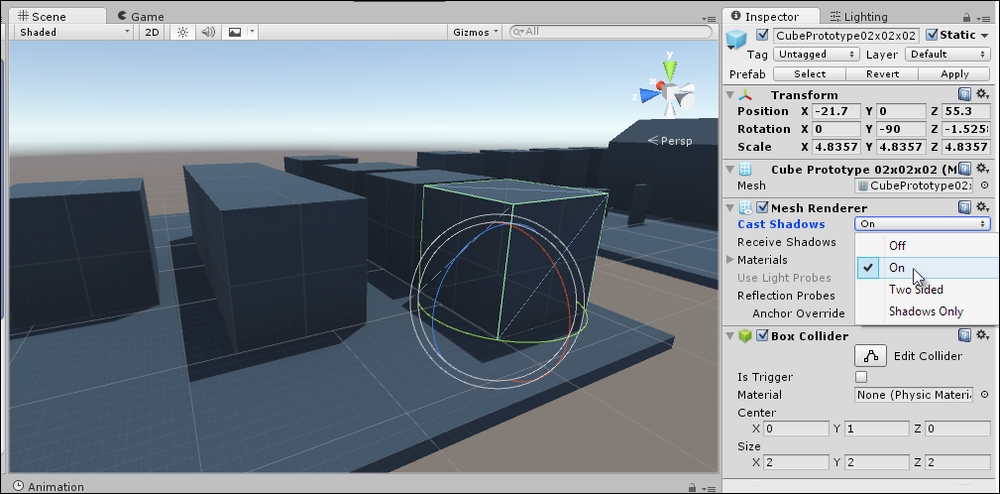
Figure 1.39: Enabling cast shadows from the Mesh Renderer component
Voila! Your meshes now cast shadows. Splendid work: in reaching this far, you've created a new project, populated a scene with meshes, and successfully illuminated them with directional lighting. That's excellent. However, it'd be even better if we could explore our environment in the first-person mode. We'll see how next.