Book Image

Swift Game Development - Third Edition

By : Siddharth Shekar, Stephen Haney
Book Image

Swift Game Development - Third Edition

By: Siddharth Shekar, Stephen Haney

Overview of this book

Swift is the perfect choice for game development. Developers are intrigued by Swift and want to make use of new features to develop their best games yet. Packed with best practices and easy-to-use examples, this book leads you step by step through the development of your first Swift game. The book starts by introducing Swift's best features – including its new ones for game development. Using SpriteKit, you will learn how to animate sprites and textures. Along the way, you will master physics, animations, and collision effects and how to build the UI aspects of a game. You will then work on creating a 3D game using the SceneKit framework. Further, we will look at how to add monetization and integrate Game Center. With iOS 12, we see the introduction of ARKit 2.0. This new version allows us to integrate shared experiences such as multiplayer augmented reality and persistent AR that is tied to a specific location so that the same information can be replicated on all connected devices. In the next section, we will dive into creating Augmented Reality games using SpriteKit and SceneKit. Then, finally, we will see how to create a Multipeer AR project to connect two devices, and send and receive data back and forth between those devices in real time. By the end of this book, you will be able to create your own iOS games using Swift and publish them on the iOS App Store.
Table of Contents (22 chapters)
Swift Game Development Third Edition
Contributors
Preface
Other Books You May Enjoy
Index

Creating a SpriteKit particle file


Xcode provides an excellent UI for creating and editing particle systems. To use the UI, we will add a new SpriteKit particle file to our project. Follow these steps to add the new file:

  1. Start by adding a new file to your project and locating the SpriteKit Particle File type. You can find this template under the Resource category, as shown here:

  2. In the following prompt, select Snow as the Particle Template.

  3. Name the file PierrePath.sks and click Create to add the new file to your project.

Xcode will open the new particle emitter in the main frame, which should look something like this:

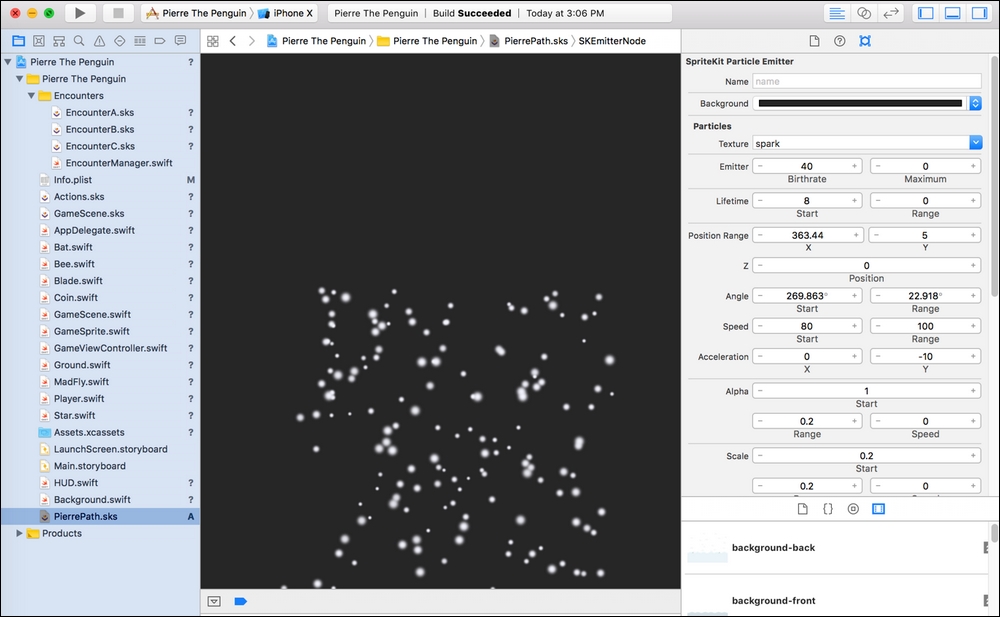
Previewing the Snow template in Xcode's particle editor

At the time of writing this book, Xcode's particle editor remains quirky. If you do not see the white snow particle effect in the middle, try clicking anywhere in the dark gray center area to reposition the particle emitter—occasionally, it does not start where expected.

This is also useful for testing setting changes without...