

Before we can edit the Viking helmet in this project, we need to practice using the transformation tools. We already learned how to activate tools, and we know what the gizmos look like, so now it's time to stick some arrows in the dummy!
- Click on the Move tool in the Toolbar to activate it.
- Select the Arrow_01 object by clicking on it in the Outliner or in the 3D Viewport.
- Press the tilde ~ key to bring up the View pie menu.
- Choose the View Selected option to frame the arrow.
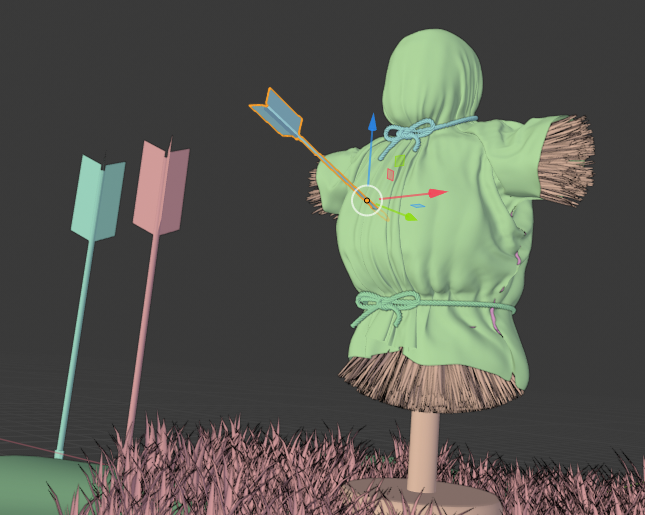
- Rotate the view with the middle mouse button so that we can see the dummy in the middle of the scene, as shown in the following screenshot:
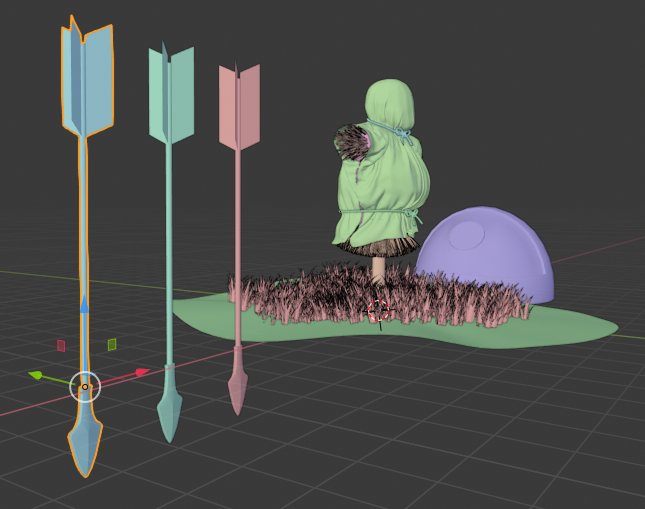
- Left-click on the red axis arrow of the Move gizmo and drag it sideways toward the Dummy object.
- Next, click and drag the green axis arrow of the gizmo to pull it toward the front of the Dummy object.
- Finally, click and drag upward on the blue axis arrow to bring it up to the chest area of the Dummy object.
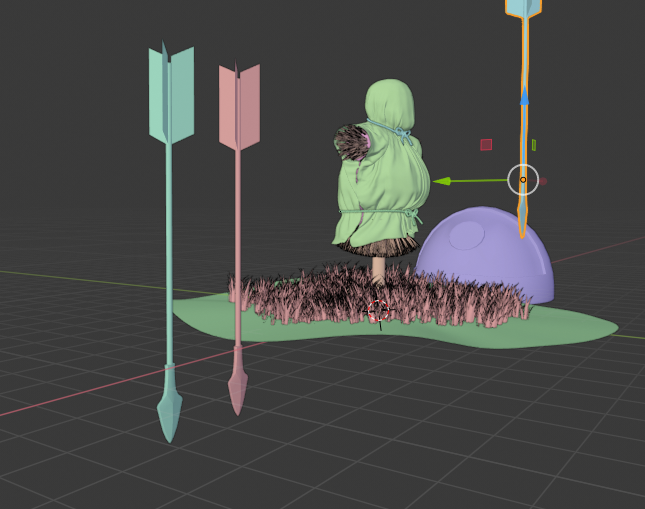
When you're done moving the arrow along all three axes, the arrow should be positioned similarly to what's shown in the following screenshot:
Now that the arrow has been moved into position, it's time to rotate it. First, we'll frame the arrow in the view, and then we'll use the rotate tool:
- Press the tilde ~ key to bring up the View pie menu.
- Choose the View Selected option to frame the arrow.
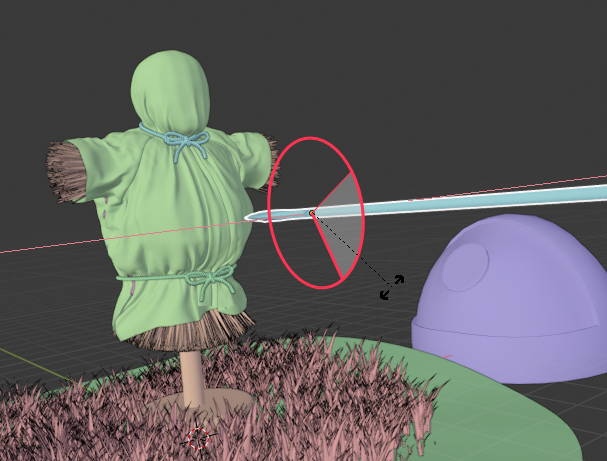
- Select the Rotate tool from the Toolbar.
- Click and drag on the red axis of the rotation gizmo to aim the arrow at the dummy's chest, as shown in the following screenshot:
This is looking good, but the arrow is way too big – it's an arrow, not a spear! Let's size it down with the Scale tool. When we scale objects, we usually want to scale along all three axes at once to keep the object's size proportional. Luckily, the scale tool makes this really easy as we can use the white circles of the gizmo. Let's give it a shot:
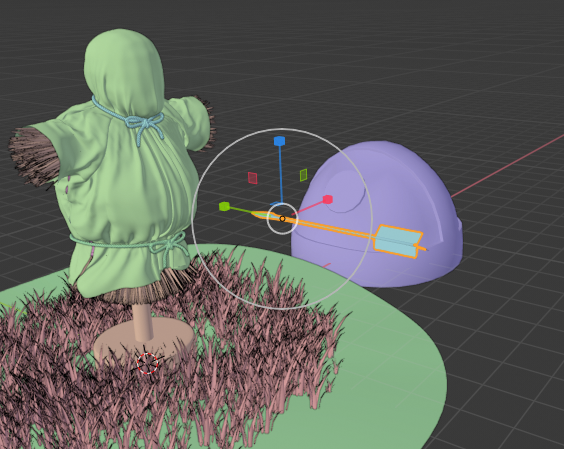
- Click on the Scale tool in the Toolbar to activate it.
- Hover your mouse over the Scale gizmo so that the gizmo's white circles light up.
- Click and drag inward to make the arrow smaller.
That will do the trick! The arrow should now be a similar size to what you can see in the following screenshot:
Excellent! Now, we need to go back to the Move tool one last time and stick that arrow into the dummy's chest. Just like with the Scale tool, you can click on the Move gizmo's white circle to move the object along all three axes at once. Let's try this now:
- Click on the Move tool in the Toolbar to activate it.
- Rotate the view as needed so that we can move the Arrow_01 object toward the Dummy object.
- Hover your mouse over the Move gizmo's white circle.
- Click and drag the white circle toward the dummy until the tip of the Arrow_01 object pierces the Dummy object, as shown in the following screenshot:
Good work, but there are two more arrows. Use what we just learned to finish placing all three arrows into the dummy's chest:
- Select the Arrow_02 object.
- Press the tilde ~ key to bring up the View pie menu and choose the View Selected option.
- Use the Move tool to move it in front of the dummy.
- Use the Rotate tool to aim the arrow tip at the dummy.
- Use the Scale tool to shrink the arrow down to a more appropriate size.
- Use the Move tool again to stick the arrow in the dummy's chest.
- Repeat these steps again for the Arrow_03 object.
When you're finished placing the arrows, we can move on to editing the Viking helmet!