Book Image

Blender 3D By Example - Second Edition

By : Oscar Baechler, Xury Greer
Book Image

Blender 3D By Example - Second Edition

By: Oscar Baechler, Xury Greer

Overview of this book

Blender is a powerful 3D creation package that supports every aspect of the 3D pipeline. With this book, you'll learn about modeling, rigging, animation, rendering, and much more with the help of some interesting projects. This practical guide, based on the Blender 2.83 LTS version, starts by helping you brush up on your basic Blender skills and getting you acquainted with the software toolset. You’ll use basic modeling tools to understand the simplest 3D workflow by customizing a Viking themed scene. You'll get a chance to see the 3D modeling process from start to finish by building a time machine based on provided concept art. You will design your first 2D character while exploring the capabilities of the new Grease Pencil tools. The book then guides you in creating a sleek modern kitchen scene using EEVEE, Blender’s new state-of-the-art rendering engine. As you advance, you'll explore a variety of 3D design techniques, such as sculpting, retopologizing, unwrapping, baking, painting, rigging, and animating to bring a baby dragon to life. By the end of this book, you'll have learned how to work with Blender to create impressive computer graphics, art, design, and architecture, and you'll be able to use robust Blender tools for your design projects and video games.
Table of Contents (18 chapters)

Modeling the armrests

The last pieces of the chair we need to make are the armrests. We're mostly going to use box modeling, but we'll introduce one more very useful modifier before we're done.

We're going to start with a plane, and cut in the details we need to match the curvature of the armrests:

  1. Go to the Top view.
  2. Press the Shift + S hotkey to bring up the Snap pie menu.
  3. Choose Cursor to World Origin.
  4. Find the Add menu at the top of the 3D Viewport or press the Shift + A hotkey.
  5. Choose Mesh | Plane.
  6. Rename the plane Chair_Armrests.
  7. Tab into Edit Mode.
  8. Press the 1 key on the home row to switch to vertex select mode.
  9. Grab the top-right corner vertex of the plane and move it up to the top-right corner of the armrest in the reference image.
  1. Move the other three vertices into their respective corners as well:
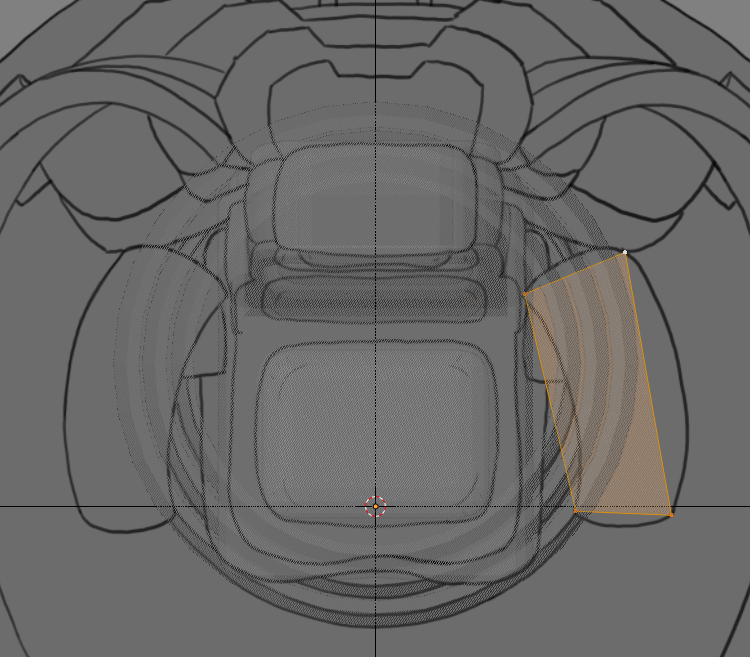
Placing the four verts on the armrest's...