Creating levels in UE4 is easy and facilitated by a great all-around UI. In this recipe, we'll outline basic editor usage and describe how to construct your first level once you have your first project launched.
Creating your first level in UE4
Getting ready
Complete the previous recipe, Creating your first project in UE4. Once you have a project constructed, we can proceed with creating a level.
How to do it...
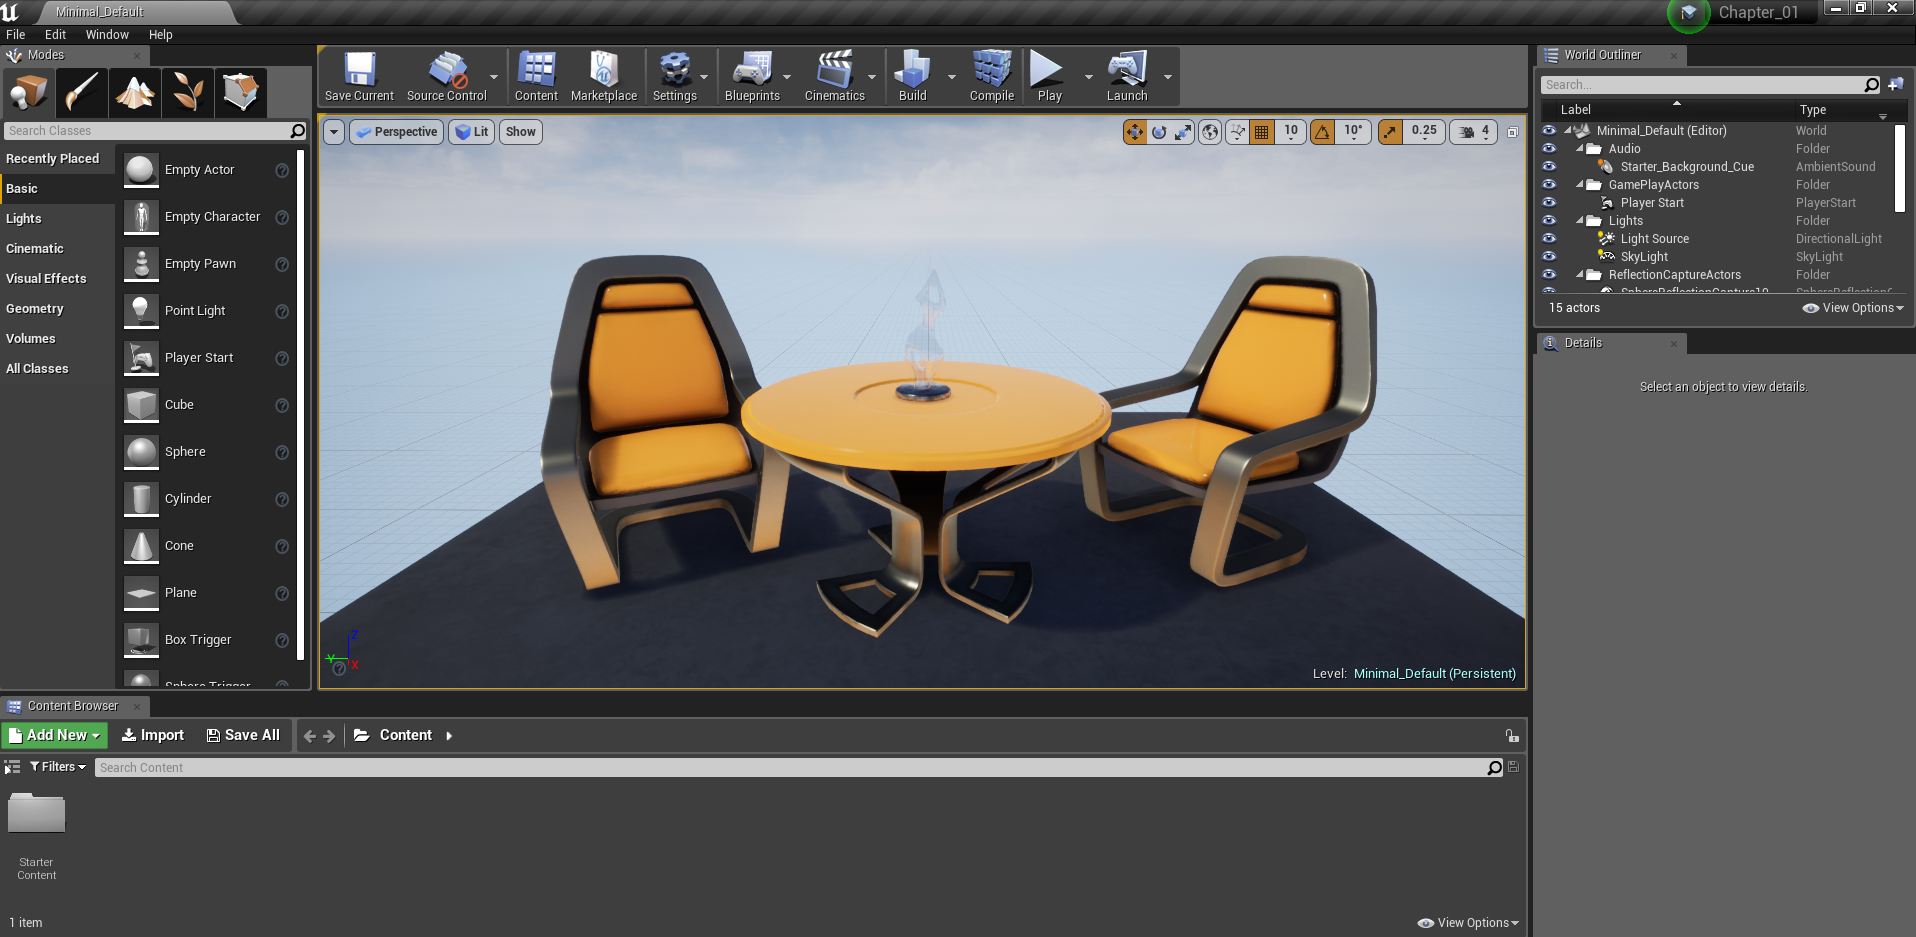
- The default level that gets set up when you start a new project will contain some default geometry and scenery if the starter content was included when creating the project:

The MinimalDefault level and interface of Unreal Engine 4
You don't need to start with this starter stuff, however. If you don't want to build from it, you can delete it, or create a new level.
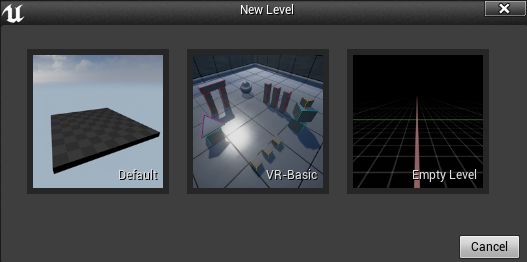
- To create a new level, click File | New Level...:

From here, you can select to create a level with a background sky (Default), or without a background sky (Empty Level).
If you choose to create a level without a background sky, keep in mind that you must add a light to it to see the geometry you add to it.
- If you loaded the Starter Content on your project's creation (or some other content), then you can use the Content Browser to pull content into your level. Simply drag and drop instances of your content from the Content Browser into the level and save it, and then play the game by hitting the Play button.
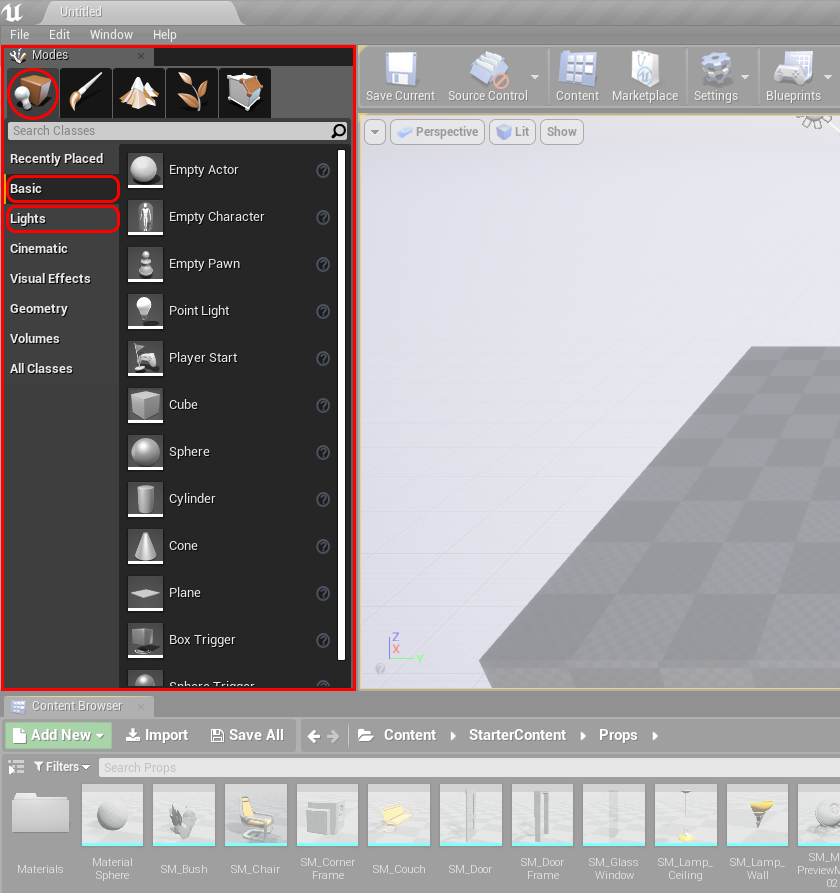
- Add some geometry to your level using the Modes panel (Window | Modes). Be sure to click on the left-most button with the picture of a light bulb and cube on it to access the placeable geometry:

By default, the Basic option is selected, which contains general geometry and other common features that are needed in Unreal. You can also add lights via the Modes tab by clicking on the Lights subtab on the left-hand side of the Modes tab. These can be added to a level by dragging and dropping as well.
The Modes panel contains two useful items for level construction: some sample geometry to add (cubes and spheres and the like), as well as a panel full of lights. Try these out and experiment to begin laying out your level.
If you are interested in learning more about building levels inside Unreal Engine, check out https://docs.unrealengine.com/en-us/Engine/QuickStart
If you are interested in learning more about building levels inside Unreal Engine, check out https://docs.unrealengine.com/en-us/Engine/QuickStart


