Book Image

Unreal Engine 4 Game Development Quick Start Guide

By : Rachel Cordone
Book Image

Unreal Engine 4 Game Development Quick Start Guide

By: Rachel Cordone

Overview of this book

Unreal Engine is a popular game engine used by developers for building high-end 2D and 3D games. This book is a practical guide designed to help you get started with Unreal Engine 4 and confidently develop interactive games. You’ll begin with a quick introduction to the Unreal Engine 4 (UE4) ecosystem. Next, you’ll learn how to create Blueprints and C++ code to define your game's functionality. As you progress, you’ll cover the core systems of UE4 such as Unreal Motion Graphics (UMG), Animation Blueprints, and behaviour trees to further build on your game development knowledge. The concluding chapters will then help you learn how to use replication to create multiplayer games. By the end of this book, you will be well-versed with UE4 and have developed the skills you need to use the framework for developing and deploying robust and intuitive games.
Table of Contents (10 chapters)

Editor preferences

Back in the main editor window, if you go to Edit | Editor Preferences (near the bottom), you will see options to customize a lot of things pertaining to the editor. Let's go over some that are used more often:

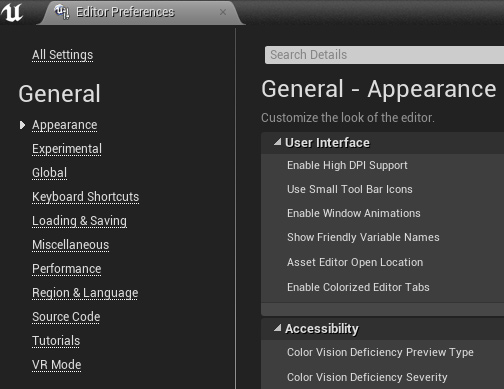
  • In the Appearance section, you can change the color of the grid and selected items, set colorblind options for the editor, and change the font size and color for the log.
  • The Keyboard Shortcuts section has a complete list of the keyboard shortcuts the editor uses in its various windows and modes, and they are all completely customizable. Spend some time familiarizing yourself with them, as they will save you a lot of time when working on the editor.
  • Next is the Loading & Saving section. Earlier, we talked about the autosave feature, and here is where you can change how it operates. By default, it is set to 10 minutes, but you can change that time here in the Auto Save section. You can also change what happens when you start up the editor as far as which level is loaded, and if it should restore any asset tabs you had open when you last shut down, which is pretty useful if you're working in a lot of different classes at a time and don't want to lose your place.
  • Another section that you will want to take a look at is the Play section under Level Editor. Here, we can customize the Play in editor settings as well as the new window settings, changing the window size and the mouse/keyboard control scheme.
  • You might not want to change most of these settings right away, but don't be scared to try them out. All of the sections here have a Reset to Defaults button if you need to revert your changes. You should definitely come back to these settings once you've had some experience with the editor and know more about what changes can improve your workflow.

Project settings

Next, we'll discuss the project settings under Edit | Project Settings:

The first section we'll talk about is Description. Here is where you will set your project/company name, any copyright and licensing notices, and window settings for the game (resizeable, borderless window, and so on). You can also manually set your project thumbnail here, which will show up in the Epic Games launcher in your project library.

Next up is Maps & Modes. Here, you can change the default GameMode class for your game (which can be overridden per level as previously discussed). You can also set which level is loaded when the editor starts up and which level is loaded when the actual game starts up (usually a title screen level).

There are also options for split-screen multiplayer if your game uses that.

The last option here is the GameInstance class, which can store data across level loads.

The next section is Movies, which allows you to set any startup movies, such as company logos, and lets you set whether or not these are skippable. And please, on behalf of gamers everywhere, make these skippable.

The next section is Packaging. Here is where you set your project to a development or shipping build and set options such as whether or not to do a full rebuild each time you run one. You can also set the Blueprint nativization method if desired, which converts them to C++ during the build process and will be discussed more in Chapter 8, Optimization, Testing, and Packaging.

After that comes Supported Hardware, which is self-explanatory, and then Target Hardware. When we were first setting up our project, we set it to Desktop / Console and Maximum Quality. If you needed to change it, here is where that is done.

One last section you'll want to explore on your own is the Engine section. A lot of the defaults are set here for things such as AI movement, animation compression, and audio classes.

Further down in the Engine section are the physics defaults, where you can set things such as gravity (which, as discussed, can be overridden per level), terminal velocity, and friction settings.

The last part of the engine settings I want to talk about is rendering. Here is where the major components of the graphics will be adjusted, such as ambient occlusion and motion blur. Depending on the scope of your project, some of these will not be needed, and they can be individually disabled here to increase your game's performance and fit your game's art style.

Input settings

The input settings are part of the Engine section, but I want to discuss it separately from the other editor preferences. This section defines the keyboard, mouse, and gamepad inputs that our game will use, and will come into play in Chapter 2, Programming Using Blueprints. Let's take a look at the inputs that have been provided for our third-person project:

When you create your project, these inputs will automatically be created based on the template you use, but you will naturally want to add more depending on your gameplay. For instance, to add a Use key, you would press the plus sign next to Action Mappings, then change the name from NewActionMapping_0 to Use, and then select a keyboard key for it to use (E is common). Now, when you are creating or modifying your character class, you will be able to use this as an input event (discussed more in Chapter 2, Programming Using Blueprints).

Axis Mappings have an additional setting for scale, since they include gamepad thumbsticks that don't have a strict on/off state. If you look at MoveForward for example, you can see that the backward key (S) also calls the same input event; it just gives it a negative value so the character will move in the opposite direction.

Now that we've customized the editor with our preferences, let's look at how to further expand the engine's capabilities by using plugins.