
Using the Voxel Remesher in a low-to-high detail workflow
Sculpting is an artistic process. In a lot of ways, it is similar to drawing. When we are trying to draw a character, we don't start with the finer details such as the nostrils, the anatomy of the ear, the individual hairs of the eyebrows, or anything like that. First, we block out the major forms, then work our way to finer and finer details. It's the same with sculpting.
The Voxel Remesher is meant to be used in this same way. Typically, we start with the voxel size set very large so that we are working with just a few polygons while we block out a shape. Then, when we don't have enough polygons to represent the forms we are trying to create, we reduce the voxel size and run the remesher again.
In this section, we will practice this workflow and learn a few hotkeys that can help us.
Getting ready
We're going to start this section from scratch. Launch Blender and create a new project with the sculpting preset. Once the new project has been created, we can practice with the Voxel Remesher workflow.
How to do it…
This time, we're not going to use the eyedropper to sample a voxel size from the model. Instead, we can set the voxel size by using a keyboard shortcut:
- Hover your pen over the 3D Viewport before pressing the following keyboard shortcut.
- Press the Shift + R keyboard shortcut to begin changing the voxel size.
A visualization of the voxel size will appear over the model, as you can see in the following screenshot:

Figure 2.17 – The voxel size can be visualized using this grid pattern
- Drag your pen to the left to increase the voxel size to around
0.2500. - Tap your pen down onto the graphics tablet to confirm the new voxel size.
Perfect! Increasing the voxel size also increases the size of the polygons that will be generated when we run the Voxel Remesher. This also means we will have fewer polygons, which, in this case, is a good thing. Having fewer polygons will make the sculpture easier to work with while we block out the largest of our major forms.
Important Note
Be careful with this setting – if you set the voxel size too low, it will take a very long time for your computer to calculate the new mesh. Usually, we don't need to go any lower than 0.01 m. If you try to use the Voxel Remesher with a setting that is much lower than this, you could crash Blender and lose your sculpture.
We also have a keyboard shortcut to run the Voxel Remesher. Let's use it now:
- Hover your pen over the 3D Viewport before pressing the following keyboard shortcut.
- Press the Ctrl + R keyboard shortcut to run the Voxel Remesher.
The sphere will be remeshed to have very few and very large polygons, as you can see in the following screenshot:
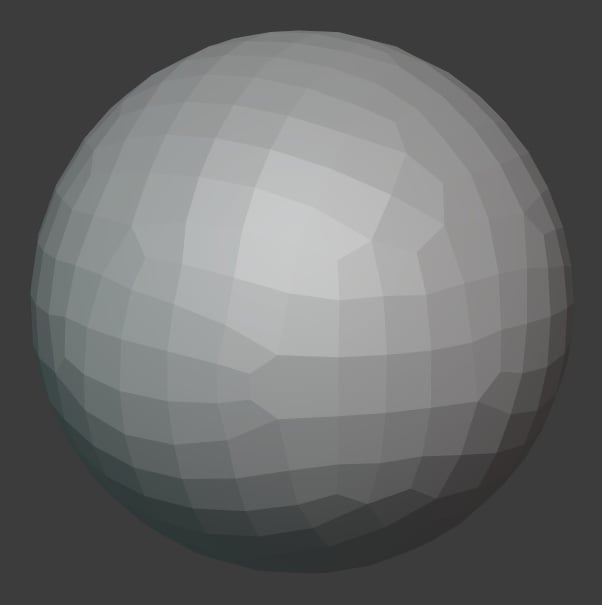
Figure 2.18 – The Quad Sphere after running the Voxel Remesher at a voxel size of 0.2500
Reducing the poly count is helpful at this stage because we can stay focused on the appropriate level of detail. Let's try pulling out a protrusion using the Snake Hook brush:
- Click on the Snake Hook brush from the Toolbar to activate it.
- Set the Radius setting of the brush to
250 px. - Use the Snake Hook brush to pull a piece of the sphere outward. Be careful not to create an overly curvy shape that the polygons can't properly support.
When working with the Voxel Remesher, we have to make our changes in small increments; we make a change with our brushes, then we run the remesher again. Now that we have a protrusion coming out of the sphere, we need to remesh the polygons so that they support the new form.
- Press Ctrl + R to run the Voxel Remesher again.
Notice that new polygons have been created to support the protrusion, but the rest of the sphere stayed the same. That's a good thing! If you can't see the difference, you can turn on the wireframe overlay to view the before and after, as we've done in the following diagram:
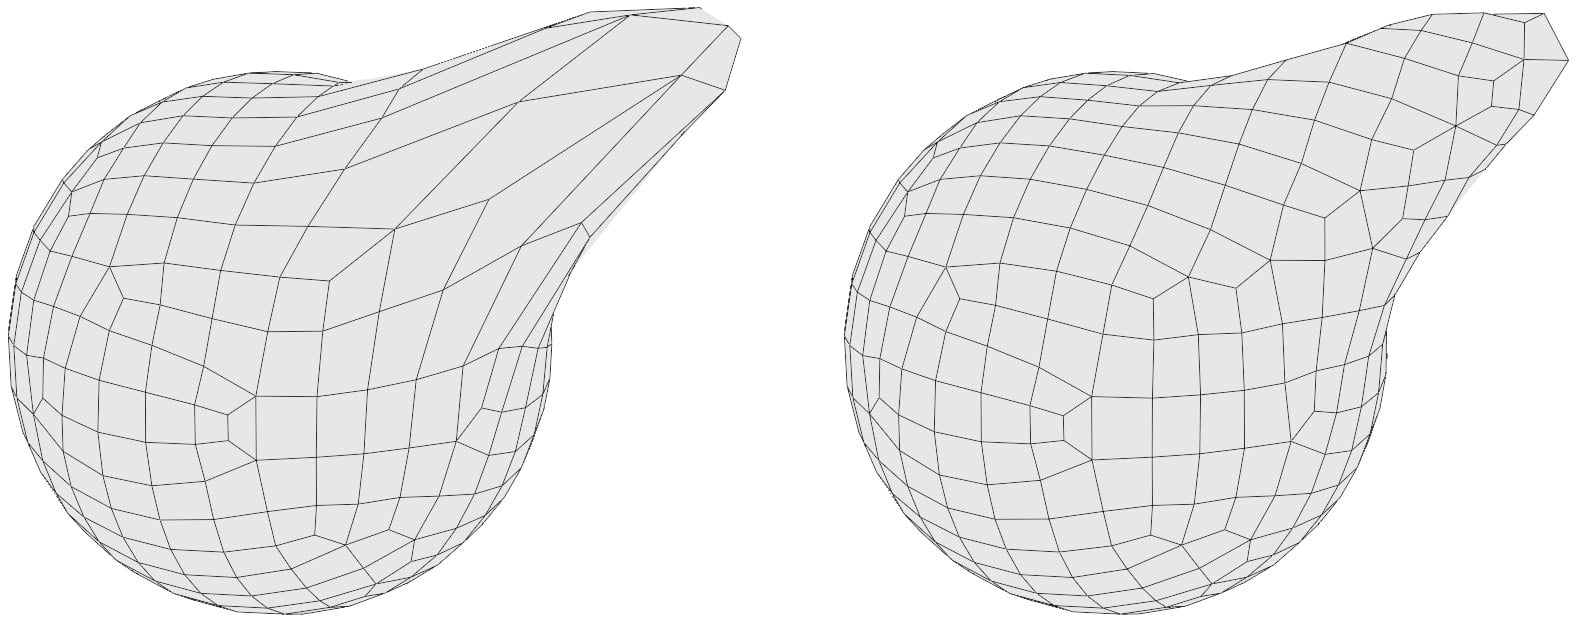
Figure 2.19 – The wireframe of the sphere before and after voxel remeshing a second time (this diagram has been simplified for better visibility in this book)
You might be wondering whether it's excessive to use the Voxel Remesher in this way. Not at all! This is how it's meant to be used. We can run the remesher as many times as we need to. Any time we begin to work on a new form and the polygons become stretched out, it's time to run the remesher again. You might run the Voxel Remesher 10, 50, 100, or even 1,000 times during a sculpting session; that's why we have the keyboard shortcuts.
Go ahead and practice this before moving on. Once we have all of the largest forms settled in, we need to use a smaller voxel size so that we can work on the smaller details:
- Use the Shift + R keyboard shortcut to begin changing the voxel size.
- Drag your pen to the right to decrease the voxel size to around
0.1000. - Tap your pen down onto the graphics tablet to confirm the new voxel size.
- Press Ctrl + R to run the Voxel Remesher again.
Perfect! Now we can add more details at this new voxel size. We should avoid decreasing the voxel size too much too quickly. If we go too quickly, we will end up with jagged artifacts on the surface of our mesh. If you recall back to our example in the Practicing the basics of the Voxel Remesher section, this is what happened to the character's neck. If we end up with some of these jagged edges, we will have to find a way to smooth them out later. So, it's easier if we simply don't introduce these issues in the first place.
We will get plenty more practice with the Voxel Remesher throughout this book, as it will be the main method we use while creating all of the major forms of our sculptures.
How it works…
Working from low detail to high detail is the best way to achieve good results in our sculptures. Another way to think about voxel size is in terms of resolution. Resolution describes the amount of detail we can achieve based on the current size and density of the polygons.
This is the same concept in raster graphics and digital images. An image with few pixels has a low resolution and can only support a very low level of detail. An image with millions of pixels has a high resolution and can support a very high level of detail. An example of this can be seen in the following diagram:
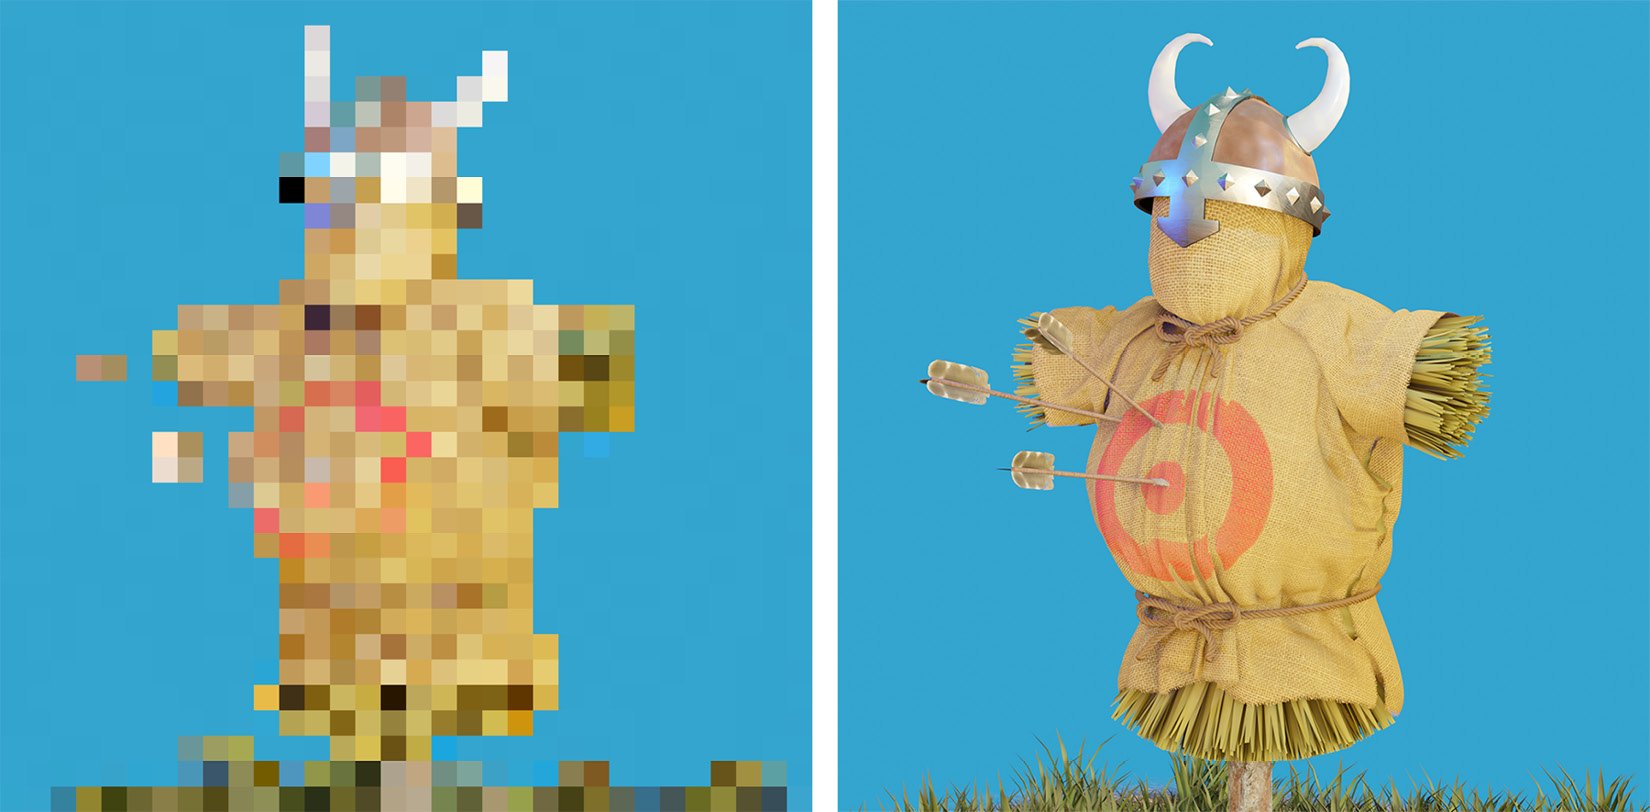
Figure 2.20 – A low-resolution image with 32 x 32 pixels on the left-hand side versus a high-resolution image with 1024 x 1024 pixels on the right-hand side
Resolution in an image and resolution in a 3D sculpture work very similarly. However, we have an advantage in 3D sculptures: we can increase the resolution by decreasing the voxel size, then running the Voxel Remesher.
This method will serve us well in the early stages of our sculpting workflow. However, we will eventually get to a point where the Voxel Remesher causes problems. Sometimes, we need to be able to work with extremely high-frequency details such as skin pores, fingernails, scars, scales, or other fine textures. Attempting to use the Voxel Remesher for these details becomes problematic for performance and workflow reasons.
To get around this, we need to learn about the final sculpting workflow – multiresolution.