

Blueprints Visual Scripting
The first question you should be asking is: what is a Blueprint?
The word Blueprint has more than one meaning in Unreal Engine. First, it is the name of a visual scripting language created by Epic Games for Unreal Engine. Second, it can refer to a new type of game object created using the Blueprint language.
There are two main types of Blueprints: Level Blueprint and Blueprint Class. Each Level of the game has its own Level Blueprint and it is not possible to create a separate Level Blueprint. On the other hand, Blueprint Class is used to create interactive objects for the game and can be reused in any Level.
Opening the Level Blueprint Editor
To open the Level Blueprint Editor, click on the Blueprints button located in the leftmost group of buttons in the toolbar of the Unreal Editor. Then, select the Open Level Blueprint option from the dropdown, as shown in the following screenshot:
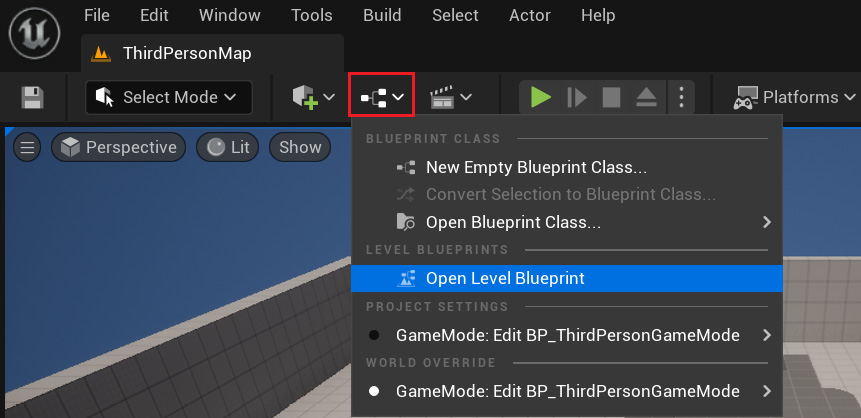
Figure 1.4 – Opening a Level Blueprint
The Editor will open the Level Blueprint of the current Level. The Level Blueprint Editor is simpler than the Blueprint Class Editor because it has only the My Blueprint panel, the Details panel, and the Event Graph Editor. The following screenshot shows the Level Blueprint Editor:
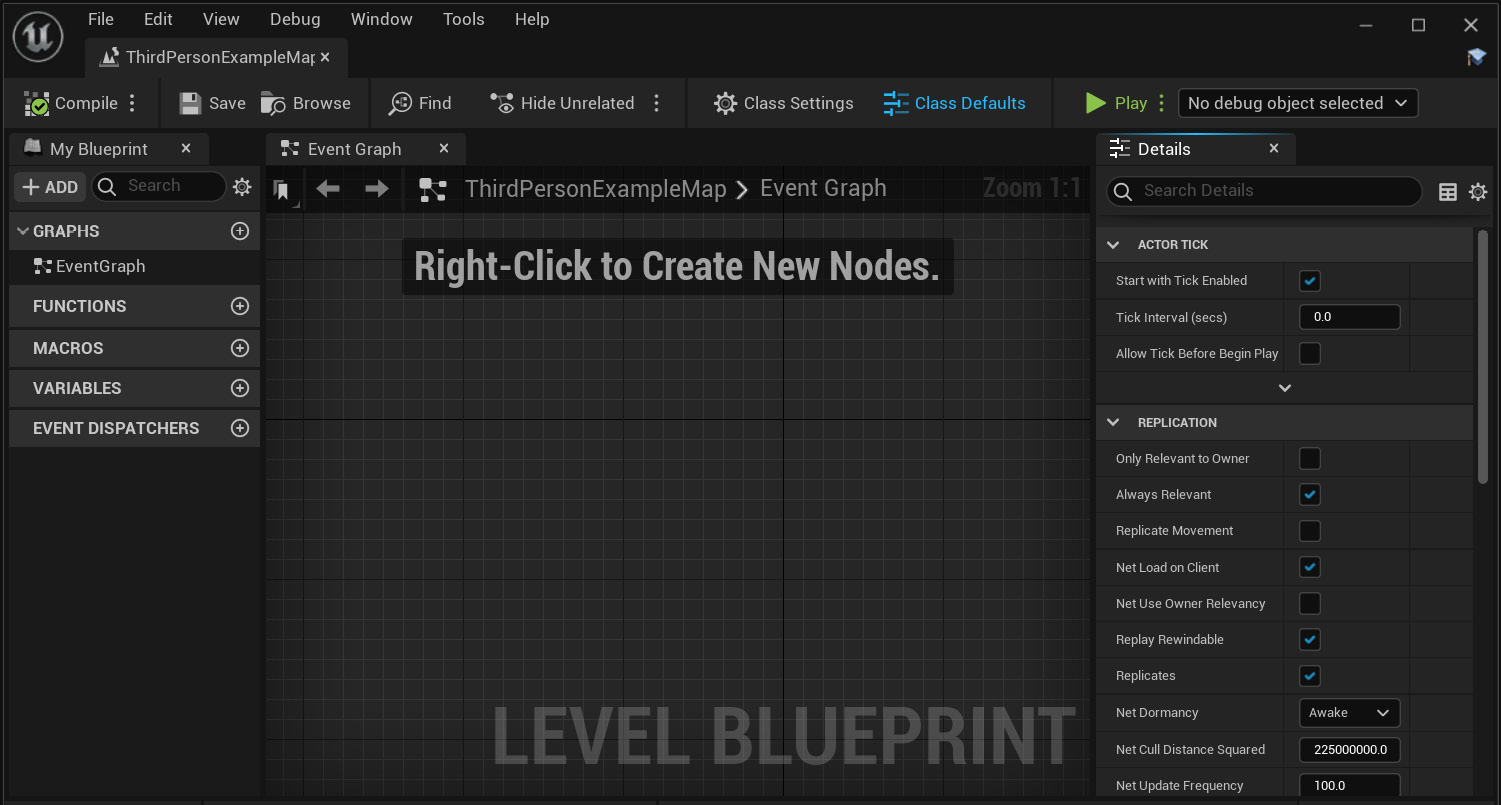
Figure 1.5 – The Level Blueprint Editor
For now, we will not do anything with the Level Blueprint. We opened it to get our first glance at the interface. Close the Level Blueprint Editor to return to the Level Editor window. Now, we will create a Blueprint Class to open the Blueprint Class Editor and see all the panels available.
Creating a Blueprint Class
There are three ways to create a Blueprint Class:
- Click the same Blueprints button in the toolbar that we used to open the Level Blueprint. Then, click the New Empty Blueprint Class button in the dropdown.
- Click the Content Drawer button to open the Content Browser, then click the Add button and select Blueprint Class under the Create Basic Asset category.
- Right-click anywhere on an empty space in the Content Browser and select Blueprint Class from the menu that appears.
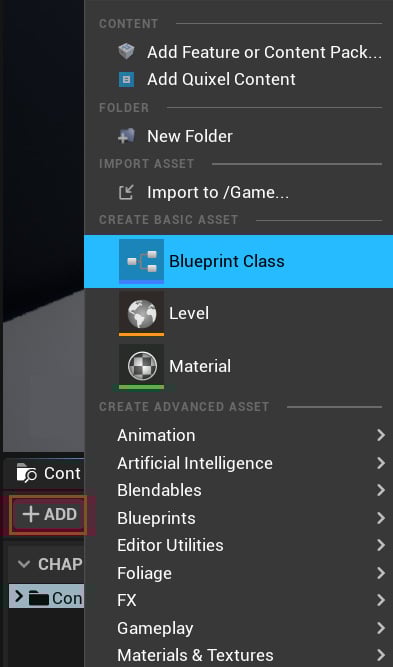
Figure 1.6 – Creating a Blueprint Class
On the next window, you must choose the parent class of the new Blueprint. For now, think of the parent class as the Blueprint type. The window shows the most Common classes, but if you need to choose another parent class, then just expand the All Classes option. When you choose the parent class, this window will close, and a new Blueprint asset will appear in the Content Browser to be renamed. You can click the Cancel button because we are just familiarizing ourselves with the process.
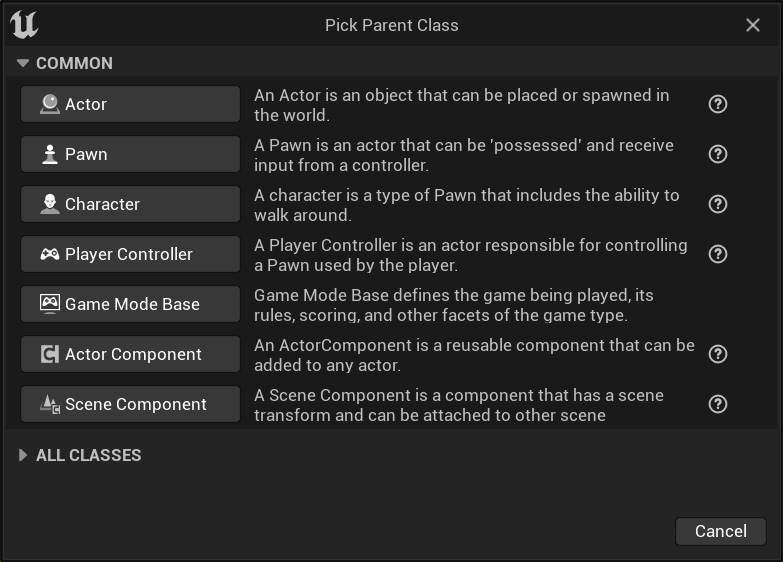
Figure 1.7 – Blueprint Parent Class
Now that we've learned how to open the current Level Blueprint and how to create a Blueprint Class, we will explore the panels of the Blueprint Class Editor. You can open the Blueprint Class Editor by right-clicking on a Blueprint asset in the Content Browser and selecting Edit, or by double-clicking on a Blueprint asset.