Book Image

Complete Virtual Reality and Augmented Reality Development with Unity

By : Jesse Glover, Jonathan Linowes
Book Image

Complete Virtual Reality and Augmented Reality Development with Unity

By: Jesse Glover, Jonathan Linowes

Overview of this book

Unity is the leading platform to develop mixed reality experiences because it provides a great pipeline for working with 3D assets. Using a practical and project-based approach, this Learning Path educates you about the specifics of AR and VR development using Unity 2018 and Unity 3D. You’ll learn to integrate, animate, and overlay 3D objects on your camera feed, before moving on to implement sensor-based AR applications. You’ll explore various concepts by creating an AR application using Vuforia for both macOS and Windows for Android and iOS devices. Next, you’ll learn how to develop VR applications that can be experienced with devices, such as Oculus and Vive. You’ll also explore various tools for VR development: gaze-based versus hand controller input, world space UI canvases, locomotion and teleportation, timeline animation, and multiplayer networking. You’ll learn the Unity 3D game engine via the interactive Unity Editor and C# programming. By the end of this Learning Path, you’ll be fully equipped to develop rich, interactive mixed reality experiences using Unity. This Learning Path includes content from the following Packt products: • Unity Virtual Reality Projects - Second Edition by Jonathan Linowes • Unity 2018 Augmented Reality Projects by Jesse Glover
Table of Contents (24 chapters)
Title Page
Copyright
About Packt
Contributors
Preface
Index

The game element UI


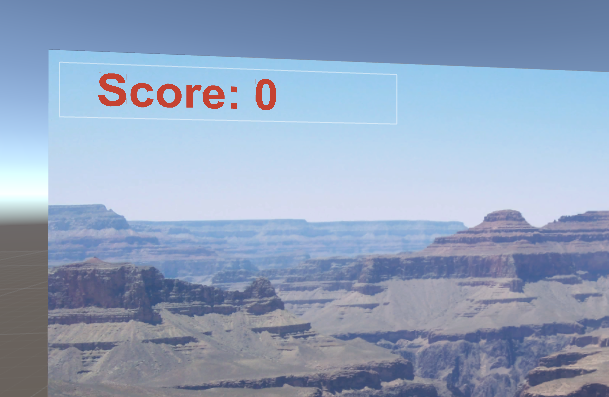
When Ethan gets killed in the Diorama scene from Chapter 4, Gaze-Based Control, the score value in the GameController object's KillTarget script is updated, but we don't show the current score to the player (set up in that chapter). We'll do this now, adding a scoreboard into the scene at the top-left corner of the backdrop PhotoPlane image:

  1. From the Project panel, drag the DefaultCanvas prefab directly into the Scene view
  2. Rename it ScoreBoard
  3. With ScoreBoard selected, set the Rect Transform component's Pos X, Pos YPos Z to (-2.8, 7, 4.9) and the Width and Height to (3000, 480)
  4. With Text under ScoreBoard selected, set the Font Size to 100 and choose a noticeable color such as red for the Text
  5. Enter the Score: 0 sample string for Text
  6. Disable Image under ScoreBoard by unchecking the Enable check box or deleting it

We have added another canvas to the scene, sized and placed it where we want, and formatted the text for display. It should look like this:
Now, we need to update...