

Setting up the development environment
Now that you know a bit more about how we will be making games, it is time to set up a development environment so we can get coding.
What about Mac and Linux?
The games that we will be making can be built to run on Windows, Mac, and Linux! The code we use will be identical for each platform. However, each version does need to be compiled and linked on the platform for which it is intended, and Visual Studio will not be able to help us with Mac and Linux.
It would be unfair to say, especially for complete beginners, that this book is entirely suited for Mac and Linux users. Although, I guess, if you are an enthusiastic Mac or Linux user and you are comfortable with your operating system, you will likely succeed. Most of the extra challenges you will encounter will be in the initial setup of the development environment, SFML, and the first project.
To this end, I can highly recommend the following tutorials, which will hopefully replace the next 10 pages (approximately), up to the Planning Timber!!! section, when this book will become relevant to all operating systems.
For Linux, read this to replace the next few sections: https://www.sfml-dev.org/tutorials/2.5/start-linux.php.
On Mac, read this tutorial to get started: https://www.sfml-dev.org/tutorials/2.5/start-osx.php.
Installing Visual Studio 2019 Community edition
To start creating a game, we need to install Visual Studio 2019. Installing Visual Studio can be almost as simple as downloading a file and clicking a few buttons. I will walk you through the installation process a step at a time.
Important note
Note that, over the years, Microsoft is likely to change the name, appearance, and download page that’s used to obtain Visual Studio. They are likely to change the layout of the user interface and make the instructions that follow out of date. However, the settings that we configure for each project are fundamental to C++ and SFML, so careful interpretation of the instructions that follow in this chapter will likely be possible, even if Microsoft does something radical to Visual Studio. Anyway, at the time of writing, Visual Studio 2019 has been released for just two weeks, so hopefully this chapter will be up to date for a while. If something significant does happen, then I will add an up-to-date tutorial on http://gamecodeschool.com as soon as I find out about it.
Let’s get started with installing Visual Studio:
- The first thing you need is a Microsoft account and login details. If you have a Hotmail or MSN email address, then you already have one. If not, you can sign up for a free one here: https://login.live.com/.
- The next step is to visit https://visualstudio.microsoft.com/vs/ and find the download link for Community 2019. This is what it looks like at the time of writing:

- Save the file to your computer.
- When the download completes, run the download by double-clicking on it. My file, at the time of writing, was called
vs_community__33910147.1551368984.exe. Yours will be different based on the current version of Visual Studio. - After giving permission for Visual Studio to make changes to your computer, you will be greeted with the following window. Click Continue:

- Wait for the installer program to download some files and set up the next stage of the installation. Shortly, you will be presented with the following window:

- If you want to choose a new location to install Visual Studio, locate the Change option and configure the install location. The simplest thing to do is leave the file at the default location chosen by Visual Studio. When you are ready, locate the Desktop development with C++ option and select it.
- Next, click the Install button. Grab some refreshments as this step might take a while.
- When the process completes, you can close all open windows, including any that prompt you to start a new project, as we are not ready to start coding until we have installed SFML.
Now, we are ready to turn our attention to SFML.
Setting up SFML
This short tutorial will guide you through downloading the SFML files that allow us to include the functionality contained in the library in our projects. In addition, we will see how we can use the SFML DLL files that will enable our compiled object code to run alongside SFML. To set up SFML, follow these steps:
- Visit this link on the SFML website: http://www.sfml-dev.org/download.php. Click on the button that says Latest stable version, as shown here:

- By the time you read this book, the latest version will almost certainly have changed. This won’t matter as long as you do the next step just right. We want to download the 32-bit version of Visual C++ 2017. This might sound counter-intuitive because we have just installed Visual Studio 2019 and you probably (most commonly) have a 64-bit PC. The reason we chose to download the 32-bit version is that Visual C++ 2017 is part of Visual Studio 2019 (Visual Studio does more than C++) and we will be building games in 32-bit so that they can run on both 32- and 64-bit machines. Click the Download button that’s shown in the following screenshot:

- When the download completes, create a folder at the root of the same drive where you installed Visual Studio and name it
SFML. Also, create another folder at the root of the drive where you installed Visual Studio and call itVS Projects. - Finally, unzip the SFML download. Do this on your desktop. When unzipping is complete, you can delete the .zip folder. You will be left with a single folder on your desktop. Its name will reflect the version of SFML that you downloaded. Mine is called
SFML-2.5.1-windows-vc15-32-bit. Your filename will likely reflect a more recent version. Double-click this folder to see its contents, then double-click again into the next folder (mine is calledSFML-2.5.1). The following screenshot shows what mySFML-2.5.1folder’s content looks like. Yours should look the same: - Copy the entire contents of this folder and paste all the files and folders into the
SFMLfolder that you created in Step 3. For the rest of this book, I will refer to this folder simply as “yourSFMLfolder”.
Now, we are ready to start using C++ and SFML in Visual Studio.
Creating a new project
As setting up a project is a fiddly process, we will go through it step by step so that we can start getting used to it:
- Start Visual Studio in the same way you start any app: by clicking on its icon. The default installation options will have placed a Visual Studio 2019 icon in the Windows start menu. You will see the following window:

- Click on the Create a new project button, as highlighted in the preceding screenshot. You will see the Create a new project window, as shown in the following screenshot:

- In the Create a new project window, we need to choose the type of project we will be creating. We will be creating a console app, so select Console App, as highlighted in the preceding screenshot, and click the Next button. You will then see the Configure your new project window. This following screenshot shows the Configure your new project window after the next three steps have been completed:

- In the Configure your new project window, type
Timberin the Project name field. Note that this causes Visual Studio to automatically configure the Solution name field to the same name. - In the Location field, browse to the
VS Projectsfolder that we created in the previous tutorial. This will be the location that all our project files will be kept. - Check the option to Place solution and project in the same directory.
- Note that the preceding screenshot shows what the window looks like when the previous three steps have been completed. When you have completed these steps, click Create. The project will be generated, including some C++ code. This following screenshot shows where we will be working throughout this book:

- We will now configure the project to use the SFML files that we put in the
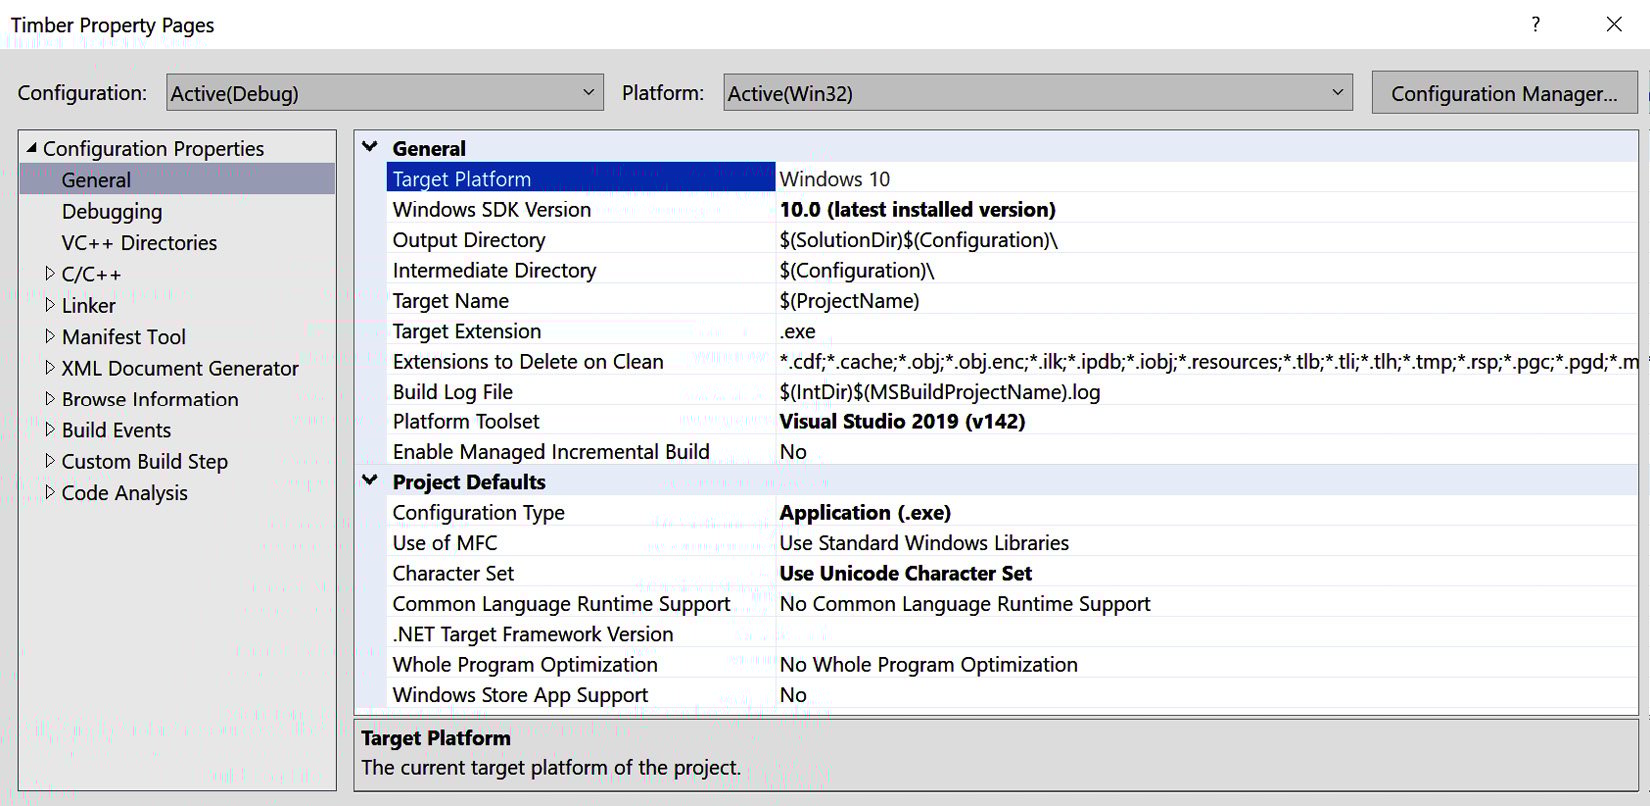
SFMLfolder. From the main menu, select Project | Timber properties…. You will see the following window:
Tip
In the preceding screenshot, the OK, Cancel, and Apply buttons are not fully formed. This is likely a glitch with Visual Studio not handling my screen resolution correctly. Yours will hopefully be fully formed. Whether your buttons appear like mine do or not, continuing with the tutorial will be the same.
Next, we will begin to configure the project properties. As these steps are quite intricate, I will cover them in a new list of steps.
Configuring the project properties
At this stage, you should have the Timber Property Pages window open, as shown in the preceding screenshot at the end of the previous section. Now, we will begin to configure some properties while using the following annotated screenshot for guidance:
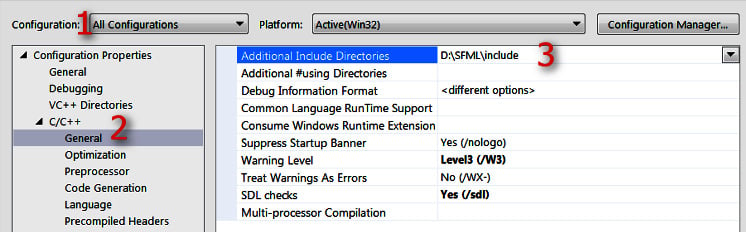
We will add some fairly intricate and important project settings in this section. This is the laborious part, but we will only need to do this once per project. What we need to do is tell Visual Studio where to find a special type of code file from SFML. The special type of file I am referring to is a header file. Header files are the files that define the format of the SFML code so that when we use the SFML code, the compiler knows how to handle it. Note that the header files are distinct from the main source code files and they are contained in files with the .hpp file extension. All this will become clearer when we eventually start adding our own header files in the second project. In addition, we need to tell Visual Studio where it can find the SFML library files. In the Timber Property Pages window, perform the following three steps, which are numbered in the preceding screenshot:
- First (1), select All Configurations from the Configuration: drop down.
- Second (2), select C/C++ then General from the left-hand menu.
- Third (3), locate the Additional Include Directories edit box and type the drive letter where your SFML folder is located, followed by
\SFML\include. The full path to type, if you located yourSFMLfolder on your D drive, is as shown in the preceding screenshot; that is,D:\SFML\include. Vary your path if you installed SFML on a different drive. - Click Apply to save your configurations so far.
- Now, still in the same window, perform these steps, which refer to the following annotated screenshot. First (1), select Linker and then General.
- Now, find the Additional Library Directories edit box (2) and type the drive letter where your
SFMLfolder is, followed by\SFML\lib. So, the full path to type if you located yourSFMLfolder on your D drive is, as shown in the following screenshot,D:\SFML\lib. Vary your path if you installed SFML to a different drive:
- Click Apply to save your configurations so far.
- Finally, for this stage, still in the same window, perform these steps, which refer to the following annotated screenshot. Switch the Configuration: drop down (1) to Debug as we will be running and testing our games in debug mode.
- Select Linker and then Input (2).
- Find the Additional Dependencies edit box (3) and click into it at the far-left-hand side. Now, copy and paste/type the following:
sfml-graphics-d.lib;sfml-window-d.lib;sfml-system-d.lib;sfml-network-d.lib;sfml-audio-d.lib;at the indicated place. Be extra careful to place the cursor exactly in the right place and not to overwrite any of the text that is already there. - Click OK:

- Click Apply and then OK.
Phew; that’s it! We have successfully configured Visual Studio and can move on to planning the Timber!!! project.