

Drawing the game’s background
Now, we will get to see some graphics in our game. What we need to do is create a sprite. The first one we will create will be the game background. We can then draw it in between clearing the window and displaying/flipping it.
Preparing the Sprite using a Texture
The SFML RenderWindow class allowed us to create our window object, which basically took care of all the functionality that our game’s window needs.
We will now look at two more SFML classes that will take care of drawing sprites to the screen. One of these classes, perhaps unsurprisingly, is called Sprite. The other class is called Texture. A texture is a graphic stored in memory, on the graphics processing unit (GPU).
An object that’s made from the Sprite class needs an object made from the Texture class in order to display itself as an image. Add the following highlighted code. Try and work out what is going on as well. Then, we will go through it, a line at a time:
int main()
{
    // Create a video mode object
    VideoMode vm(1920, 1080);
    // Create and open a window for the game
    RenderWindow window(vm,	“Timber!!!”, Style::Fullscreen);
    // Create a texture to hold a graphic on the GPU
    Texture textureBackground;
    // Load a graphic into the texture
    textureBackground.loadFromFile(“graphics/background.png”);
    // Create a sprite
    Sprite spriteBackground;
    // Attach the texture to the sprite
    spriteBackground.setTexture(textureBackground);
    // Set the spriteBackground to cover the screen
    spriteBackground.setPosition(0,0);
    while (window.isOpen())
    {
First, we create an object called textureBackground from the SFML Texture class:
Texture textureBackground;
Once this is done, we can use the textureBackground object to load a graphic from our graphics folder into textureBackground, like this:
textureBackground.loadFromFile(“graphics/background.png”);
Tip
We only need to specify graphics/background as the path is relative to the Visual Studio working directory where we created the folder and added the image.
Next, we create an object called spriteBackground from the SFML Sprite class with this code:
Sprite spriteBackground;
Then, we can associate the Texture object (backgroundTexture) with the Sprite object (backgroundSprite), like this:
spriteBackground.setTexture(textureBackground);
Finally, we can position the spriteBackground object in the window object at the 0,0 coordinates:
spriteBackground.setPosition(0,0);
Since the background.png graphic in the graphics folder is 1,920 pixels wide by 1,080 pixels high, it will neatly fill the entire screen. Just note that this previous line of code doesn’t actually show the sprite. It just sets its position, ready for when it is shown.
The backgroundSprite object can now be used to display the background graphic. Of course, you are almost certainly wondering why we had to do things in such a convoluted way. The reason is because of the way that graphics cards and OpenGL work.
Textures take up graphics memory, and this memory is a finite resource. Furthermore, the process of loading a graphic into the GPU’s memory is very slow – not so slow that you can watch it happen or that you will see your PC noticeably slow down while it is happening, but slow enough that you can’t do it every frame of the game loop. So, it is useful to disassociate the actual texture (textureBackground) from any code that we will manipulate during the game loop.
As you will see when we start to move our graphics, we will do so using the sprite. Any objects that are made from the Texture class will sit happily on the GPU, just waiting for an associated Sprite object to tell it where to show itself. In later projects, we will also reuse the same Texture object with multiple different Sprite objects, which makes efficient use of GPU memory.
In summary, we can state the following:
- Textures are very slow to load onto the GPU.
- Textures are very fast to access once they are on the GPU.
- We associate a
Spriteobject with a texture. - We manipulate the position and orientation of
Spriteobjects (usually in theUpdate the scenesection).
We draw the Sprite object, which, in turn, displays the Texture object that is associated with it (usually in the Draw the scene section). So, all we need to do now is use our double buffering system, which is provided by our window object, to draw our new Sprite object (spriteBackground), and we should get to see our game in action.
Double buffering the background sprite
Finally, we need to draw that sprite and its associated texture in the appropriate place in the game loop.
Tip
Note that when I present code that is all from the same block, I don’t add the indentations because it lessens the instances of line wraps in the text of the book. The indenting is implied. Check out the code file in the download bundle to see full use of indenting.
Add the following highlighted code:
/*
****************************************
Draw the scene
****************************************
*/
// Clear everything from the last run frame
window.clear();
// Draw our game scene here
window.draw(spriteBackground);
// Show everything we just drew
window.display();
The new line of code simply uses the window object to draw the spriteBackground object, in between clearing the display and showing the newly drawn scene.
We now know what a sprite is, and that we can associate a texture with it and then position it on the screen and finally draw it. The game is ready to be run again so that we can see the results of this code.
Running the game
If we run the program now, we will see the first signs that we have a real game in progress:
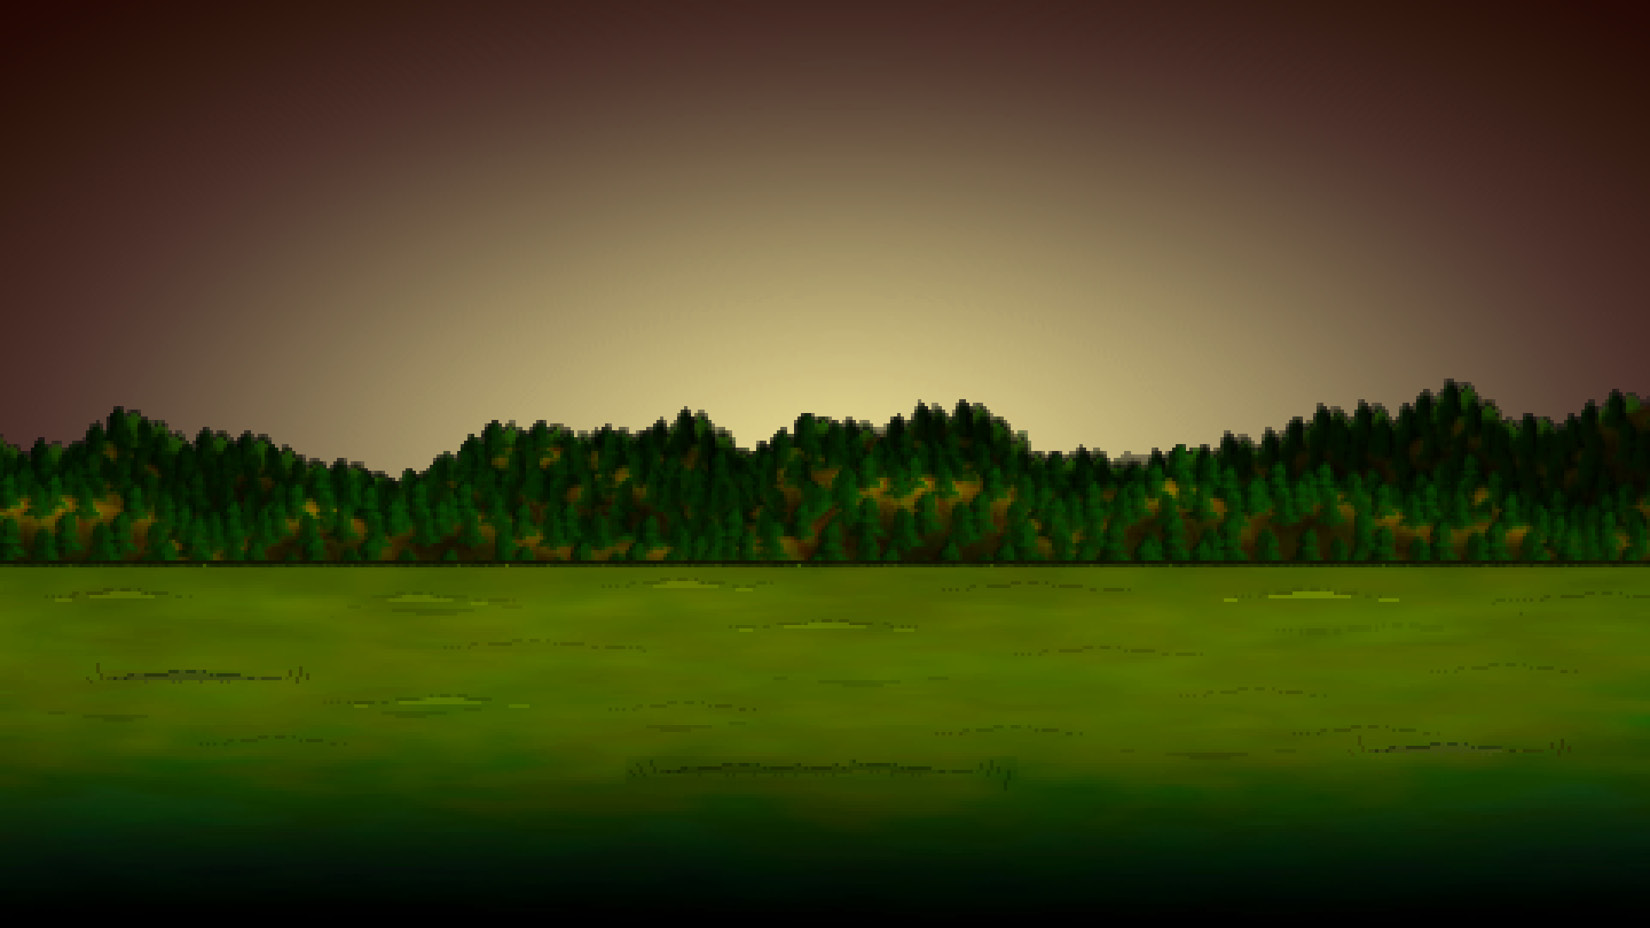
It’s not going to get Indie Game of the Year on Steam in its current state, but we are on the way at least!
Let’s look at some of the things that might go wrong in this chapter and as we proceed through this book.