

Rendering a basic UI with Dear ImGui
Graphical applications require some sort of UI. The interactive UI can be used to debug real-time applications and create powerful productivity and visualization tools. Dear ImGui is a fast, portable, API-agnostic immediate-mode GUI library for C++ developed by Omar Cornut (https://github.com/ocornut/imgui):
The ImGui library provides numerous comprehensive examples that explain how to make a GUI renderer for different APIs, including a 700-line code example using OpenGL 3 and GLFW (imgui/examples/imgui_impl_opengl3.cpp). In this recipe, we will demonstrate how to make a minimalistic ImGui renderer in 200 lines of code using OpenGL 4.6. This is not feature-complete, but it can serve as a good starting point for those who want to integrate ImGui into their own modern graphical applications.
Getting ready
Our example is based on ImGui version v1.83. Here is a JSON snippet for our Bootstrap script so that you can download the library:
{
  "name": "imgui",
  "source": {
    "type": "git",
    "url": "https://github.com/ocornut/imgui.git",
    "revision" : "v1.83"
  }
}
The full source code can be found in Chapter2/04_ImGui.
How to do it...
Let's start by setting up the vertex arrays, buffers, and shaders that are necessary to render our UI. Perform the following steps:
- To render geometry data coming from ImGui, we need a VAO with vertex and index buffers. We will use an upper limit of 256 kilobytes for the indices and vertices data:
GLuint VAO;
glCreateVertexArrays(1, &VAO);
GLuint handleVBO;
glCreateBuffers(1, &handleVBO);
glNamedBufferStorage(handleVBO, 256 * 1024, nullptr,  GL_DYNAMIC_STORAGE_BIT);
GLuint handleElements;
glCreateBuffers(1, &handleElements);
glNamedBufferStorage(handleElements, 256 * 1024,  nullptr, GL_DYNAMIC_STORAGE_BIT);
- The geometry data consist of 2D vertex positions, texture coordinates, and RGBA colors, so we should configure the vertex attributes as follows:
glVertexArrayElementBuffer(VAO, handleElements);
glVertexArrayVertexBuffer(  VAO, 0, handleVBO, 0, sizeof(ImDrawVert));
glEnableVertexArrayAttrib(VAO, 0);
glEnableVertexArrayAttrib(VAO, 1);
glEnableVertexArrayAttrib(VAO, 2);
The
ImDrawVertstructure is a part of ImGui, which is declared as follows:struct ImDrawVert { ImVec2 pos; ImVec2 uv; ImU32 col; }; - Vertex attributes corresponding to the positions, texture coordinates, and colors are stored in an interleaved format and should be set up like this:
glVertexArrayAttribFormat(  VAO, 0, 2, GL_FLOAT, GL_FALSE,   IM_OFFSETOF(ImDrawVert, pos));
glVertexArrayAttribFormat(  VAO, 1, 2, GL_FLOAT, GL_FALSE,  IM_OFFSETOF(ImDrawVert, uv));
glVertexArrayAttribFormat(  VAO, 2, 4, GL_UNSIGNED_BYTE, GL_TRUE,  IM_OFFSETOF(ImDrawVert, col));
The
IM_OFFSETOF()macro is a part of ImGui, too. It is used to calculate the offset of member fields inside theImDrawVertstructure. The macro definition itself is quite verbose and platform-dependent. Please refer toimgui/imgui.hfor implementation details. - The final touch to the VAO is to tell OpenGL that every vertex stream should be read from the same buffer bound to the binding point with an index of
0:glVertexArrayAttribBinding(VAO, 0, 0); glVertexArrayAttribBinding(VAO, 1, 0); glVertexArrayAttribBinding(VAO, 2, 0); glBindVertexArray(VAO);
- Now, let's take a quick look at the shaders that are used to render our UI. The vertex shader looks similar to the following code block. The
PerFrameDatastructure in the shader corresponds to the similar structure of the C++ code:const GLchar* shaderCodeVertex = R"( #version 460 core layout (location = 0) in vec2 Position; layout (location = 1) in vec2 UV; layout (location = 2) in vec4 Color; layout (std140, binding = 0) uniform PerFrameData { uniform mat4 MVP; }; out vec2 Frag_UV; out vec4 Frag_Color; void main() { Frag_UV = UV; Frag_Color = Color; gl_Position = MVP * vec4(Position.xy,0,1); } )"; - The fragment shader simply modulates the vertex color with a texture. It should appear as follows:
const GLchar* shaderCodeFragment = R"( #version 460 core in vec2 Frag_UV; in vec4 Frag_Color; layout (binding = 0) uniform sampler2D Texture; layout (location = 0) out vec4 out_Color; void main() { out_Color = Frag_Color * texture( Texture, Frag_UV.st); } )"; - The vertex and fragment shaders are compiled and linked in a similar way to the Using the GLFW library recipe, so some parts of the code here have been skipped for the sake of brevity. Please refer to the source code bundle for the complete example:
const GLuint handleVertex =  glCreateShader(GL_VERTEX_SHADER);...
const GLuint handleFragment =  glCreateShader(GL_FRAGMENT_SHADER);...
const GLuint program = glCreateProgram();...
glUseProgram(program);
These were the necessary steps to set up vertex arrays, buffers, and shaders for UI rendering. There are still some initialization steps that need to be done for ImGui itself before we can render anything. Follow these steps:
- Let's set up the data structures that are needed to sustain an ImGui context:
ImGui::CreateContext();
ImGuiIO& io = ImGui::GetIO();
- Since we are using
glDrawElementsBaseVertex()for rendering, which has a vertex offset parameter ofbaseVertex, we can tell ImGui to output meshes with more than 65535 vertices that can be indexed with 16-bit indices. This is generally good for performance, as it allows you to render the UI with fewer buffer updates:io.BackendFlags |= ImGuiBackendFlags_RendererHasVtxOffset;
- Now, let's build a texture atlas that will be used for font rendering. ImGui will take care of the
.ttffont loading and create a font atlas bitmap, which we can use as an OpenGL texture:ImFontConfig cfg = ImFontConfig();
- Tell ImGui that we are going to manage the memory ourselves:
cfg.FontDataOwnedByAtlas = false;
- Brighten up the font a little bit (the default value is
1.0f). Brightening up small fonts is a good trick you can use to make them more readable:Cfg.RasterizerMultiply = 1.5f;
- Calculate the pixel height of the font. We take our default window height of
768and divide it by the desired number of text lines to be fit in the window:cfg.SizePixels = 768.0f / 32.0f;
- Align every glyph to the pixel boundary and rasterize them at a higher quality for sub-pixel positioning. This will improve the appearance of the text on the screen:
cfg.PixelSnapH = true;
cfg.OversampleH = 4;
cfg.OversampleV = 4;
- And, finally, load a
.ttffont from a file:ImFont* Font = io.Fonts->AddFontFromFileTTF( "data/OpenSans-Light.ttf", cfg.SizePixels, &cfg);
Now, when the ImGui context initialization is complete, we should take the font atlas bitmap created by ImGui and use it to create an OpenGL texture:
- First, let's take the font atlas bitmap data from ImGui in 32-bit RGBA format and upload it to OpenGL:
unsigned char* pixels = nullptr;
int width, height;
io.Fonts->GetTexDataAsRGBA32(  &pixels, &width, &height);
- The texture creation code should appear as follows:
GLuint texture;
glCreateTextures(GL_TEXTURE_2D, 1, &texture);
glTextureParameteri(texture, GL_TEXTURE_MAX_LEVEL, 0);
glTextureParameteri(  texture, GL_TEXTURE_MIN_FILTER, GL_LINEAR);
glTextureParameteri(  texture, GL_TEXTURE_MAG_FILTER, GL_LINEAR);
glTextureStorage2D(  texture, 1, GL_RGBA8, width, height);
- Scanlines in the ImGui bitmap are not padded. Disable the pixel unpack alignment in OpenGL by setting its value to 1 byte to handle this correctly:
glPixelStorei(GL_UNPACK_ALIGNMENT, 1);
glTextureSubImage2D(texture, 0, 0, 0,  width, height, GL_RGBA, GL_UNSIGNED_BYTE, pixels);
glBindTextures(0, 1, &texture);
- We should pass the texture handle to ImGui so that we can use it in subsequent draw calls when required:
io.Fonts->TexID = (ImTextureID)(intptr_t)texture;
io.FontDefault = Font;
io.DisplayFramebufferScale = ImVec2(1, 1);
Now we are ready to proceed with the OpenGL state setup for rendering. All ImGui graphics should be rendered with blending and the scissor test turned on and the depth test and backface culling disabled. Here is the code snippet to set this state:
glEnable(GL_BLEND);
glBlendEquation(GL_FUNC_ADD);
glBlendFunc(GL_SRC_ALPHA, GL_ONE_MINUS_SRC_ALPHA);
glDisable(GL_CULL_FACE);
glDisable(GL_DEPTH_TEST);
glEnable(GL_SCISSOR_TEST);
Let's go into the main loop and explore, step by step, how to organize the UI rendering workflow:
- The main loop starts in a typical GLFW manner, as follows:
while ( !glfwWindowShouldClose(window) ) { int width, height; glfwGetFramebufferSize(window, &width, &height); glViewport(0, 0, width, height); glClear(GL_COLOR_BUFFER_BIT); - Tell ImGui our current window dimensions, start a new frame, and render a demo UI window with
ShowDemoWindow():ImGuiIO& io = ImGui::GetIO(); io.DisplaySize = ImVec2( (float)width, (float)height ); ImGui::NewFrame(); ImGui::ShowDemoWindow();
- The geometry data is generated in the
ImGui::Render()function and can be retrieved viaImGui::GetDrawData():ImGui::Render(); const ImDrawData* draw_data = ImGui::GetDrawData();
- Let's construct a proper orthographic projection matrix based on the left, right, top, and bottom clipping planes provided by ImGui:
  Const float L = draw_data->DisplayPos.x;
  const float R = draw_data->DisplayPos.x +                  draw_data->DisplaySize.x;
  const float T = draw_data->DisplayPos.y;
  const float B = draw_data->DisplayPos.y +                  draw_data->DisplaySize.y;
  const mat4 orthoProj = glm::ortho(L, R, B, T);
  glNamedBufferSubData( perFrameDataBuffer, 0,    sizeof(mat4), glm::value_ptr(orthoProj) );
- Now we should go through all of the ImGui command lists, update the content of the index and vertex buffers, and invoke the rendering commands:
for (int n = 0; n < draw_data->CmdListsCount; n++) { const ImDrawList* cmd_list = draw_data->CmdLists[n]; - Each ImGui command list has vertex and index data associated with it. Use this data to update the appropriate OpenGL buffers:
  glNamedBufferSubData(handleVBO, 0,    (GLsizeiptr)cmd_list->VtxBuffer.Size *    sizeof(ImDrawVert), cmd_list->VtxBuffer.Data);
  glNamedBufferSubData(handleElements, 0,    (GLsizeiptr)cmd_list->IdxBuffer.Size *    sizeof(ImDrawIdx), cmd_list->IdxBuffer.Data);
- Rendering commands are stored inside the command buffer. Iterate over them and render the actual geometry:
for (int cmd_i = 0; cmd_i < cmd_list-> CmdBuffer.Size; cmd_i++ ) { const ImDrawCmd* pcmd = &cmd_list->CmdBuffer[cmd_i]; const ImVec4 cr = pcmd->ClipRect; glScissor( (int)cr.x, (int)(height - cr.w), (int)(cr.z - cr.x), (int)(cr.w - cr.y) ); glBindTextureUnit( 0, (GLuint)(intptr_t)pcmd->TextureId); glDrawElementsBaseVertex(GL_TRIANGLES, (GLsizei)pcmd->ElemCount, GL_UNSIGNED_SHORT, (void*)(intptr_t)(pcmd->IdxOffset * sizeof(ImDrawIdx)), (GLint)pcmd->VtxOffset); } } - After the UI rendering is complete, reset the scissor rectangle and do the usual GLFW stuff to swap the buffers and poll user events:
  glScissor(0, 0, width, height);
  glfwSwapBuffers(window);
  glfwPollEvents();
}
Once we exit the main loop, we should destroy the ImGui context with ImGui::DestroyContext(). OpenGL object deletion is similar to some of the previous recipes and will be omitted here for the sake of brevity.
The preceding code will render the UI. To enable user interaction, we need to pass user input events from GLWF to ImGui. Let's demonstrate how to deal with the mouse input to make our minimalistic UI interactive:
- First, let's install a cursor position callback for GLFW:
glfwSetCursorPosCallback(window, []( auto* window, double x, double y ) { ImGui::GetIO().MousePos = ImVec2(x, y ); }); - The final thing we need to bring our UI to life is to set the mouse button callback and route the mouse button events into ImGui:
glfwSetMouseButtonCallback(window,  [](auto* window, int button, int action, int mods) {
     auto& io = ImGui::GetIO();
     int idx = button == GLFW_MOUSE_BUTTON_LEFT ?        0 : button == GLFW_MOUSE_BUTTON_RIGHT ? 2 : 1;
     io.MouseDown[idx] = action == GLFW_PRESS;
  });
Now we can run our demo application. The application for this recipe renders a Dear ImGui demo window. If everything has been done correctly, the resulting output should look similar to the following screenshot. It is possible to interact with the UI using a mouse:
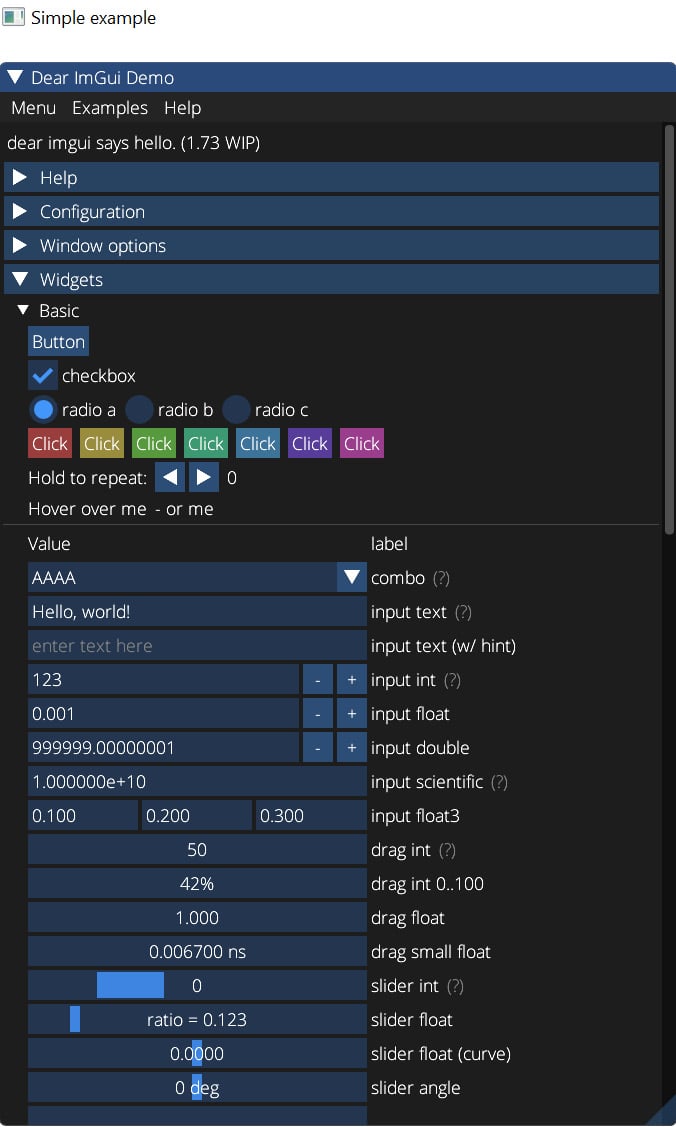
Figure 2.3 – The Dear ImGui demo window
There's more…
Our minimalistic implementation skipped some features that were needed to handle all ImGui rendering possibilities. For example, we did not implement user-defined rendering callbacks or the handling of flipped clipping rectangles. Please refer to imgui/examples/imgui_impl_opengl3.cpp for more details.
Another important part is to pass all of the necessary GLFW events into ImGui, including numerous keyboard events, cursor shapes, scrolling, and more. The complete reference implementation can be found in imgui/examples/imgui_impl_glfw.cpp.