
The process of weight painting is somewhat paradoxical: while it's one of the simplest in theory, it can be extremely difficult to get good results.
The complexity of getting good results will depend on how good your mesh topology is, and how you position and create your bones. Blender has an option to guess the bone weights when you bind a rig to a mesh, and it often bring us decent results. With this basic weights set, it's a matter of using the weight paint tools to define the deformation range of a bone into a mesh.
The logic behind weight painting is very simple: you pick a deformation bone and visually paint its influence on a mesh. Blender 2.5 offers some very neat features to allow us to turn this often tedious process into something quicker, such as allowing pressure sensitivity for tablets, mirroring weights, and custom brushes, just to name a few.
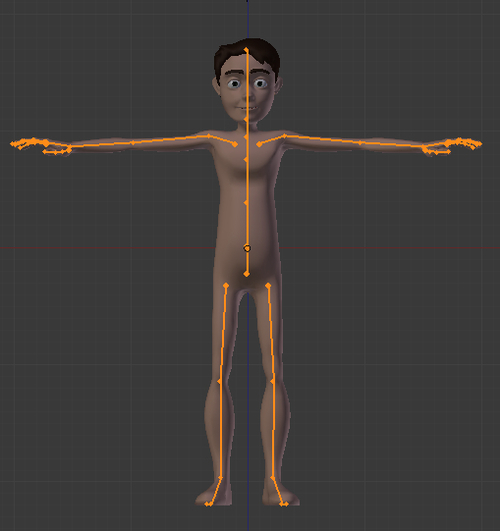
Open the file 001-WeightPaint.blend from this book's support files. You'll see the base mesh of my character Otto along with a basic rig in X-Ray mode. The armature is in Object Mode, so you can enter in Pose Mode (Ctrl + Tab) and try to move some bones. You'll notice that these bones aren't deforming the mesh yet, so the armature still needs to be connected to the mesh. The next screenshot shows the character and the armature:
Select the mesh, hold Shift, select the armature (or one of its bones, in the case the armature is in Pose Mode) and press Ctrl + P. Select Armature Deform With Automatic Weights. This will tell Blender to guess the influence of each bone on the mesh based on its size and position, painting the basic weights. This process is also often called Bone Heat , and (if you have created a good bone structure, matching the proportions of the mesh) brings us very reasonable results.
Enter in the armature's Pose Mode and try to move and rotate some bones. Notice that besides the automatic weights having being assigned quite reasonably, you may find some cases where the deformations need some adjustments.
Select the mesh again and enter in Weight Paint Mode (Ctrl + Tab). You'll see that the mesh color turns into a deep blue, and the last bone you selected in Pose Mode becomes selected again. The region affected by this bone gets colors in a gradient that goes from zero influence (blue) until 100% influence (red). The next screenshot shows different weight colors on the mesh after selecting the arm bone in Weight Paint Mode:

Note
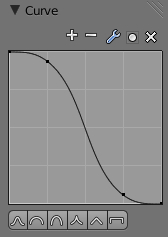
If you want to change the default color gradient used in weight painting, you can do so by opening the User Preferences window (Ctrl + Alt + U). Navigate to the System tab, enable the Custom Weight Paint Range box and define your desired colors. To save this gradient for future sessions, press Ctrl + U to save the user preferences. Note that everything in your file (including meshes and armatures) will be saved too, so you might want to define a custom range in an empty file.
While in Weight Paint mode, you can still move the bones as you wish to test the influences you set in real time. Every time you select a bone, the mesh is updated to show the equivalent influence.
Make sure your Toolbox (T) is activated and select one of the painting tools available to adjust the weights on the Tools section. They act much like in 2D applications such as Gimp or Photoshop, allowing you to Add, Subtract, Blur, Darken, or Lighten weight colors. The Blur option, for example, is very useful to get smoother transitions on the weight colors.
If you use a graphics tablet, you can enable the pressure sensitivity on the Brush Tools section by clicking on the pointing hand besides the brush values. If you enable it, the sensitivity would pass values that go from zero to the value set on the slider. You can enable the sensitivity per value, so you can use a fixed value for size and a pressure driver for the brush strength, for example. The next screenshot indicates the options:

Note
The Auto Normalize option in the Brush section shown here makes sure that the sum of all weights applied to a mesh region is not greater than 1. This can be useful, but you may face problems if you're used to adding big weight values for different bones, since adding to one bone will subtract from the other.
To paint weight values on both sides of a character at the same time, enable the X Mirror option on the Toolshelf (T). You can paint the influences for the left limbs of your character, and the same weights will be applied for the right ones. This will work only when your bones have suffixes such as .L or .R to a proper identification.
When painting weights on the torso or head, for example, it is not possible to assign mirrored weights by using only X Mirror because there are no mirrored bones to take information from. This is when you should use the Topology Mirror option: it uses the information from the underlying edge loops on the mesh to apply mirrored weights based on the X axis.
To avoid painting on unwanted parts of the mesh, you can enable the Face Selection mode to select only the parts of the mesh that you want to paint over. Click on the Face Selection icon on the window header and select your desired faces as you would do in Edit Mode. The B and C selection keyboard shortcuts work as expected. The next screenshot shows the mesh with the Face Selection mode activated and an indication to the relevant icon on the window header:

The logic behind weight painting is one of the simplest: based on a color scheme, you paint the influences of a bone on the mesh. After using the automatic weights calculated by Blender, you have some pretty neat tools to refine the results and get a proper deformation on your characters.
Blender has some very useful tools to make the Weight Painting process quicker and easier. It is optimized for using with a graphics tablet, making the process even more intuitive, but it can be used nicely with a regular mouse.