Book Image

jMonkeyEngine 3.0 : Beginner's Guide

Book Image

jMonkeyEngine 3.0 : Beginner's Guide

Overview of this book

jMonkeyEngine 3.0 is a powerful set of free Java libraries that allows you to unlock your imagination, create 3D games and stunning graphics. Using jMonkeyEngine's library of time-tested methods, this book will allow you to unlock its potential and make the creation of beautiful interactive 3D environments a breeze."jMonkeyEngine 3.0 Beginner's Guide" teaches aspiring game developers how to build modern 3D games with Java. This primer on 3D programming is packed with best practices, tips and tricks and loads of example code. Progressing from elementary concepts to advanced effects, budding game developers will have their first game up and running by the end of this book.From basic concepts and project creation to building a complex 3D Game, you will learn to layout 3D scenes, make them interactive and add various multi-media effects.You will find answers to common questions including best practices and approaches, how game characters can act and interact, how to simulate solid walls and physical forces, how to take it online to play over a network and much more.From Zero to Hero, start your journey to make your game idea a reality.
Table of Contents (20 chapters)
jMonkeyEngine 3.0 Beginner's Guide
Credits
About the Author
About the Reviewers
www.PacktPub.com
Preface
Index

Time for action – coloring the mesh


When you are done sculpting the mesh, switch back from Sculpt Mode to Edit Mode. Now you create the mesh's surface—its material and texture. For this we use a professional technique called UV mapping.

  1. Verify that the model is selected in Edit Mode (it has an orange outline). If it isn't, right-click to select it.

  2. In the Outliner panel, find the model entry (marked with an orange triangle). Open the node and rename the mesh to mymodel. Delete the camera and the light, if there are any.

  3. In the Properties panel (the one with the long row of small icons) click on the Material button (a reddish chequered circle). If your model doesn't have a material yet, click on the plus sign to add one. Rename the material to mymodel—just like the filename, so the two can be associated with each other more easily.

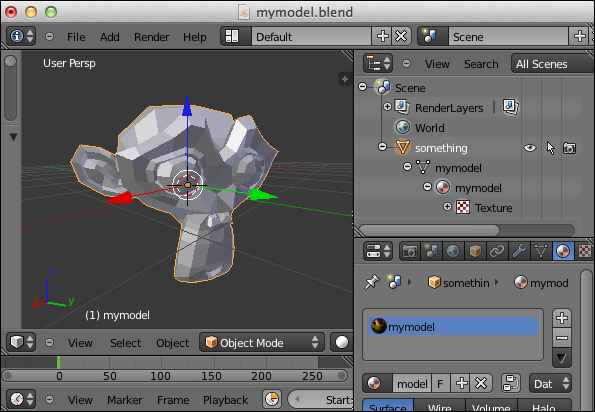
Now let's add the actual texture to the model.

  1. Verify the model is still selected and in Edit Mode. In the Mesh Tools panel on the left-hand side, scroll down to UV...