
Let's step ahead and add eyes and a closed mouth to the head:
1. Let's add some eyes for our character. Select the Sphere3D tool.
2. In the Initialize settings, set the HDivide and VDivide to 64, and go to Tool | MakePolymesh3D.
3. Open the model of your creature and append the newly created PM_Sphere3D.
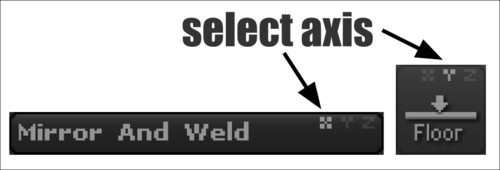
4. Open the Draw palette. Activate all three axes of the floor button and then press the button itself. You should now see three grids — one for each axis.
5. To align the three grids with the character, set the Elv (Elevation) slider in the Draw palette to 0.
6. Position the sphere in the character's right-eye socket by using the Transpose tool. It's crucial to put it in the character's right-eye socket because ZBrush will mirror only from this side.
7. Go to Tool | Geometry | Mirror And Weld with only the X-axis selected, as shown in the next image:
8. If we put the sphere on the wrong side, we'll get a message saying "The resulting mesh...