
The ability to intuitively navigate levels is a basic skill that all developers should be familiar with. Thankfully, this interface is quite intuitive to anyone who is already familiar with the WASD control scheme popular in most First Person Shooters Games developed on the PC.
You should have already opened a level from the CryENGINE 3 Software Development Kit content and seen a perspective viewport displaying the level.
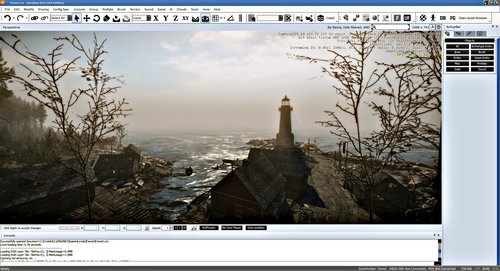
The window where you can see the level is called the Perspective Viewport window. It is used as the main window to view and navigate your level. This is where a large majority of your level will be created and common tasks such as object placement, terrain editing, and in-editor play testing will be performed.
The first step to interacting with the loaded level is to practice moving in the Perspective Viewport window.
Note
Sandbox is designed to be ergonomic for both left and right-handed users. In this example, we use the WASD control scheme, but the arrow keys are also supported for movement of the camera.

Press W to move forwards.
Then press S to move backwards.
A is pressed to move or strafe left.
Finally, D is pressed to move or strafe right.
Now you have learned to move the camera on its main axes, it's time to adjust the rotation of the camera.
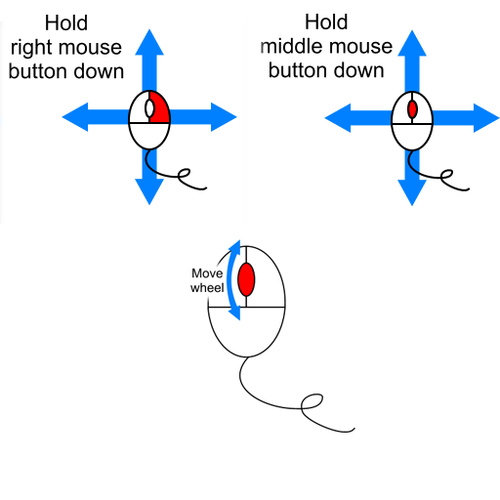
When the viewport is the active window, hold down the right mouse button on your mouse and move the mouse pointer to turn the view.
You can also hold down the middle mouse button and move the mouse pointer to pan the view.
Roll the middle mouse button wheel to move the view forward or backward.
Finally, you can hold down Shift to double the speed of the viewport movements.
The Viewport allows for a huge diversity of views and layouts for you to view your level; the perspective view is just one of many. The perspective view is commonly used as it displays the output of the render engine. It also presents you a view of your level using the standard camera perspective, showing all level geometry, lighting, and effects.
To experiment further with the viewport, note that it can also render subsystems and their toolsets such as flow graph, or character editor.
You will likely want to adjust the movement speed and how to customize the viewport toyour individual use. You can also split the viewport in multiple different views, which is discussed further.
The Speed input is used to increase or decrease the movement speed of all the movements you make in the main Perspective Viewport.

The three buttons to the right of the Speed: inputs are quick links to the .1, 1, and 10 speeds.
Top View, Front, and Left views will show their respective aspects of your level, consisting of bounding boxes and line-based helpers. It should be noted that geometry is not drawn.
Map view shows an overhead map of your level with helper, terrain, and texture information pertaining to your level.
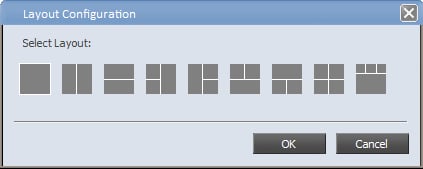
Individual users can customize the layout and set viewing options specific to their needs using the viewport menu accessed by right-clicking on the viewports header.
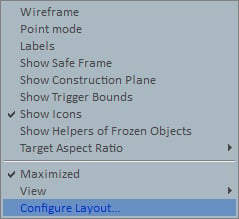
The Layout Configuration window can be opened from the viewport header under Configure Layout. Once selected, you will be able to select one of the preset configurations to arrange the windows of the Sandbox editor into multiple viewport configurations. It should be recognized that in multiple viewport configurations some rendering effects may be disabled or performance may be reduced.