

Before you can get any fine details, or details that you would see while viewing from close up, into the surface of your model you will need to subdivide your mesh to increase its resolution. In the same way that a computer monitor displays more pixels when its resolution is increased, a model will have more points on its surface when the resolution is increased.
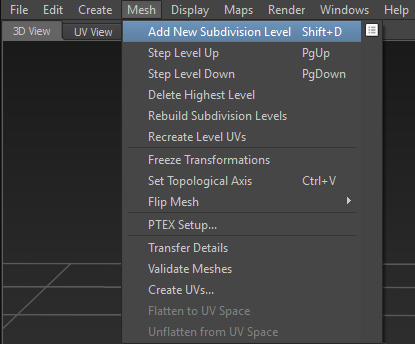
The hotkey for subdividing your surface is Shift + D or you can alternatively go into the menus as shown in the following screenshot:
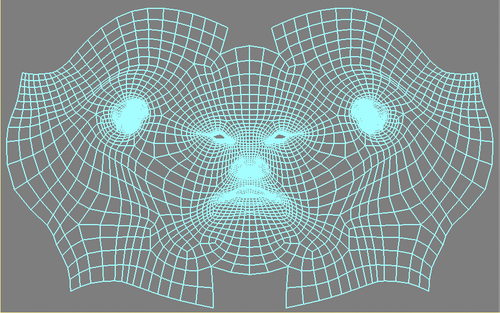
What this does is it adds more polygons which can be manipulated to add more detail. You will not want to subdivide your model too many times, otherwise, your computer will begin to slow down. The extent to which your computer will slow down is exponential. For example, if you have a six-sided cube and you subdivide it once, it will become 24-sided. If you subdivide it one more time, it will become 96-sided and so on. The following screenshot from Maya shows you what the wireframe looks like from one level to the next:
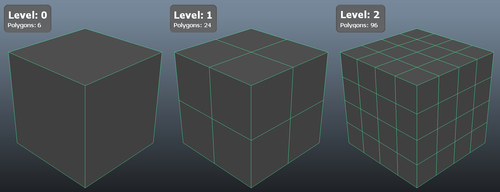
The reason this image was created in Maya is because Mudbox will only show the proper wireframe when your model reaches 1000 polygons or more.
The more powerful your computer, the more smoothly Mudbox 2013 will run. More specifically, it's the RAM and the video memory that are important. The following are some explanations on how RAM and video memory will affect your machines performance.
RAM is the most important of all. The more RAM you have, the more polygons Mudbox will be able to handle, without taking a performance hit.
The video memory increases the performance of your video card and allows high resolution, high speed, and color graphics. Basically, it allows the Graphical User Interface (GUI) to have better performance.
So, now that you know RAM is important, how do you decide how much will be needed to run Mudbox 2013 smoothly? Well, one thing to consider is your operating system and the version of Mudbox 2013 you are running. If you have a 32-bit operating system and you are running the 32-bit Mudbox 2013, then the maximum RAM you can get is 4 GB. But, in reality you are only getting about 3 GB of RAM as the operating system needs to use around 1 GB of that memory.
On the other hand, if you are using a 64-bit operating system and the 64-bit Mudbox 2013 version then you are capped at about 8 TB (yes, I said TB not GB). You will not need anywhere near that amount of RAM to run Mudbox 2013 smoothly. My recommendation is to have a minimum of 8 GB of RAM and 1 GB of video memory. With this amount of RAM and video memory you should be able to work with around 10 million triangles on the top level of your sculpt.
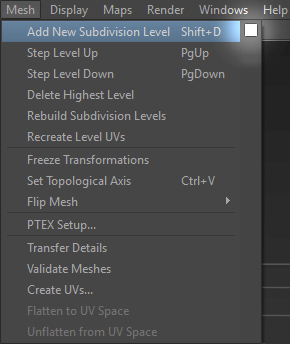
Notice the little white box next to Add New Subdivision Level in the following screenshot:
By clicking on this box, you will be given a few options for how Mudbox will handle the subdivision, as shown in the following screenshot:
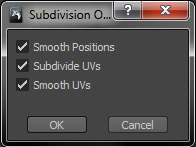
The options shown in the previous screenshot are explained as follows:
Smooth Positions: This option will smooth out the edges by averaging out the vertices that are added. The following screenshot shows the progression from Level 0 to Level 2 on a cube:

Subdivide UVs: If this option is unchecked when you create a new subdivision level, then you will lose your UVs on the object. To get your UVs back you will need to recreate the UVs for that level. This is discussed in a recipe found in Chapter 5, Get In and Get Out. If the Subdivide UVs option is turned on then it will just add subdivisions to your existing UVs.
Smooth UVs: If this option is turned on, the UVs will be smoothed within the UV Borders as shown in the next screenshot:

If you want your borders to smooth along with the interior parts of the shell, as shown in the next screenshot, then you will need to take a few extra steps to allow this:
This is the method Mudbox used in the 2009 and earlier versions. In Mudbox 2010, they switched the way they handle this operation so that the borders do not smooth. Here is an excerpt from the Service Pack notes from 2010:
"A new environment variable now exists to alter how the Smooth UVs property works when subdividing a model: MUDBOX2009_SUBDIVIDE_SMOOTH_UV. When this environment variable is set, the Smooth UVs property works as it did in Mudbox 2009. That is, the entire UV shell, including its UV borders, are smoothed when subdividing a model whenever the Smooth UVs property is turned on. If this environment variable is not set, the default Mudbox 2010 UV smoothing behavior occurs. That is, smoothing only occurs for the interior UVs in a UV shell, leaving the UV shell border edges unsmoothed. Which UV smoothing method you choose to use is entirely dependent on your individual rendering pipeline requirements and render application used."
This has not changed since Mudbox 2010. So, basically what you need to do on a PC is add an environment variable MUDBOX2009_SUBDIVIDE_SMOOTH_UV that has a value of 1. To do this you will need to right-click on My
Computer and click on Properties. Then, choose Advanced
system
settings and under the Advanced tab click on Environment
Variables.... Under System Variables click on New.... In the blank where it says Variable
Name enter MUDBOX2009_SUBDIVIDE_SMOOTH_UV and under Variable
Value input a 1. Hit OK and it's all ready to go.
Once you create subdivision levels using Shift + D, or through the menus, you can move up and down the levels you have created by using the Page Up key to move up in levels, or the Page Down key to move down in levels. But keep in mind, you will not be able to go any higher than the highest level you created using Add New Subdivision Level and you will never be able to go below Level 0.
Another thing to take into account is which model you are subdividing. If you have multiple objects in your scene, you need to make sure the correct mesh is active when subdividing. The following are a couple of ways to make sure you are subdividing the correct mesh:
One way is to select the object in the Object List before hitting Shift + D.
Another way is to hover your mouse cursor over the mesh that you want to subdivide and then hit Shift + D. This will subdivide the mesh that is directly underneath your cursor.