

All light sources covered up to this point spread light in an even intensity distribution. However, sometimes a light source has a more sophisticated intensity distribution pattern. For example, a lamp shade can change the light intensity distribution and make it uneven. A different situation is when the intensity is even, but the color isn't due to something covering the light source. Using math to represent those and other situations may be too complex or have a negative effect on rendering performance. The most common solution in these cases is to use a texture that represents the intensity/color pattern emitted by these light sources.
The following screenshot shows a point light source projecting a texture with stars on the bunny:
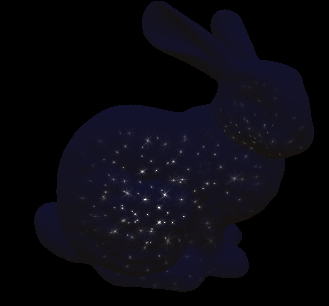
To project a texture with a point light, you will need a texture that wraps around the point light's center. The best option is to use a cube map texture. The cube map texture is a group of six 2D textures that cover the faces of an imaginary box. Microsoft's Direct X SDK comes with a texture tool called DirectX Texture Tool, which helps you group six 2D textures and store them in an DXT format.
In order to sample the cube map texture, you will need a direction vector that points from the light source in the pixel directions. When the light is stationary, the texture can be prepared so the vector is the world-space direction from the light center to the pixel. If the light can rotate, the sampling direction has to take the rotation into an account. In those cases, you will need a matrix that transforms a direction in world space into the light's space.
Sampling the cube map texture will require a linear sampler state. Fill a D3D11_SAMPLER_DESC object with the following values:
|
Sampler State Descriptor Parameter |
Value |
|---|---|
|
|
|
|
|
|
|
|
|
|
|
|
|
|
|
|
|
|
|
|
|
The reset of the descriptor fields should be set to 0.
Create the actual sampler state from the descriptor using the device function CreateSamplerState.
To keep the code generic, we are going to support light source rotation. For light sources that don't rotate, just use an identity matrix. For performance reasons, it is preferred to calculate the sampling direction in the vertex shader using the vertex world position.
In order to transform a position into light space, we are going to use the following shader constant matrix:
float4x4 LightTransform;
Usually when a light rotates, it is attached to some scene model that represents the light source. The model has a transformation from the model space to world space. All you need to do is inverse that transformation and use it as LightTransform.
Computing the sampling direction can be done in either the vertex or pixel shader using the following code (again, it is recommended to do this in the vertex shader):
float3 GetDirToLight(float3 WorldPosition)
{
   float3 ToLgiht = LightTransform[3].xyz + WorldPosition;
   return mul(ToLgiht.xyz, (float3x3)LightTransform);
}
This function takes the vertex/pixel position as argument and returns the sampling direction. If you choose to calculate the sampling direction in the vertex shader, make sure that you pass the result to the pixel shader.
In addition to the cube map texture, we will need a single intensity value. If you recall from the basic point light implementation, the intensity used to be combined with the color value. Now that the color value is sampled from a texture, it can no longer be combined with the intensity on the CPU. The intensity is stored in the following global variable:
float PointIntensity;
We will be accessing the cube map texture in the pixel shader using the following shader resource view deceleration:
TextureCube ProjLightTex : register( t0 );
As mentioned in the Getting ready section of this recipe, sampling the cube map will also require a linear sampler. Add the following sampler state deceleration in your pixel shader:
SamplerState LinearSampler : register( s0 );
Using the sampling direction, we can now find the per-pixel color value of the light using the following code:
float3 GetLightColor(float3 SampleDirection)
{
   return PointIntensity * ProjLightTex.Sample(LinearSampler, SampleDirection);
}
The returned color intensity should now be used to calculate color affect using the following code:
float3 CalcPoint(float3 LightColor, float3 position, Material material)
{
float3 ToLight = PointLightPos - position;
float3 ToEye = EyePosition.xyz - position;
float DistToLight = length(ToLight);
// Phong diffuse
ToLight /= DistToLight; // Normalize
float NDotL = saturate(dot(ToLight, material.normal));
float3 finalColor = LightColor * NDotL;
// Blinn specular
ToEye = normalize(ToEye);
float3 HalfWay = normalize(ToEye + ToLight);
float NDotH = saturate(dot(HalfWay, material.normal));
finalColor += LightColor * pow(NDotH, material.specExp) * material.specIntensity;
// Attenuation
float DistToLightNorm = 1.0 - saturate(DistToLight * PointLightRangeRcp);
float Attn = DistToLightNorm * DistToLightNorm;
finalColor *= material.diffuseColor * Attn;
return finalColor;
}If you compare this code with the code used for spot lights that don't use projected textures, you will notice that the only difference is the light color getting passed as an argument instead of the constant color used in the basic implementation.
We consider the cube map texture to be in light space. This means that the values in the texture stay constant regardless of the light rotation and movement. By transforming the direction to the light into light space, we can sample the texture with it and get the color value. Aside from the sampled color value replacing the constant color from the basic point light implementation, the code stays exactly the same.