

We will wrap up this chapter with a recipe for creating a simple image viewer in the OpenGL v3.3 core profile using the SOIL image loading library.
After setting up the Visual Studio environment, we can now work with the SOIL library. The code for this recipe is in the Chapter1/ImageLoader directory.
Let us now implement the image loader by following these steps:
Load the image using the
SOILlibrary. Since the loaded image fromSOILis inverted vertically, we flip the image on the Y axis.int texture_width = 0, texture_height = 0, channels=0; GLubyte* pData = SOIL_load_image(filename.c_str(), &texture_width, &texture_height, &channels, SOIL_LOAD_AUTO); if(pData == NULL) { cerr<<"Cannot load image: "<<filename.c_str()<<endl; exit(EXIT_FAILURE); } int i,j; for( j = 0; j*2 < texture_height; ++j ) { int index1 = j * texture_width * channels; int index2 = (texture_height - 1 - j) * texture_width * channels; for( i = texture_width * channels; i > 0; --i ) { GLubyte temp = pData[index1]; pData[index1] = pData[index2]; pData[index2] = temp; ++index1; ++index2; } }Set up the OpenGL texture object and free the data allocated by the
SOILlibrary.glGenTextures(1, &textureID); glActiveTexture(GL_TEXTURE0); glBindTexture(GL_TEXTURE_2D, textureID); glTexParameteri(GL_TEXTURE_2D, GL_TEXTURE_MIN_FILTER,GL_LINEAR); glTexParameteri(GL_TEXTURE_2D, GL_TEXTURE_MAG_FILTER, GL_LINEAR); glTexParameteri(GL_TEXTURE_2D, GL_TEXTURE_WRAP_S, GL_CLAMP); glTexParameteri(GL_TEXTURE_2D, GL_TEXTURE_WRAP_T, GL_CLAMP); glTexImage2D(GL_TEXTURE_2D, 0, GL_RGB, texture_width, texture_height, 0, GL_RGB, GL_UNSIGNED_BYTE, pData); SOIL_free_image_data(pData);
Set up the vertex shader to output the clip space position (
shaders/shader.vert).#version 330 core layout(location=0) in vec2 vVertex; smooth out vec2 vUV; void main() { gl_Position = vec4(vVertex*2.0-1,0,1); vUV = vVertex; }
Set up the fragment shader that samples our image texture (
shaders/shader.frag).#version 330 core layout (location=0) out vec4 vFragColor; smooth in vec2 vUV; uniform sampler2D textureMap; void main() { vFragColor = texture(textureMap, vUV); }
Set up the application code using the
GLSLShadershader class.shader.LoadFromFile(GL_VERTEX_SHADER, "shaders/shader.vert"); shader.LoadFromFile(GL_FRAGMENT_SHADER,"shaders/shader.frag"); shader.CreateAndLinkProgram(); shader.Use(); shader.AddAttribute("vVertex"); shader.AddUniform("textureMap"); glUniform1i(shader("textureMap"), 0); shader.UnUse();Set up the geometry and topology and pass data to the GPU using buffer objects.
vertices[0] = glm::vec2(0.0,0.0); vertices[1] = glm::vec2(1.0,0.0); vertices[2] = glm::vec2(1.0,1.0); vertices[3] = glm::vec2(0.0,1.0); GLushort* id=&indices[0]; *id++ =0; *id++ =1; *id++ =2; *id++ =0; *id++ =2; *id++ =3; glGenVertexArrays(1, &vaoID); glGenBuffers(1, &vboVerticesID); glGenBuffers(1, &vboIndicesID); glBindVertexArray(vaoID); glBindBuffer (GL_ARRAY_BUFFER, vboVerticesID); glBufferData (GL_ARRAY_BUFFER, sizeof(vertices), &vertices[0], GL_STATIC_DRAW); glEnableVertexAttribArray(shader["vVertex"]); glVertexAttribPointer(shader["vVertex"], 2, GL_FLOAT, GL_FALSE,0,0); glBindBuffer(GL_ELEMENT_ARRAY_BUFFER, vboIndicesID); glBufferData(GL_ELEMENT_ARRAY_BUFFER, sizeof(indices), &indices[0], GL_STATIC_DRAW);
Set the shader and render the geometry.
void OnRender() { glClear(GL_COLOR_BUFFER_BIT|GL_DEPTH_BUFFER_BIT); shader.Use(); glDrawElements(GL_TRIANGLES, 6, GL_UNSIGNED_SHORT, 0); shader.UnUse(); glutSwapBuffers(); }Release the allocated resources.
void OnShutdown() { shader.DeleteShaderProgram(); glDeleteBuffers(1, &vboVerticesID); glDeleteBuffers(1, &vboIndicesID); glDeleteVertexArrays(1, &vaoID); glDeleteTextures(1, &textureID); }
The SOIL library provides a lot of functions but for now we are only interested in the SOIL_load_image function.
int texture_width = 0, texture_height = 0, channels=0;
GLubyte* pData = SOIL_load_image(filename.c_str(), &texture_width, &texture_height, &channels, SOIL_LOAD_AUTO);
if(pData == NULL) {
cerr<<"Cannot load image: "<<filename.c_str()<<endl;
exit(EXIT_FAILURE);
}The first parameter is the image file name. The next three parameters return the texture width, texture height, and total color channels in the image. These are used when generating the OpenGL texture object. The final parameter is the flag which is used to control further processing on the image. For this simple example, we will use the SOIL_LOAD_AUTO flag which keeps all of the loading settings set to default. If the function succeeds, it returns unsigned char* to the image data. If it fails, the return value is NULL (0). Since the image data loaded by SOIL is vertically flipped, we then use two nested loops to flip the image data on the Y axis.
int i,j;
for( j = 0; j*2 < texture_height; ++j )
{
int index1 = j * texture_width * channels;
int index2 = (texture_height - 1 - j) * texture_width * channels;
for( i = texture_width * channels; i > 0; --i )
{
GLubyte temp = pData[index1];
pData[index1] = pData[index2];
pData[index2] = temp;
++index1;
++index2;
}
}After the image data is loaded, we generate an OpenGL texture object and pass this data to the texture memory.
glGenTextures(1, &textureID);
glActiveTexture(GL_TEXTURE0);
glBindTexture(GL_TEXTURE_2D, textureID);
glTexParameteri(GL_TEXTURE_2D, GL_TEXTURE_MIN_FILTER,GL_LINEAR);
glTexParameteri(GL_TEXTURE_2D, GL_TEXTURE_MAG_FILTER, GL_LINEAR);
glTexParameteri(GL_TEXTURE_2D, GL_TEXTURE_WRAP_S, GL_CLAMP);
glTexParameteri(GL_TEXTURE_2D, GL_TEXTURE_WRAP_T, GL_CLAMP);
glTexImage2D(GL_TEXTURE_2D, 0, GL_RGB, texture_width, texture_height, 0, GL_RGB, GL_UNSIGNED_BYTE, pData);
SOIL_free_image_data(pData);
As with every other OpenGL object, we have to first call glGenTextures. The first parameter is the total number of texture objects we need and the second parameter holds the ID of the texture object generated. After generation of the texture object, we set the active texture unit by calling glActiveTexture(GL_TEXTURE0) and then bind the texture to the active texture unit by calling glBindTextures(GL_TEXTURE_2D, &textureID). Next, we adjust the texture parameters like the texture filtering for minification and magnification, as well as the texture wrapping modes for S and T texture coordinates. After these calls, we pass the loaded image data to the glTexImage2D function.
The glTexImage2D function is where the actual allocation of the texture object takes place. The first parameter is the texture target (in our case this is GL_TEXTURE_2D). The second parameter is the mipmap level which we keep to 0. The third parameter is the internal format. We can determine this by looking at the image properties. The fourth and fifth parameters store the texture width and height respectively. The sixth parameter is 0 for no border and 1 for border. The seventh parameter is the image format. The eighth parameter is the type of the image data pointer, and the final parameter is the pointer to the raw image data. After this function, we can safely release the image data allocated by SOIL by calling SOIL_free_image_data(pData).
In this recipe, we use two shaders, the vertex shader and the fragment shader. The vertex shader outputs the clip space position from the input vertex position (vVertex) by simple arithmetic. Using the vertex positions, it also generates the texture coordinates (vUV) for sampling of the texture in the fragment shader.
gl_Position = vec4(vVertex*2.0-1,0,1);
vUV = vVertex;
The fragment shader has the texture coordinates smoothly interpolated from the vertex shader stage through the rasterizer. The image that we loaded using SOIL is passed to a texture sampler (uniform sampler2D textureMap) which is then sampled using the input texture coordinates (vFragColor = texture(textureMap, vUV)). So in the end, we get the image displayed on the screen.
The application side code is similar to the previous recipe. The changes include an addition of the textureMap sampler uniform.
shader.Use();
  shader.AddAttribute("vVertex");
  shader.AddUniform("textureMap");
  glUniform1i(shader("textureMap"), 0);
shader.UnUse();
Since this uniform will not change throughout the lifetime of the application, we initialize it once only. The first parameter of glUniform1i is the location of the uniform. We set the value of the sampler uniform to the active texture unit where the texture is bound. In our case, the texture is bound to texture unit 0, that is, GL_TEXTURE0. Therefore we pass 0 to the uniform. If it was bound to GL_TEXTURE1, we would pass 1 to the uniform.
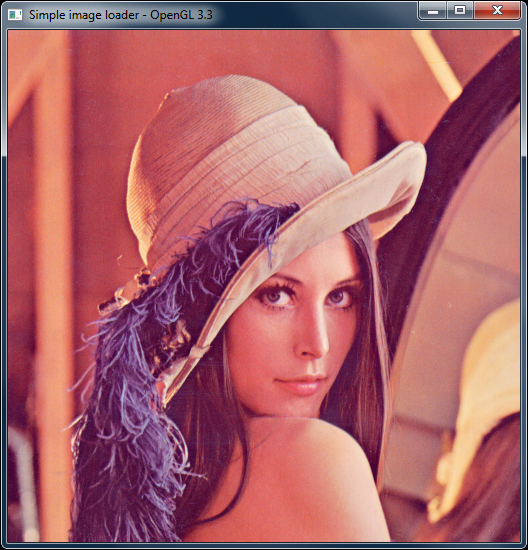
The OnShutdown() function is similar to the earlier recipes. In addition, this code adds deletion of the OpenGL texture object. The rendering code first clears the color and depth buffers. Next, it binds the shader program and then invokes the glDrawElement call to render the triangles. Finally the shader is unbound and then the glutSwapBuffers function is called to display the current back buffer as the next front buffer. Compiling and running this code displays the image in a window as shown in the following screenshot:
Using image loading libraries like SOIL and a fragment shader, we can make a simple image viewer with basic GLSL functionality. More elaborate effects may be achieved by using techniques detailed in the later recipes of this book.