

There is nothing as exciting as ordering and finally receiving a new piece of hardware; yet, things can go poorly even in the first few minutes. This chapter will hopefully help you avoid the pitfalls that normally accompany unpacking and configuring your Arduino. We'll step through the process, answer many of the different questions you might have, and help you understand what is going on. If you don't get through this chapter, you'll not be successful at any of the others, and your HW will go unused, which would be a real tragedy. So, let's get started.
One of the most challenging aspects of writing this guide is to decide to what level I should describe each step. Some of you are beginners, others may have some limited experience, and others will know significantly more in some of these areas. I'll try to be brief but still detail the steps to take in order to be successful.
The items you'll need for this chapter's projects are as follows:
An Arduino
A USB cable to go between your Arduino and the host computer
A host computer running a Windows, Mac, or Linux operating system
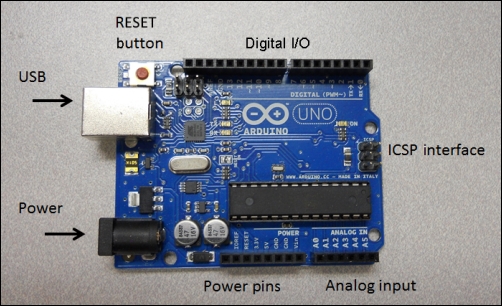
Before plugging anything in, inspect the board for any issues that might have occurred during shipping. This is normally not a problem, but it is always good to do a quick visual inspection. You should also acquaint yourself with the different connections on the board. In the following image, the connections on the board are labelled for your information:
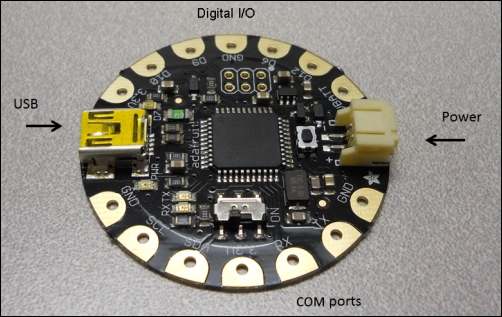
The Arduino Mega is very similar; it just has more I/O pins. However, the FLORA is a bit different. The following image shows the connections:
Before you connect the board, download the appropriate SW for your computer (Windows, Mac, or Linux from http://arduino.cc/en/main/software#.UxoUA_ldUvs). Install the SW by following the instructions for your board and operating system. This will also install the drivers for the board. Then, connect the board to the computer. To do this, you'll need to go through the USB-client connection. This is achieved by performing the following steps:
Connect the USB connector end of the cable to the board.
Connect the other end of the USB connector to the USB port of the PC.
When you plug the board in, the PWR LED should constantly be green. The following image shows the location of the LED so that you're certain which one to look for:
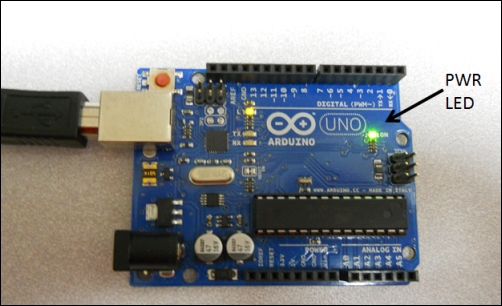
The Arduino Uno is also preloaded with a simple blink program; the yellow LED should also be turning on and off every second. The Mega will look very similar to the Arduino Uno.
If you are using the FLORA Arduino, you should get your Arduino IDE from http://learn.adafruit.com/getting-started-with-flora/download-software. Unzip the file and place it in a directory where you can get to it later. Then, use the USB cable to connect the device to the computer. When the device is connected, it should look like the following image when powered on:
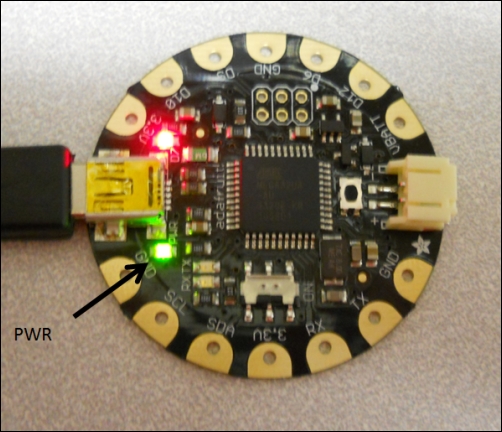
Don't worry yet about the blinking red LED; I'll explain this in Chapter 2, Getting Started with the Arduino IDE.