

Let's get started. We are going to create a setup in which an LED flashes when motion is detected by the PIR sensor. This is what the setup should look like when connecting the Arduino to the PIR Sensor:
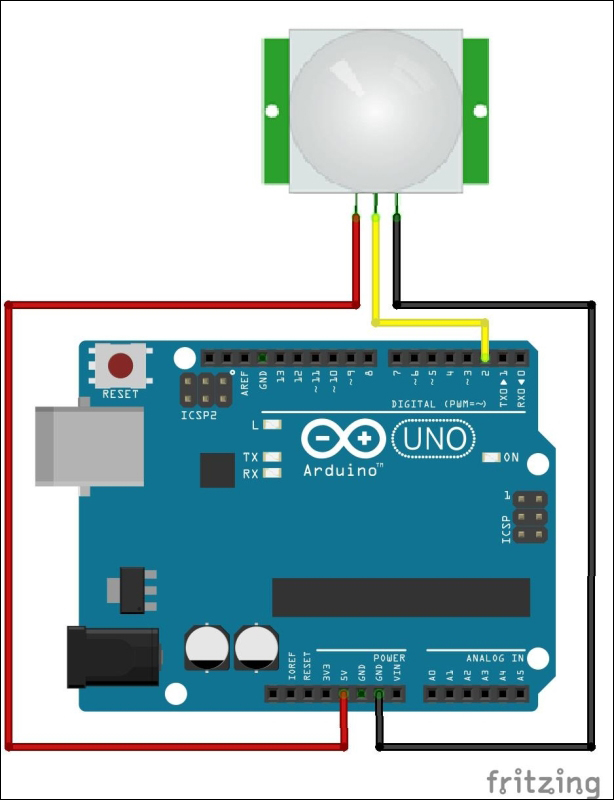
Basically, the connections are as follows:
GND → GND
VCC → 5V
OUT → D02 (digital pin 2)
Note
Digital pins are denoted using D and analog pins are denoted by A. So digital pin 13 is D13 and analog pin 2 is A02.
Open Arduino and load the sketch called PIR_LED.ino, or copy this:
int ledPin = 13; // use the onboard LED
int pirPin = 2; // 'out' of PIR connected to digital pin 2
int pirState = LOW; // start the state of the PIR to be low (no motion)
int pirValue = 0; // variable to store change in PIR value

void setup() {
  pinMode(ledPin, OUTPUT); // declare the LED as output
  pinMode(pirPin, INPUT);  // declare the PIR as input
  Serial.begin(9600); // begin the Serial port at baud 9600
}

void loop() {
  pirValue = digitalRead(pirPin); // read PIR value
  if ((pirValue =...