

If you are using Ubuntu 12.04 or earlier, the Ubuntu ImageWriter is a GUI tool that makes the installation very easy. If you are using a newer version, usb-imagewriter is not available, but SD cards can still be created from the command line. This will generally work on most flavors of Linux; check with your project's documentation to see the recommended method.
I find the easiest method is to look at what is mounted. If the SD card is inserted, it should be automatically recognized:
$ mount -lAnother way to find the mount(s) on the SD card is looking using the
dmsegcommand. Ubuntu's documentation recommends usingdmesgto find out which device the SD card is. Insert the SD card and run this:$ dmesg | tail -20You'll get a response similar to this:
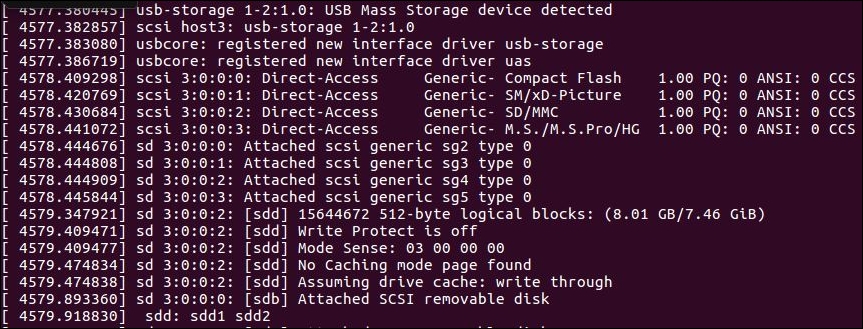
dmesg output after SD card insertion
Before overwriting, you need to detach the disks that are mounted. In this case,
sdd1andsdd2are the mounted partitions for devicesdd, as shown in the last line of the image above.In Linux, your disk devices are usually identified by looking in the
/dev/folder for devices starting with sd (for example sda, sdb, sdc). A partition is a division of the physical volume so it can be treated as different devices, and they can be identified by having incremental numbers (for example sdd has partitions sdd1 and sdd2):$ sudo umount /dev/sdd1 $ sudo umount /dev/sdd2
After downloading the latest ZIP file of the Raspbian image from the Raspberry Pi website, you can validate it using the
sha1sumtool:$ sudo sha1sum ~/Downloads/2016-05-27-raspbian- jessie.zip 64c7ed611929ea5178fbb69b5a5f29cc9cc7c157 /media/sf_Downloads/2016-05-27-raspbian-jessie.zip
If your return value matches the SHA-1 value on the Raspberry Pi Downloads page, unzip the file, and run the
ddcommand to write your image to the SD card. Make sure you are using the correct device!The dd command is for entire disks, so we reference sdd instead of the partitions
sdd1orsdd2.We don't want to duplicate things to partitions, we want to duplicate the entire disk, and whatever partitions your source has will be applied to the destination, our SD card.$ sudo dd bs=1M if=/path/to/raspbian-jessie.img of=/dev/sdd
Note
The dd command can take a while to run, and doesn't provide any output while it is, so you can get that feeling it might be stuck. Be patient, depending on the speed of your SD Card it could take several minutes to copy.
The output will be similar to this:

dd command input and output
After several minutes, your card will be ready to go!
Whichever way you decided to set up your SD card, you are just a few connections away from getting your Raspberry Pi Zero online!