Book Image

Building Smart Homes with Raspberry Pi Zero

By : Marco Schwartz
Book Image

Building Smart Homes with Raspberry Pi Zero

By: Marco Schwartz

Overview of this book

The release of the Raspberry Pi Zero has completely amazed the tech community. With the price, form factor, and being high on utility—the Raspberry Pi Zero is the perfect companion to support home automation projects and makes IoT even more accessible. With this book, you will be able to create and program home automation projects using the Raspberry Pi Zero board. The book will teach you how to build a thermostat that will automatically regulate the temperature in your home. Another important topic in home automation is controlling electrical appliances, and you will learn how to control LED Lights, lamps, and other electrical applications. Moving on, we will build a smart energy meter that can measure the power of the appliance, and you’ll learn how to switch it on and off. You’ll also see how to build simple security system, composed of alarms, a security camera, and motion detectors. At the end, you will integrate everything what you learned so far into a more complex project to automate the key aspects of your home. By the end, you will have deepened your knowledge of the Raspberry Pi Zero, and will know how to build autonomous home automation projects.
Table of Contents (17 chapters)
Building Smart Homes with Raspberry Pi Zero
Credits
About the Author
About the Reviewer
www.PacktPub.com
Preface
Index

Controlling LEDs


In this first project of the chapter, we are going to see how to control LEDs using your Raspberry Pi Zero. As an example, here we'll see how to control and dim a single LED that we will place on a breadboard. However, the same code can be applied to any kind of LED lighting in your home, or to LED strips.

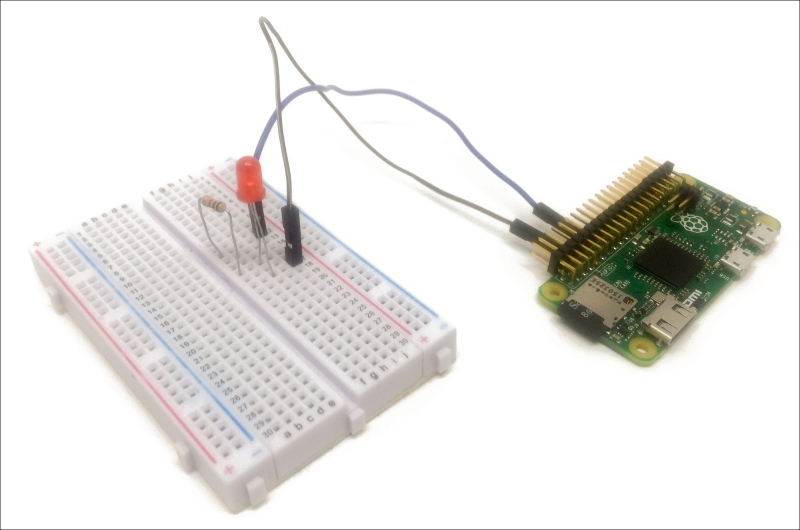
Let's first see how to assemble this project. Place the LED on the breadboard in series with the 330 Ohm resistor—the longest pin of the LED in contact with the resistor. Then, connect the other side of the resistor to the GPIO18 pin on the Raspberry Pi and the other end of the LED to a GND pin of the Raspberry Pi.

You can, of course, use a cobbler cable kit to easily connect the Pi to the LED. Here, and for the rest of this chapter, I just used two simple jumper wires so you can really see the connections in the images.

This is the final result:

Now that the project is assembled, we are going to test it. To do so, we'll run a simple code that will basically continuously change...