Book Image

ESP8266 Home Automation Projects

By : Catalin Batrinu, Constantin Tambrea
Book Image

ESP8266 Home Automation Projects

By: Catalin Batrinu, Constantin Tambrea

Overview of this book

The ESP8266 is a low-cost yet powerful Wi-Fi chip that is becoming more popular at an alarming rate, and people have adopted it to create interesting projects. With this book, you will learn to create and program home automation projects using the ESP8266 Wi-Fi chip. You will learn how to build a thermostat to measure and adjust the temperature accordingly and how to build a security system using the ESP8266. Furthermore, you will design a complete home automation system from sensor to your own cloud. You will touch base on data monitoring, controlling appliances, and security aspects. By the end of the book, you will understand how to completely control and monitor your home from the cloud and from a mobile application. You will be familiar with the capabilities of the ESP8266 and will have successfully designed a complete ready-to-sell home automated system.
Table of Contents (16 chapters)
Title Page
Credits
About the Author
About the Reviewer
www.PacktPub.com
Customer Feedback
Preface
3
Building a Home Thermostat with the ESP8266
5
Using ESP8266 to Build a Security System
Index

Working offline


If your data is more sensitive and you don't want to share it across the Wi-Fi network or you don't have Wi-Fi connectivity, a solution is to store your data on an SD card.

Let's see how data can be stored on an SD card.

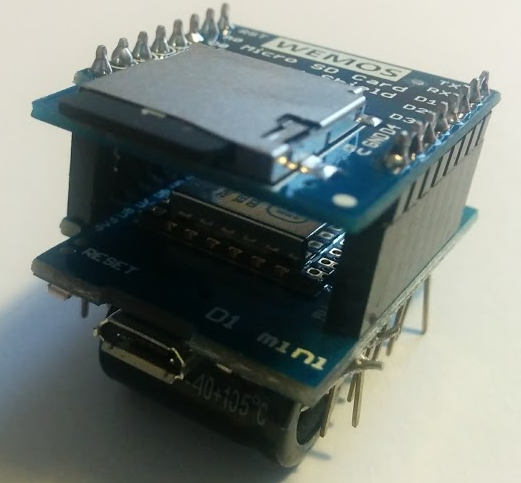
Necessary hardware that will be used:

  • Wemos D1 mini:
  • microSD card shield:
  • microSD card:

Since the microSD card is a shield for the Wemos D1 mini, it is easy to stack them; you just need to solder the pins that are coming into the package:

Let's determine the size of the SD card with the following sketch.

Include the SPI.h and the SD library:

#include <SPI.h> 
#include <SD.h> 

Set up variables using the SD utility library functions:

Sd2Card card; 
SdVolume volume; 
SdFile root; 
const int chipSelect = D8; 

In the setup function, we will determine if the card is inserted or not and the card details will be read over SPI:

void setup() 
{ 
  Serial.begin(115200); 
  Serial.print("\nInitializing SD card..."); 

Use the initialization code from the utility libraries...