Book Image

ESP8266 Robotics Projects

By : Pradeeka Seneviratne
Book Image

ESP8266 Robotics Projects

By: Pradeeka Seneviratne

Overview of this book

The ESP8266 Wi-Fi module is a self-contained SOC with an integrated TCP/IP protocol stack and can give any microcontroller access to your Wi-Fi network. It has a powerful processing and storage capability and also supports application hosting and Wi-Fi networking. This book is all about robotics projects based on the original ESP8266 microcontroller board and some variants of ESP8266 boards. It starts by showing all the necessary things that you need to build your development environment with basic hardware and software components. The book uses the original ESP8266 board and some variants such as the Adafruit HUZZAH ESP8266 and the Adafruit Feather HUZZAH ESP8266 . You will learn how to use different type of chassis kits, motors, motor drivers, power supplies, distribution boards, sensors, and actuators to build robotics projects that can be controlled via Wi-Fi. In addition, you will learn how to use line sensors, the ArduiCam, Wii Remote, wheel encoders, and the Gripper kit to build more specialized robots. By the end of this book, you will have built a Wi-Fi control robot using ESP8266.
Table of Contents (15 chapters)
Title Page
Credits
About the Author
About the Reviewer
www.PacktPub.com
Customer Feedback
Preface

Wiring the encoders with Arduino


Figure 3.4 shows the wiring diagram for connecting two hall-effect sensors with Arduino UNO:

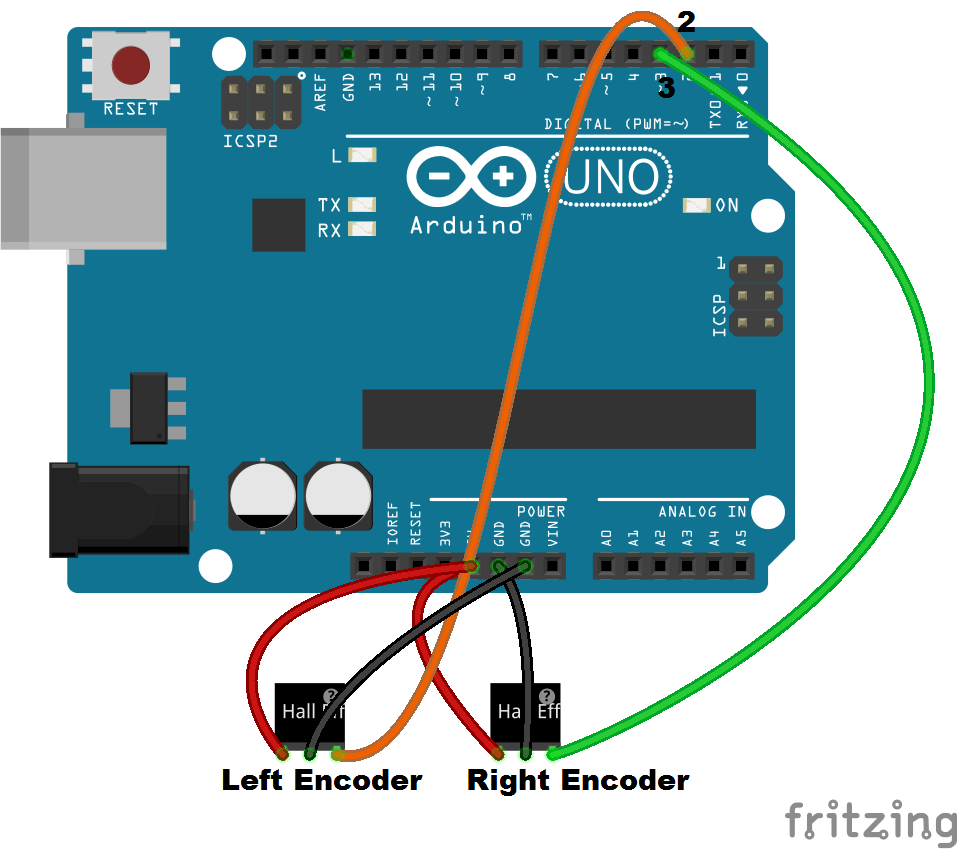
Figure 3.4: Wiring diagram for the encoder

Use the existing circuit you built in Chapter 2Building a Mini Round Robot with Original ESP8266, to control the two DC gear motors with SparkFun Dual TB6612FNG (1 A) motor driver, Arduino UNO, ESP8266 (ESP-01), and a Bi-Directional Logic Level Converter. The following steps describe how to connect the two wheel encoders with Arduino UNO:

  • Hall-effect sensor attached to the left wheel:
    1. Connect the Signal wire of the hall-effect sensor to Arduino digital pin 2.
    2. Connect the Power wire of the hall-effect sensor to Arduino 5V.
    3. Connect the Ground wire of the hall-effect sensor to Arduino GND.
  • Hall-effect sensor attached to the right wheel:
    1. Connect the Signal wire of the hall-effect sensor to Arduino digital pin 3.
    2. Connect the Power wire of the hall-effect sensor to Arduino 5V.
    3. Connect the Ground wire of the hall-effect sensor to Arduino...