
Go to your course files area by selecting Files from the course Administration block.
Create an Images folder and upload your images.
Return to your course front page and click on the Topic 0 Edit summary icon.
In the Editor, open up the Insert Image dialog by clicking on the Insert Image button. That's the button with the little framed landscape painting on it:
 |
5. The Insert Image dialog contains a file browser that lets you browse and select files in your course Files area. Find the image you've just uploaded and click on the name of the image file. You will see the image previewed in the preview pane on the right of the file browser:
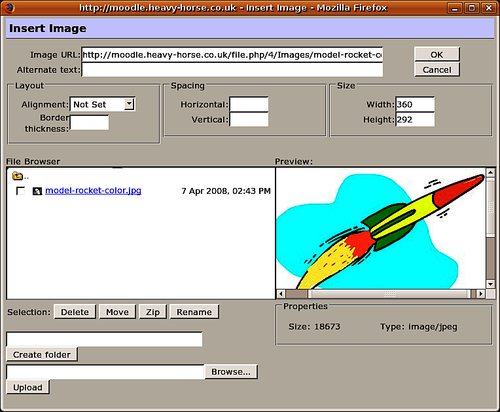 |
6. Type a description of the picture in the Alternate text box. You won't be able to press the OK button until you do.
7. Press the OK button.
8. That's it. Your picture is now added:
 |