

Let's find the compressed file downloaded from http://arduino.cc/en/Main/Software in the previous part and let's decompress it on our computer.
Whatever the platform, the IDE works equally and even if I'll describe some specific bits of three different platforms, I'll only describe the use of the IDE and show screenshots from OS X.
There isn't a typical installation of the IDE because it runs into the Java Virtual Machine . This means you only have to download it, to decompress it somewhere on your system, and then launch it and JAVA will execute the program. It is possible to use only the CLI (command-line interface, the famous g33ks window in which you can type the command directly to the system) to build your binaries instead of the graphical interface, but at this point, I don't recommend this.
Usually, Windows and OS X come with Java installed. If that isn't the case, please install it from the java.com website page at http://www.java.com/en/download/.
On Linux, the process really depends on the distribution you are using, so I suggest to check the page http://www.arduino.cc/playground/Learning/Linux and if you want to check and install all the environment and dependencies from sources, you can also check the page http://www.arduino.cc/playground/Linux/All.
In Windows, let's click on the .exe file included in the uncompressed folder. On OS X, let's click on the global self-contained package with the pretty Arduino logo. On Linux, you'll have to start the Arduino script from the GUI or by typing in the CLI.
You have to know that using the IDE you can do everything we will make in this book.
The IDE provides a graphical interface in which you can write your code, debug it, compile it, and upload it, basically.
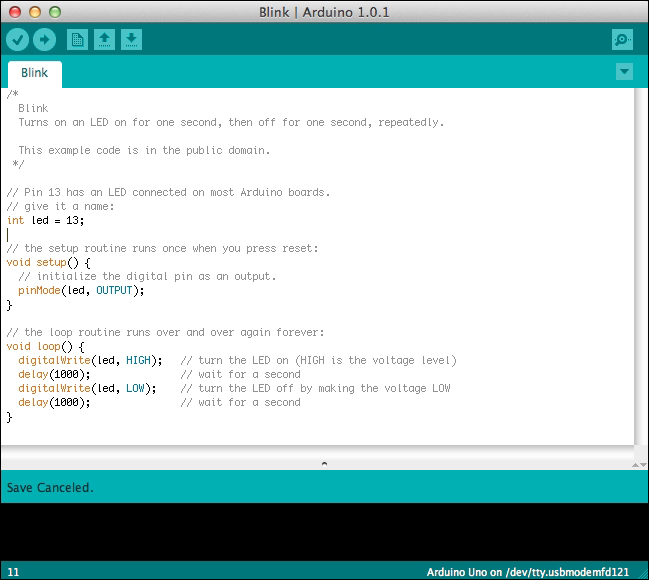
The famous Blink code example opened in the Arduino IDE
There are six icons from left to right that we have to know very well because we'll use them every time:
Verify (check symbol): This provides code checking for errors
Upload (right-side arrow): This compiles and uploads our code to the Arduino board
New (small blank page): This creates a new blank sketch
Open (up arrow): This opens a list of all sketches already existing in our sketchbook
Save (down arrow): This saves our sketch in our sketchbook
Serial Monitor (small magnifying glass): This provides the serial monitoring
Each menu item in the top bar provides more options we will discover progressively all throughout this book.
However, the Tools menu deserves closer attention:
Auto Format: This provides code formatting with correct and standard indentations
Archive Sketch: This compresses the whole current sketch with all files
Board: This provides a list of all boards supported
Serial Port: This provides a list of all serial devices on the system
Programmer: This provides a list of all programmer devices supported and used in case of total reprogramming of the AVR chipset
Burn Bootloader: This is the option used when you want to overwrite (or even write) a new bootloader on your board.

The Tools menu
The preferences dialog is also a part we have to learn about right now. As usual, the preferences dialog is a place where we don't really need to go often but only for changing global parameters of the IDE. You can choose the sketchbook location and the Editor language in this dialog. You can also change a couple of bits like automatic check-up of IDE updates at start up or Editor font size.
The sketchbook concept will make our life easier. Indeed, the sketchbook is a folder where, basically, all your sketches will go. On my personal point of view, it is very precious to use it like this because it really organizes things for you and you can retrieve your pieces of code easier. Follow me there; you'll thank me later.
When we start a sketch from scratch, we basically type the code, verify it, upload it, and save it. By saving it, the first time, the IDE creates a folder in which it will put all the files related to our current sketch. By clicking on the sketch file inside this folder, the Arduino IDE will open and the related code will be displayed in the edit/typing part of the window.
We are almost done!
Let's install the drivers of the Arduino USB interface on our system.