Book Image

Moodle 2 for Teaching 7-14 Year Olds Beginner's Guide

By : Mary Cooch
Book Image

Moodle 2 for Teaching 7-14 Year Olds Beginner's Guide

By: Mary Cooch

Overview of this book

Moodle is a very popular e-learning tool in universities and high schools. But what does it have to offer younger students who want a fun, interesting, interactive, and informative learning experience? Moodle empowers teachers to achieve all this and more and this book will show you how!Moodle 2 For Teaching 7-14 Year Olds will show complete beginners in Moodle with no technical background how to make the most of its features to enhance the learning and teaching of children aged around 7-14. The book focuses on the unique needs of young learners to create a fun, interesting, interactive, and informative learning environment your students will want to go to day after day.This is a practical book for teachers, written by a teacher with two decades of practical experience, latterly in using Moodle to motivate younger students. Learn how to put your lessons online in minutes; how to set creative homework that Moodle will mark for you and how to get your students working together to build up their knowledge. Throughout the book we will build a course from scratch, adaptable for ages 7 to 14, on Rivers and Flooding. You can adapt this to any topic, as Moodle lends itself to all subjects and ages.
Table of Contents (15 chapters)
Moodle 2 for Teaching 7-14 Year Olds
Credits
About the Author
About the Reviewers
www.PacktPub.com
Preface

Time for action — re-sizing several photos, all in one go


Let's learn how to re-size several photos at once.

  1. 1. Start IrfanView.

  2. 2. Select menu option File | Batch conversion/Rename.

  3. 3. In the dialogue box that appears next, click on Look in and navigate to the folder of photos that you want to resize.

  4. 4. Click on the folder. The images will appear individually.

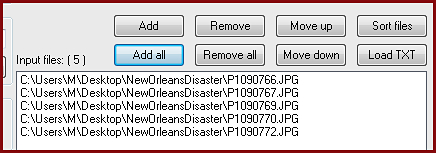
  5. 5. Click on the Add all button. Their filenames will appear in the Input files box at the bottom of the screen:

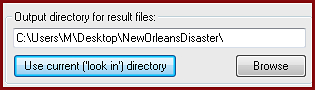
  6. 6. In Output directory for result files, choose the location to which you want the folder of resized photos to be saved. If you want it in the same place as the current folder, click on Use current ('look in') directory.

  7. 7. Under Batch conversion settings, click on Advanced.

  8. 8. In the box that is displayed, set your new size, and ignore everything else!

  9. 9. Click on OK.

  10. 10. Back on the main screen, click on Start Batch.

  11. 11. Sit back and relax as IrfanView does all the work of resizing your photos for you!

What just happened?

We used...