Let's take a tour around GIMP for a start. This tour will give you an exposure to basic tasks to do with GIMP. Along the way, we will introduced to the GIMP conceptual idea that makes it different than some of the other image manipulation programs.
We will go to produce the following image:
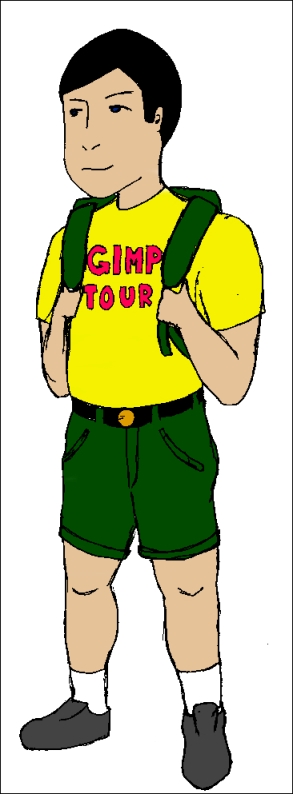
Working with GIMP requires you to work on canvas, just like an artist would do. In GIMP, the canvas is a file on your system. You may have a clean canvas (a new file), or you may also work on an image obtained from various sources.
The File menu presents you with a number of options. From here, you can create a clean canvas by selecting New. From the next screenshot, we can see that there is an extensive menu for Create. You may start to import images copied from somewhere else, scan them, or take a screenshot to begin with.
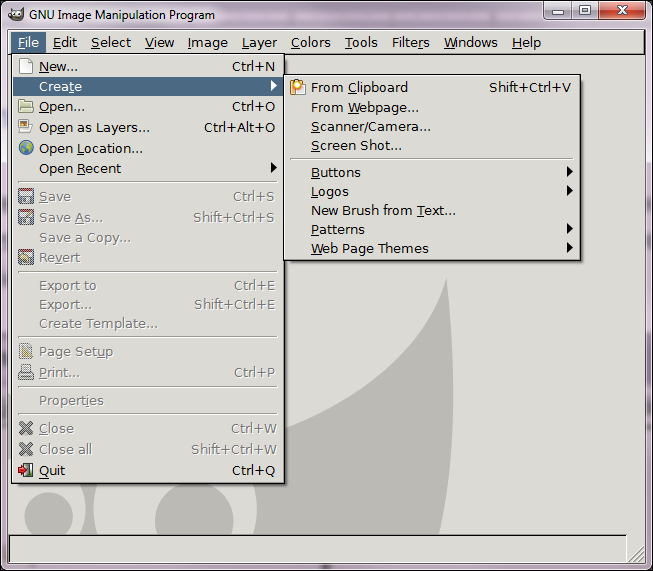
To create a new canvas, follow these steps:
Click on File.
From the menu, click on New.
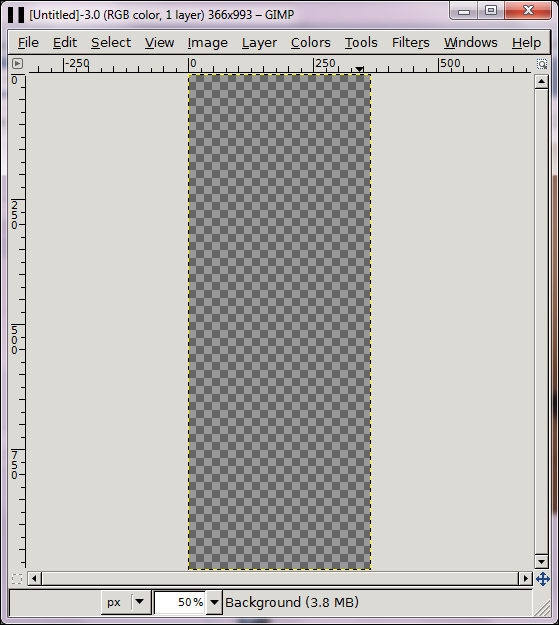
Now the Create a New Image dialog box will appear. Adjust the width and height. Before clicking on OK, set the background to be filled with nothing by selecting Transparency.

Now you have the canvas to work on your first art, as shown in the following screenshot:
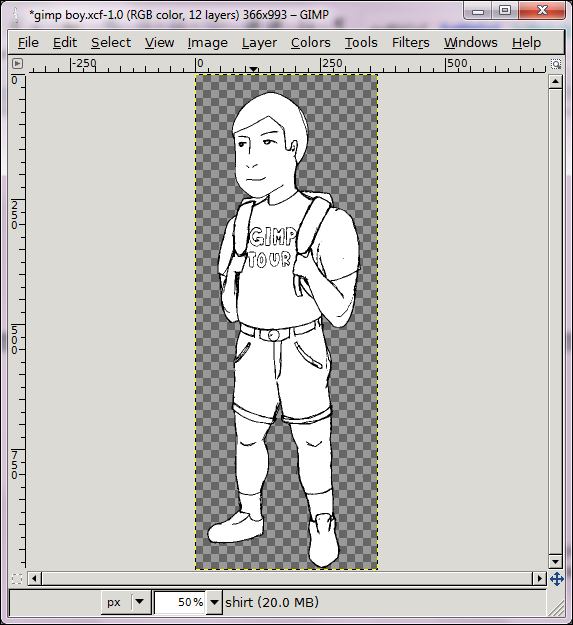
If you have hand drawn the outline of the picture and scanned it previously like I do, locate the scanned picture on your machine, and all you got to do is drag the file into the canvas. If you happen to have a stylus pen, you could easily draw on the canvas.
It is the perfect time to introduce the toolbox. The Toolbox option provides you with a set of tools to complete your work. The collections of tools here involve tools to select areas, painting, transform, and touch-up tools.
If the Toolbox window does not show up, press Ctrl + B. Following is a screenshot of the Toolbox window.

The previous screenshot consists of two parts, the tools and also tool options that further define the properties of the tool. The default installation of GIMP puts the Toolbox window and Tool option together, but they can be separated. It is one of the GIMP feature to be able to dock windows together or separate them according to user preference.
Click on Windows and choose Dockable Dialogs to expose various dialog boxes that you might want to bring up front while working.
If you're not sure how to go with each item of the menu, place the cursor on the icon, and a tooltip will appear together with a shortcut key in bold. At the bottom of the Toolbox window is the color chooser, where user can select an active color and alternative color, making painting easier when these colors are switchable.
Click on the magic wand icon
 . Then, by clicking on the hair of the boy, the hair will be selected.
Now, duplicate the layer, so we can have a layer exclusively for his hair. This step involves working with layers.
It is a good idea to have a layer for each part of the image. Hair, shirt, skin – all should have their own layer. This way you can paint each part without accidently filling other parts.
The concept of layers is important when you are working with GIMP. Think of it as if you are drawing on different set of papers or transparencies that you may cut and rearrange before you paste them on the drawing board.
The Layers dockable window can be accessed from Windows | Dockable Dialogs | Layers. The Layers window is useful to navigate between layers. Refer to the following screenshot:
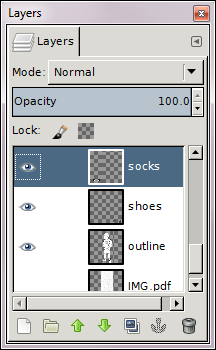
To navigate between layers, follow these steps:
Drag a layer to the
 icon to quickly create a duplicate of the layer.
Press Ctrl + I (or click on Select | Invert) to select the opposite part and delete it. Now you have a layer specific for a part.
Create a layer for each of the parts. The layers should be aligned and overlapped on top of the original outline. To rename the layers, double-click on the layer name or click on the layer and press F2.
The following is a screenshot of how the layers should look:
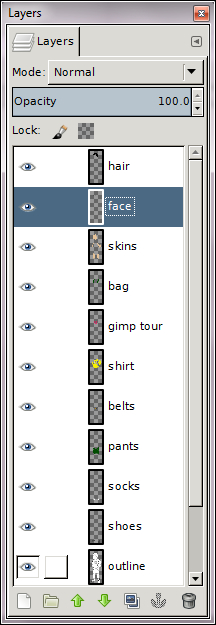
There are various controls that can be used from the Layers window alone. You may set certain layers' visibility by clicking on the eye icon and control how it blends with other layers by selecting the mode.
Layers are best used when composing images. Each of the images can be on a layer, so it is easier to adjust them around images on other layers. These layers can be organized to let certain layer sit on top of others. To do so, drag the layer to the top to make it sit on top of the other image.
This is going to be the best part. When the layers are duplicated and separated, it is easy to paint them. The trick to color carefully, so that the colors stay inside of the parts, is to select outside of the parts using the magic wand, and invert the selection (shortcut keys are Ctrl + I). Having done so, follow these steps:
Click the Paintbrush Tool
 , and pick a color of your choice and paint away.
To select another color, click on
 , and you'll be given a menu, which has a set of colors to choose from:

It is up to you to pick any color from the spectrum. Once done, click on OK, and you're back to the canvas.
Repeat the select-and-paint process for each part. To illustrate the separate layers being colored, let's look at the following screenshot:
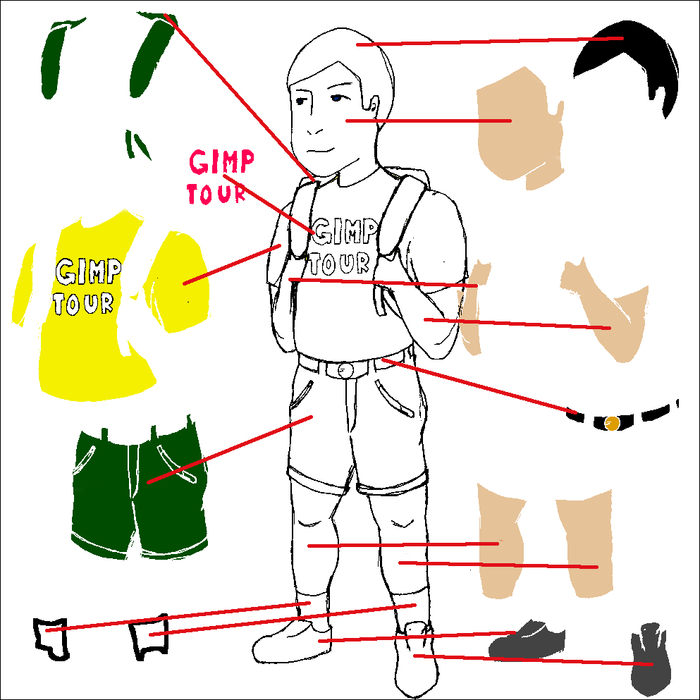
Every fill on the drawing is separated by layers to enable each layer to be modified without affecting the others. You may also specify the opacity of individual layers.
This concludes a brief tour of GIMP. These few basic steps are just the tip of the iceberg. It is amazing what GIMP has in store for you.


