
For our first lighting setup we will look at one of the most important and common ways of lighting: the three-point light setup. As the name suggests, this consists of three lights—the key light, the rim light, and the fill light. With different positions, colors, and intensities we can create a huge variety of moods for our image and this is why every artist should know how to set up this kind of lighting. Let's get started!
From the smaller viewport header, select the Display mode and from the drop-down menu, click on the Rendered mode.
Here you have it! The awesome real-time viewport. Now the scene is quite empty, so it is not so heavy and Blender should still be quite responsive. Anyway, it is up to the artist to decide when to turn the real-time viewport off if it becomes too heavy.
Tip
When we activate the real-time viewport, in the upper part of it we can see some technical info. The last one on the right is Path Tracing Samples x/x. The more samples you have, the more precise and less noisy the viewport will be. If you want to increase the samples for the viewport, go to the render settings section and under the Sampling panel, change the Preview value. Just keep in mind that higher samples also mean higher render time!
These are steps that we need to follow to create a three-point lighting setup:
Right now, the scene is quite dark and boring. So, let's add some light to start. Add a plane, add a material to it from the material menu, and name it
Key_Light. While the node editor will be needed for the biggest part of materials, for the really basic ones it is still possible to use the old materials menu. So from the Surface panel, click on the Surface drop-down menu and select Emission. Note that a new shader node has been added in the node editor.If you still have the real-time viewport active, you will see that the plane is emitting light. Place the light a bit above our scene and let's take some time to familiarize with it. As we said in the introduction, Cycles is able to calculate lights in a quite accurate way. Indeed, mesh lights will behave like it does in reality.
This means that increasing the surface of the emitter will increase the amount of light in the scene. At the same time, the shadows will become more blurred. On the other hand, a smaller surface will be weaker but will cast much sharper shadows.
For the mesh emitters the only possible setting is in the materials menu (or in the node editor) and is Strength. Let's give this light an emitting power of
10and then place it a bit on the right and a bit higher than the camera, and make it face towards the center of the scene. Now set the scale to3.Let's copy the plane, place it on the left side of the scene, and scale it up to a value of
16. Our target is to make the shadows of this light much smoother, this being a fill light. The problem is that now its light is way too strong. By clicking on the button with the number 2 on it, which is right next to the material name, duplicate the material and name itFill_Lightand set the intensity of this material to1. To make the scene a bit more interesting, we can add a touch of blue to the color of the light. Something like R: 0.600, G: 0.800, B: 0.800 should be fine.Now let's duplicate the emitting plane again and move it behind the objects facing towards the camera and leave the scale as it is. Again we will have to duplicate the material and name it
Rim_Light. Change the color to a really subtle yellow. Set the RGB value to 0.800, 0.770, 0.600. This small color temperature contrast will help make the scene more interesting.There is just a small problem now. We can see our rim light in the camera, and this is not exactly what we want in a studio shot. Luckily, even if Cycles is a realistic engine, there is still a lot of room for tricks! With the rim light selected, go to the object menu and down to the Ray Visibility panel. Here uncheck the Camera checkbox and our rim light will be gone from the real-time viewport!
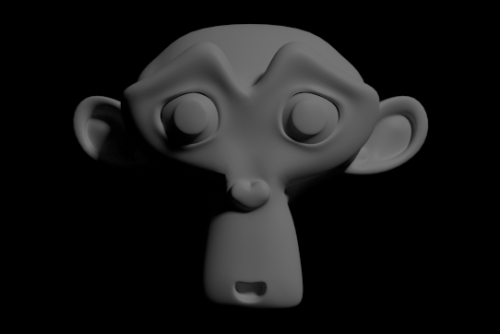
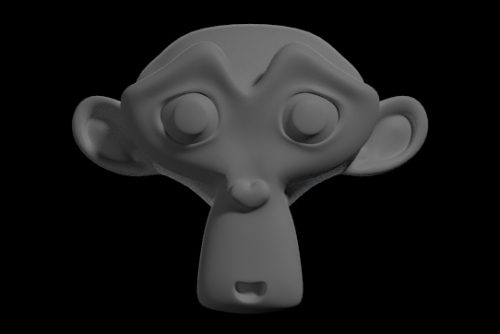
That's it for our three-point light setup! In the end, our scene should look more or less like this:

As we said at the beginning of this recipe, the three-point light setup is one of the most important setups to master and one of the most commonly used. We are now going to see the concepts behind it in depth.
This is the dominant light in the scene. This light plays the main role in determining the mood of an image and in shaping the form of subjects. It is also responsible for most of the shadows. With that said, the key light is not always the brightest one in the scene. More often than not the rim light is the brightest. On the other hand, the key light must always be brighter than the fill light. This light is usually positioned about 30 to 60 degrees to the front and to the right-hand side of the object. This is not a rule, however.
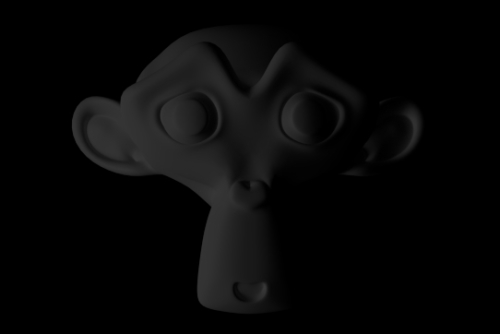
As the name suggests, this light fills in the shadow areas. As we said before, it is always of lesser visual intensity than the key light. The fill light is also really soft. This is because it is used to control the contrast of the image. A stronger fill light will result in a less-contrasted (and so with less visual tension) image, while a weaker fill light will leave the image with a higher contrast (and thus a more dramatic and visually tense image). In the real world, the fill light is always generated by the reflected or scattered light from where it takes its soft look. The fill light is usually positioned across from the key light, in order to better fill the shadows left by the latter. Still it should cast its light from the camera side.
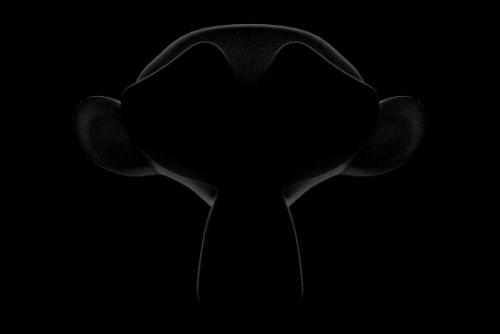
This light is also called Backlight and its primary function is to make the subject stand out from the background. It creates a thin line of light around the shape of the subject that helps to enhance the illusion of depth and emphasize the subject. This light is positioned behind the subject, more or less opposite to the camera point of view.
The three-point light setup became so popular thanks to its versatility. Playing with the intensities, colors, and position of the lights will greatly change the mood of the image, from a happy fairy look to a dark and sinister one. A good technique is to find references from images, for example, movies, and try to recreate the look of that image. You can be sure that in almost any of the movies out there, the lighting of the subjects was done with a three-point setup.
In this link Ben Simonds will explains a lot of tips and tricks with the three-point light setup, including how to give different moods:
http://bensimonds.com/2010/06/03/lighting-tips-from-the-masters/