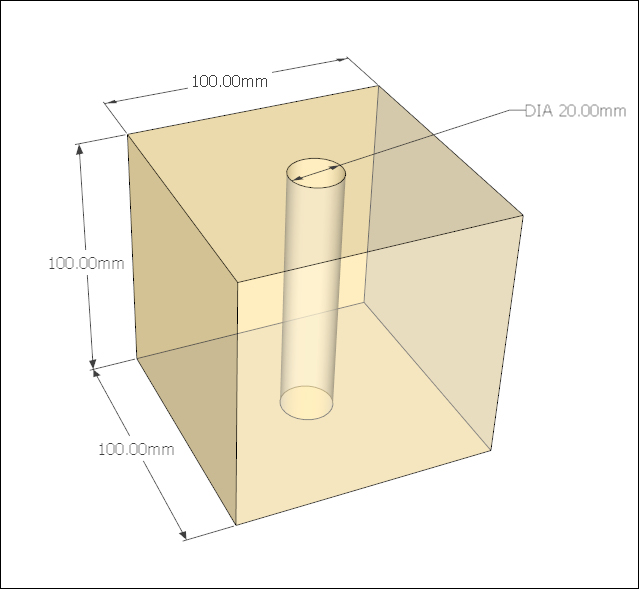

Let's make our first 3D-printable model, a simple box with a hole through it. We'll export it as an [.STL], and then import it back to SketchUp to see how the process works by performing the following steps:
Draw a 100 x 100 mm square with the Rectangle tool.
Using Push/Pull, pull the square into a 100 mm cube.
Draw a circle on top of the square with a 10 mm radius using the Circle tool.
Push this circle down to the bottom face so it creates a hole through the cube.
Select the entire box by triple-clicking on any of its faces.
Right-click on Make Group. If you look in the Entity Info dialog box, it should say Solid Group (1 in model). This is very important! If the model isn't solid, it will not print correctly, so you'll need to go back and fix it.
You should have something like the following diagram with X-ray on, so you can see the hole goes all the way through: