You now have a very usable Ubuntu computer system. You can use it to access the Internet, write riveting novels, balance your accounts—just about anything you could do with a standard personal computer. However, that is not your purpose; you want to use your embedded system to power your delightfully inventive projects. In most cases you won't want to connect a keyboard, mouse, and display to your projects, as you will want to keep your robot sizes small and maneuverable. However, you still need to communicate with your device, program it, and have it tell you what is going on when things don't work right. You'll spend some time on this task establishing remote access to your device.
To complete this task you'll need to have your external PC connected to the LAN, other than that, you are ready to go.
There are three ways you are going to access your system from your external PC:
The first is through a simple terminal interface using the SSH protocol.
The second way is using a program called vncserver, which will allow you to open a graphical "window" on your PC that will show you what the embedded system would be displaying on its display.
Finally, if you are using Microsoft Windows on your remote computer, I'll show how you can transfer files via a program called WinScp, which is custom made for this purpose.
So, first, make sure your basic system is up and working. Open a terminal window and check the IP address of your unit. You're going to need this no matter how you want to communicate with the system. You do this by issuing the
ifconfig command. You should get something that looks like this:
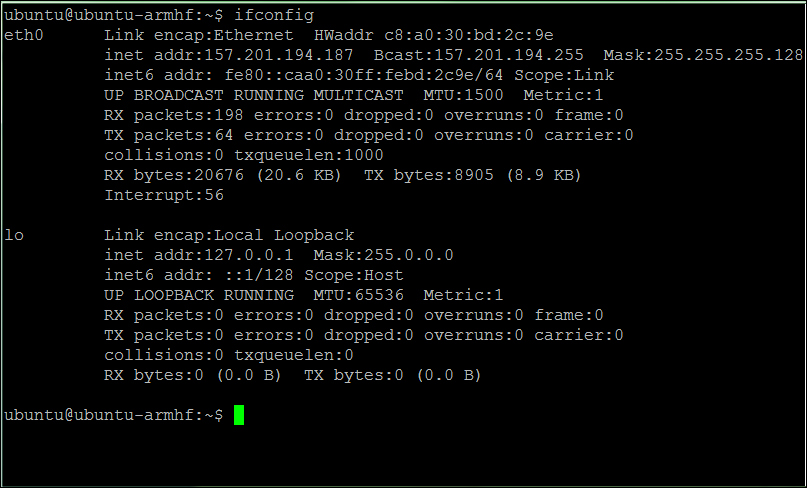
You'll need that "inet address" to contact your board via the LAN connection. First, let's configure an SSH terminal from your remote computer. An SSH terminal is a
Secure Shell Hypterminal connection, which simply means you'll be able to access your board and type in commands at the prompt, just like you have done without the Windows system. In order to do this, you need to have an SSH type application on your remote computer. If you are running Microsoft Windows, you can download such an application. My personal favorite is PuTTY. It is free and does a very good job of allowing you to save your configuration so that you don't have to type it in each time. Type putty in a search window, and you'll soon come to a page that supports a download, or you can go to www.putty.org.
Download PuTTY to your Microsoft Windows machine. Then run PuTTY by going to the directory where it has been placed and double-clicking on the file putty.exe. You should see a configuration window. It will look something like this:
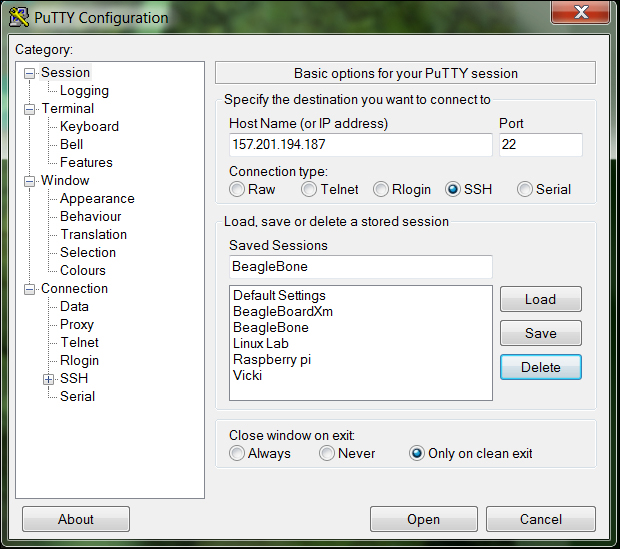
Type the inet address from the previous page in the Host Name space and make sure the SSH selection is highlighted. I save this configuration under BeagleBone so that I can load it each time.
When you press Open, the system will try to open a terminal window onto your BeagleBone Black via the LAN connection. The first time you do this, you will get a warning about an RSA key, as the two computers don't "know" about each other, so Windows is complaining that a computer that it doesn't know is about to be connected in a fairly intimate way. Simply select OK, and you should get a terminal with a login prompt.
Now you can log in and issue commands to your BeagleBone Black. If you'd like to do this from a Linux machine, the process is even simpler. Bring up a terminal window and then type ssh [email protected] –p 22. This will then bring you to the login screen of your BeagleBone Black, which should look similar to the preceding screenshot.
SSH is a really useful tool to communicate with your BeagleBone Black, and I use it extensively. However, sometimes you need a graphical look at your system, and you don't necessarily want to connect a monitor or a small LCD display. You can get this by using an application called vncserver. First, let's install a version of this on your BeagleBone Black by typing sudo apt-get install tightvncserver in a terminal window on your BeagleBone Black. This is a perfect opportunity to use SSH, by the way.
Tightvncserver is an application that will allow you to remotely view your complete windows system. Once you have it installed, you'll need to start the server by typing vncserver in a terminal window on the BeagleBone black. You will then be prompted for a password as shown in the following screenshot:
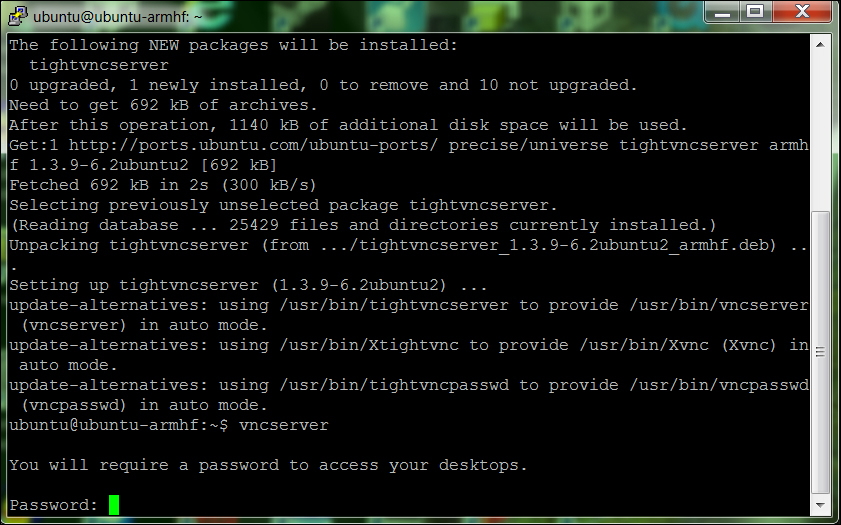
This can, and should be a different password than your password to access your BeagleBone Black. This will be the password your remote system will send to access the vncserver running on the board. Select a password—you don't need to set the password for the view only capability—and then your vncserver will be running.
You'll need a VNC viewer application for your remote computer. On my Windows system I use an application called Real VNC. When I start it up it gives me the following screen:
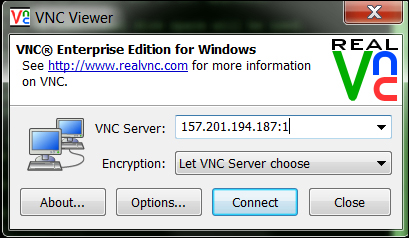
Enter the VNC Server address, which is the IP address of your BeagleBone Black, with a :1 after it, and select Connect. You will get this pop up:
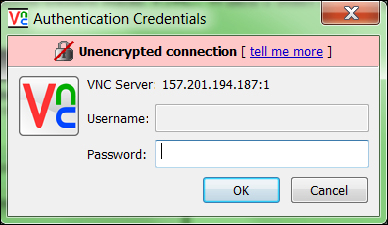
Type in the password you just entered while starting the vncserver, and you should then get a graphics view of your BeagleBone Black. Hopefully that looks like this:
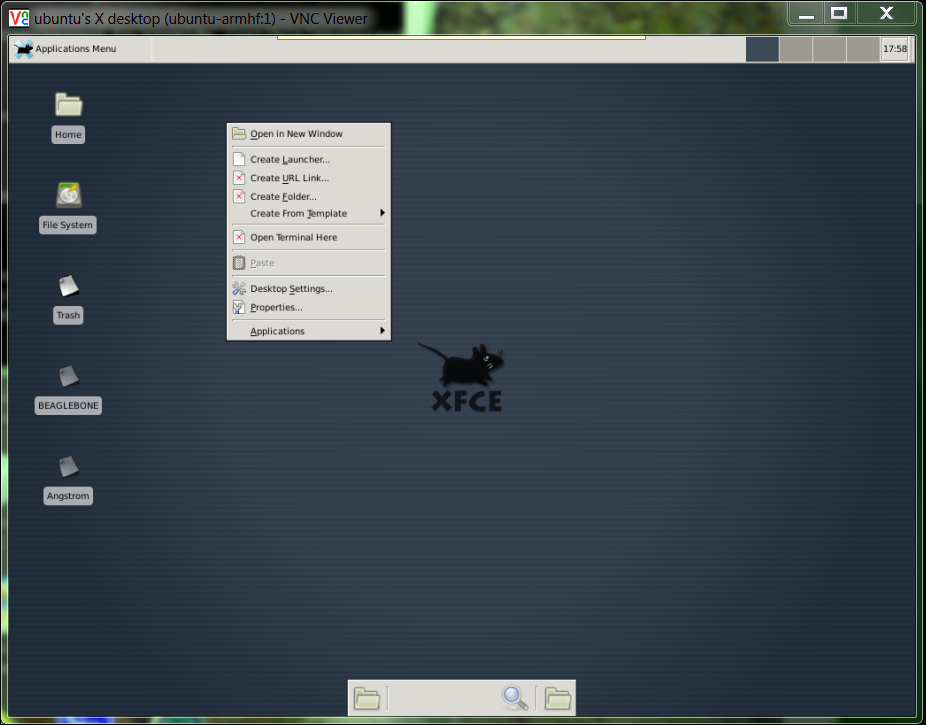
You can now access all the capabilities of your system, albeit they may be slower if you are doing graphics-intensive data transfers. You'll see this as you work through your projects.
There are ways to make your vncserver on your BeagleBone Black start automatically on boot. I have not used them; I choose to type the command vncserver from an SSH application when I want the application running. This keeps your running applications to a minimum and, more importantly, provides for fewer security risks. If you'd like to start your vncserver each time you boot, there are several places on the Internet that will show you how to configure this. Try http://www.havetheknowhow.com/Configure-the-server/Run-VNC-on-boot.html. You will only have to type the password the very first time you start vncserver—it will remember it after that. You also do not need to start Xfce using the startx command on your BeagleBone Black for it to come up in the VNC viewer to start its view onto the graphical interface.
The final piece of SW I like to use with my Windows system is a free application called WinSCP. To download and install this piece of SW, simply search the web for WinSCP and follow the instructions. Once installed, run the program. It will open the following dialogue box:
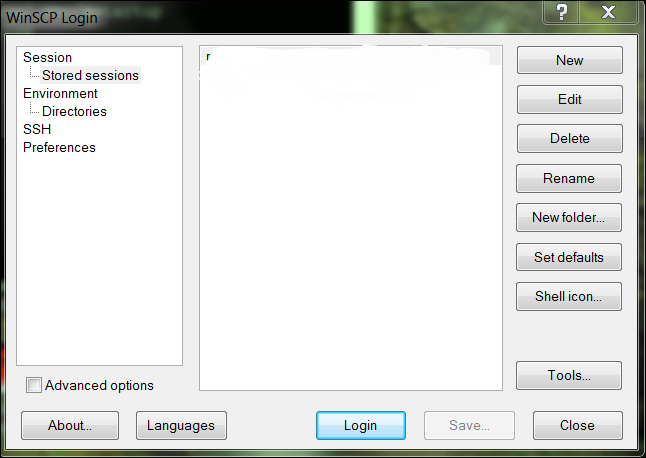
Select New, and you will get the following screen:
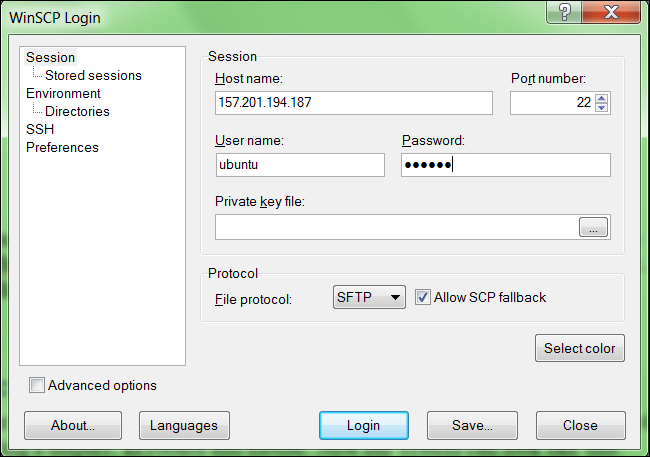
Here you fill in the IP address in the host name, ubuntu in the user name, and the BeagleBone Black password (not the vncserver password) in the password space. Press log-in and you should then see the application displayed:
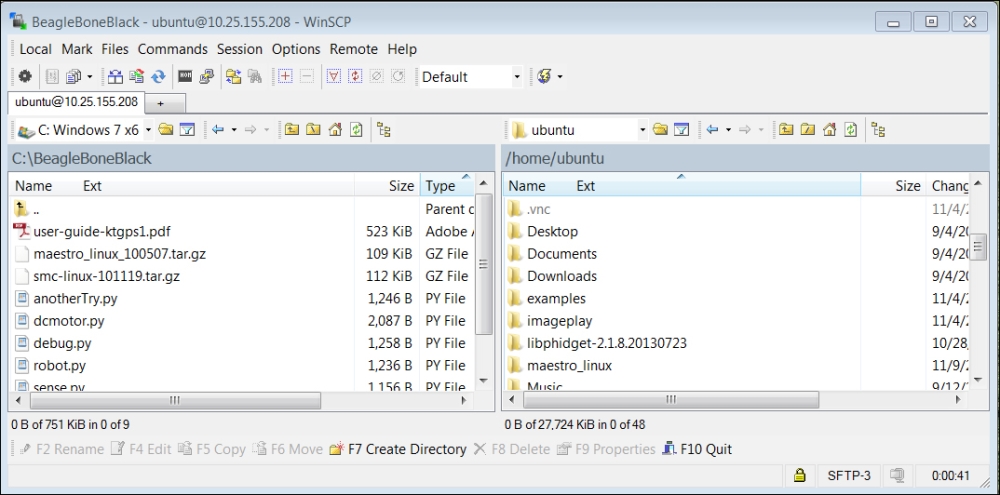
Now you can drag-and-drop files from one system to the other.
Once you've completed this step, you can now access your system fully remotely without connecting a display, keyboard, and mouse. Now your system will look like this:
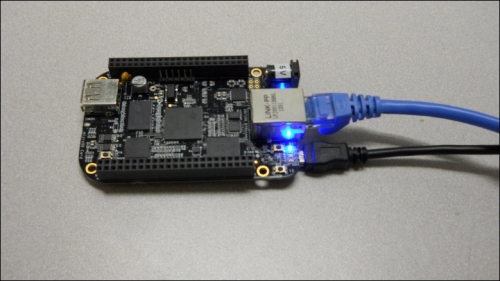
You only need to connect the power and LAN. If you need to issue simple commands, you'll connect via SSH. If you need a more complete set of graphical functionality, you can access this via vncserver. Finally, if you are using a Windows system and want to transfer files back and forth, you have access to WinScp. Now you have the toolkit you need to build your first capabilities.
One of the challenges of accessing the system remotely is that you need to know the IP address of your board. If you have the board connected to a keyboard and display, you can always just run ifconfig to get this info. But you're going to use the board in many applications where you don't have this information. There is a way to discover this by using an ipscanner application. There are several available for free; simply download and use as they instruct. They can let you know what addresses are being used, and this should then let you find your BeagleBone Black address without typing ipconfig. From Linux you can use an application called nmap.


