

Let's first set up the Arduino IDE for XBee that will be connected to your Arduino. Once you have connected all the shields to your Arduino, simply connect your Arduino with the USB cable to one of the computers. Bring up the Arduino IDE and then type in the following code into the sketch window:
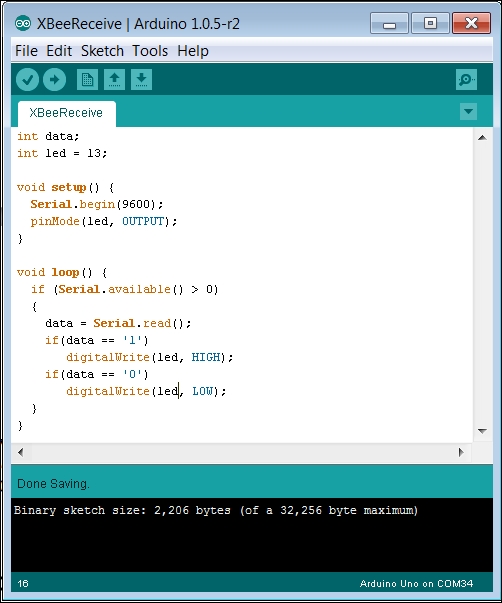
This sketch is quite simple; you can turn on the on-board LED with remote commands, 1 to turn it on and 0 to turn it off. Once you have compiled and uploaded this code, disconnect the USB cable from the computer. You'll need to physically change a switch setting on the wireless shield so that the device will now accept commands from your XBee controller. It is on the opposite end of the shield and looks like the following image:
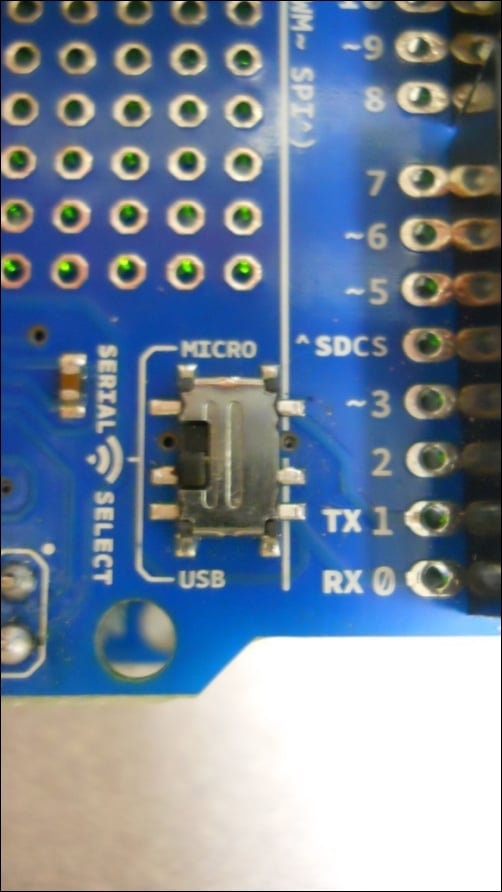
When you are programming the device, you'll want this switch to be in the USB location. When you are ready to communicate with the device, you'll want to switch this to the MICRO setting. So, change it to the MICRO setting once...