

Now that our hardware is assembled, we are going to see the basics of the Arduino environment, and how to use the aREST library that we are going to use in several chapters of this book to control Arduino from an Android phone.
The aREST library will allow us to simply control the Arduino board externally using the same commands, whether it is using an USB cable, Bluetooth, or Wi-Fi. Without this library, we will have to rewrite the same code several times for all the chapters of the book. To find a complete documentation on the aREST library, you can visit https://github.com/marcoschwartz/aREST.
The main window of the Arduino IDE is where you enter the code to program the Arduino board.
Arduino code files are usually called sketches. The following screenshot is of the Arduino IDE with the code of this chapter already loaded:
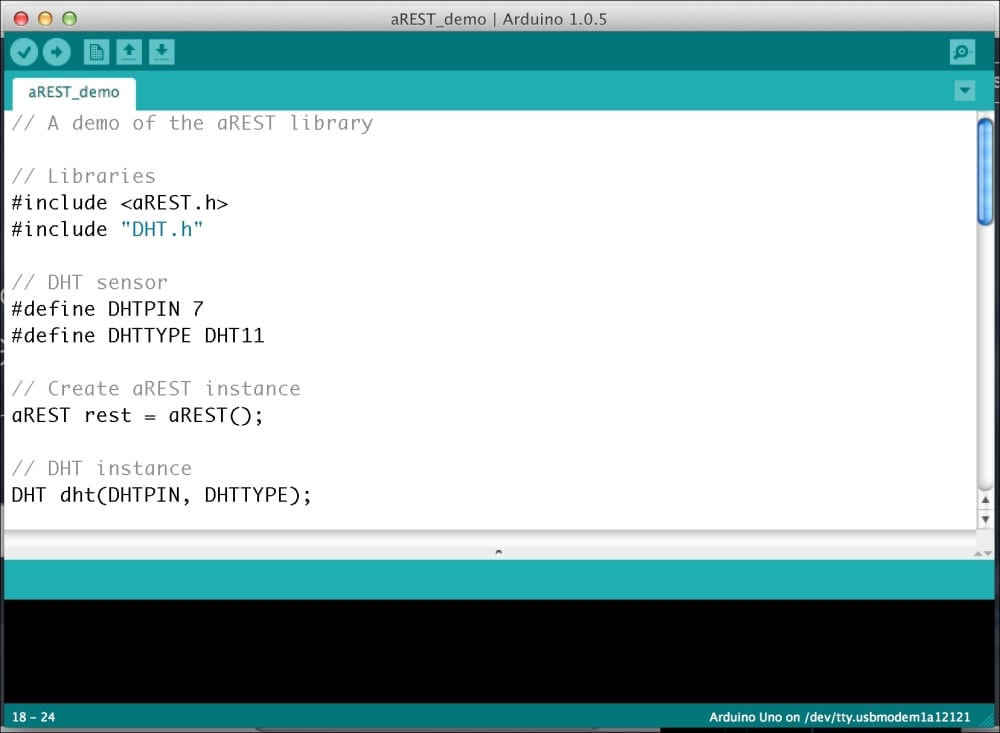
You will basically use two buttons that you can find on the left-hand side of the toolbar. The first one, with the check sign, can be use to compile the code. The second one will be used to upload the code to the Arduino board. Note that if the code has not been compiled yet, the upload button will also compile the code before uploading.
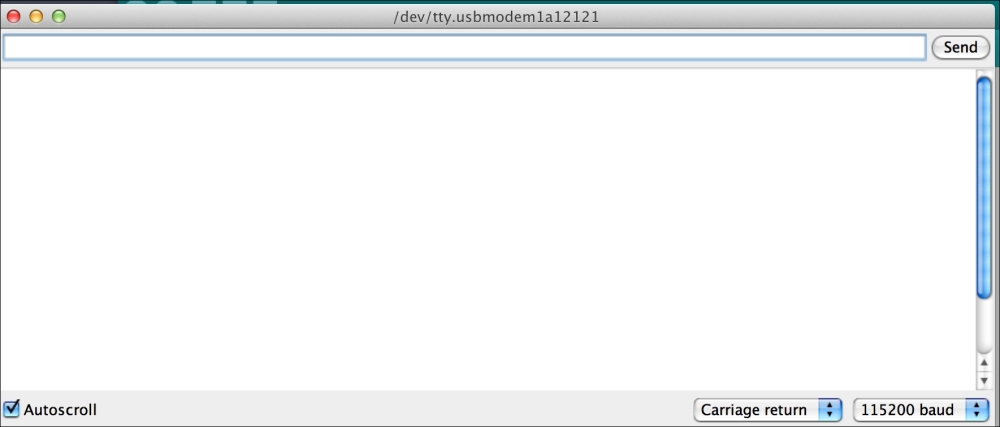
The second important window of the Arduino IDE is called the
serial monitor. This is where you can monitor what your Arduino project is doing, using the Serial.print() statements in the code to generate debug output. You can access it by clicking on the top-right icon of the Arduino IDE main window.
The following screenshot shows what the serial monitor looks like:
We are now going to build our first Arduino sketch in this book. What we want to achieve is simply to control the relay and read data from the DHT11 sensor. To do so, you are going to use the aREST library by sending commands from your computer. In the next chapter of this book, we are going to use the same commands but via a Bluetooth or Wi-Fi connection. The goal of this section is really to make you familiar with the commands of the aREST library.
The following code is the complete Arduino sketch for this part:
// Libraries
#include <aREST.h>
#include "DHT.h"

// DHT sensor
#define DHTPIN 7
#define DHTTYPE DHT11

// Create aREST instance
aREST rest = aREST();

// DHT instance
DHT dht(DHTPIN, DHTTYPE);

// Variables to be exposed to the API
int temperature;
int humidity;

void setup(void) {
  // Start Serial (with 115200 as the baud rate)
  Serial.begin(115200);

  // Expose variables to REST API
  rest.variable("temperature",&temperature);
  rest.variable("humidity",&humidity);

  // Give name and ID to device
  rest.set_id("001");
  rest.set_name("arduino_project");

  // Start temperature sensor
  dht.begin();

}

void loop() {

  // Measure from DHT
  float h = dht.readHumidity();
  float t = dht.readTemperature();

  temperature = (int)t;
  humidity = (int)h;

  // Handle REST calls
  rest.handle(Serial);

}
Let's explore the details of this Arduino sketch using the following steps:
The Arduino sketch starts by importing the required libraries for the project:
#include <aREST.h>
#include "DHT.h"
After that, we need to define on which pin the DHT11 sensor is connected to, and which is the type of the sensor:
#define DHTPIN 7
#define DHTTYPE DHT11
We also need to create an instance of the aREST library:
aREST rest = aREST();
We also need to create an instance of the DHT11 sensor so that we can measure data from it:
DHT dht(DHTPIN, DHTTYPE);
Finally, we need to create two variables that will contain our measurements:
int temperature;
int humidity;
In the
setup()function of the sketch, we need to start the serial port:Serial.begin(115200);
Next, we need to expose our two measurement variables so that we can access them via the serial port using the aREST library. Note that we have to pass the reference to these variables, not their values, as shown in the following code:
rest.variable("temperature",&temperature);
rest.variable("humidity",&humidity);
We also set an ID and name to our project. This will not play any role here, but is simply to identify our board in case we have many of them:
rest.set_id("001");
rest.set_name("arduino_project");
Finally, we start the DHT11 sensor:
dht.begin();
Now, in the
loop()function of the sketch, we make the measurements from the DHT11 sensor, and convert these measurements to integers (which is called "casting" in C):float h = dht.readHumidity(); float t = dht.readTemperature(); temperature = (int)t; humidity = (int)h;
Note that here we are converting these numbers into integers because it is the only variable type supported by the aREST library. However, as the resolution of the DHT11 sensor is limited, we are not losing any information here. Finally, we handle any requests coming from the outside using the following code:
rest.handle(Serial);
It's now time to upload the sketch to your Arduino board. If you have any error when compiling, make sure that you installed all the required Arduino libraries for this chapter.
When this is done, simply open the serial monitor (making sure the serial speed is set to 115200). Note that you could do the same with your own serial terminal software, for example, CoolTerm found at http://freeware.the-meiers.org/.
Now, we are going to test that the aREST library is working correctly. Let's proceed with the following steps:
First, we are going to query the board for its ID and name. To do so, type the following:
/idYou should be greeted by the following answer:
{"id": "001", "name": "arduino_project", "connected": true}We are now going to see how to control the relay, as this is something we are going to do several times in this book. First, we need to define that the relay pin, which is pin number 8 of the Arduino board, is an output. To do so, we can simply type:
/mode/8/oYou should receive the following answer on the serial monitor:
{"message": "Pin D8 set to output", "id": "001", "name": "arduino_project", "connected": true}Now, to activate the relay, we need to set the pin 8 to a
HIGHstate. This is done the following command:/digital/8/1You should instantly receive a confirmation message, and hear the relay click. To switch the relay off again, simply type the following code:
/digital/8/0Now, we are going to read data from the board using the aREST library. For example, to read the temperature variable, you can simply type the following code:
/temperatureYou will receive the following confirmation message with the value of the temperature:
{"temperature": 28, "id": "001", "name": "arduino_project", "connected": true}You can do the same for humidity:
/humidityYou will receive a similar message back:
{"humidity": 35, "id": "001", "name": "arduino_project", "connected": true}
If this is working, congratulations! You now know the basics of the aREST library that we will use throughout the book. Note that for now we are using these commands via serial communications, but later in the book, we will first use the same commands via Bluetooth, and then via Wi-Fi to command the Arduino board from an Android device.
Now that we have seen how the aREST library is working, we are going to create our first Android project. Note that in this introductory chapter, we won't connect both together; this will be done in the next chapter of the book.