Book Image

Raspberry Pi Robotic Blueprints

Book Image

Raspberry Pi Robotic Blueprints

Overview of this book

The Raspberry Pi is a series of credit card-sized single-board computers developed in the UK by the Raspberry Pi Foundation with the intention of promoting the teaching of basic computer science in schools. The Raspberry Pi is known as a tiny computer built on a single circuit board. It runs a Linux operating system, and has connection ports for various peripherals so that it can be hooked up to sensors, motors, cameras, and more. Raspberry Pi has been hugely popular among hardware hobbyists for various projects, including robotics. This book gives you an insight into implementing several creative projects using the peripherals provided by Raspberry Pi. To start, we’ll walk through the basic robotics concepts that the world of Raspberry Pi offers us, implementing wireless communication to control your robot from a distance. Next, we demonstrate how to build a sensible and a visionary robot, maximizing the use of sensors and step controllers. After that, we focus on building a wheeled robot that can draw and play hockey. To finish with a bang, we’ll build an autonomous hexcopter, that is, a flying robot controlled by Raspberry Pi. By the end of this book, you will be a maestro in applying an array of different technologies to create almost any imaginable robot.
Table of Contents (14 chapters)
Raspberry Pi Robotic Blueprints
Credits
About the Author
About the Reviewers
www.PacktPub.com
Preface
Index

Configuring the software


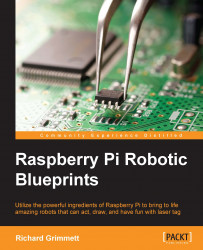
Now, you can connect the motor controller to your PC or Linux machine to see whether or not you can talk to it. Once the hardware is connected, you will use some of the software provided by Pololu to control the servos. Download the Pololu software from http://www.pololu.com/docs/0J40/3.a and install it using the instructions given on the website. Once it is installed, run the software; you should be able to see the window that is shown in the following screenshot:

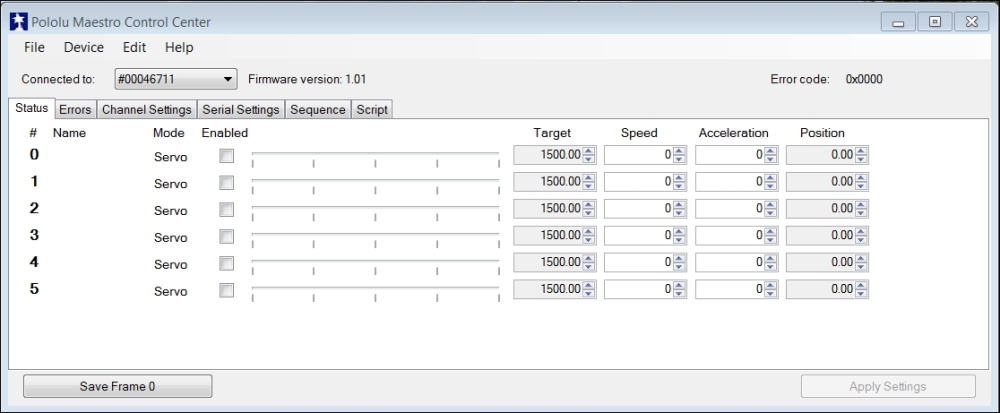
You will first need to change the Serial mode configuration in Serial Settings, so select the Serial Settings tab; you will see the window that is shown in the following screenshot:

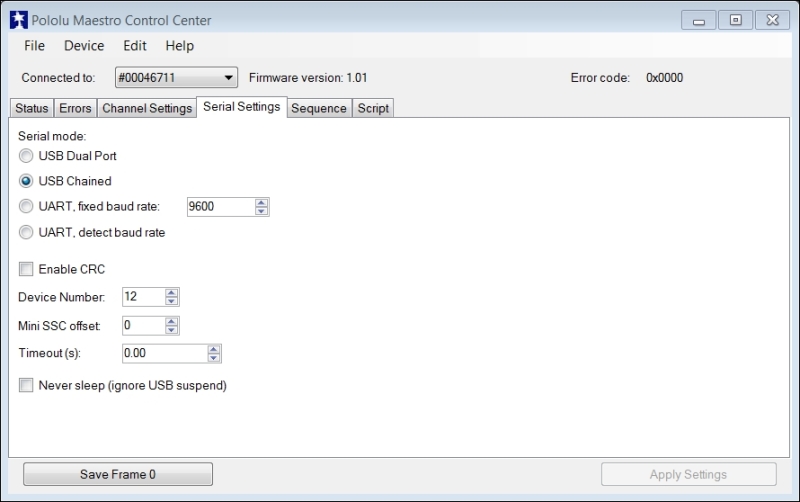
Make sure that USB Chained is selected; this will allow you to connect to and control the motor controller over the USB. Now, go back to the main screen by selecting the Status tab and you can now turn on the four servos. The screen will look as shown in the following screenshot:

Now, you can use the sliders to control the servos...