Book Image

Internet of Things with Arduino Cookbook

By : Marco Schwartz
Book Image

Internet of Things with Arduino Cookbook

By: Marco Schwartz

Overview of this book

Arduino is a powerful and very versatile platform used by millions of people around the world to create DIY electronics projects. It can be connected to a wide variety of sensors and other components, making it the ideal platform to build amazing Internet of Things (IoT) projects on—the next wave in the era of computing. This book takes a recipe-based approach, giving you precise examples on how to build IoT projects of all types using the Arduino platform. You will come across projects from several fields, including the popular robotics and home automation domains. Along with being introduced to several forms of interactions within IoT, including projects that directly interact with well-known web services such as Twitter, Facebook, and Dropbox we will also focus on Machine-to-Machine (M2M) interactions, where Arduino projects interact without any human intervention. You will learn to build a few quick and easy-to-make fun projects that will really expand your horizons in the world of IoT and Arduino. Each chapter ends with a troubleshooting recipe that will help you overcome any problems faced while building these projects. By the end of this book, you will not only know how to build these projects, but also have the skills necessary to build your own IoT projects in the future.
Table of Contents (14 chapters)
Internet of Things with Arduino Cookbook
Credits
About the Author
About the Reviewer
www.PacktPub.com
Preface
Index

Using distance sensors


For now, we are able to control our mobile robot, but except if we directly look at it, we have no way of knowing if there is an obstacle in front of it.

This is where ultrasonic sensors come into play: they are an easy, inexpensive way to know precisely if there is something in front of the mobile robot, and at what distance. In this recipe, we'll add an ultrasonic sensor to our robot and integrate it into the interface.

Getting ready

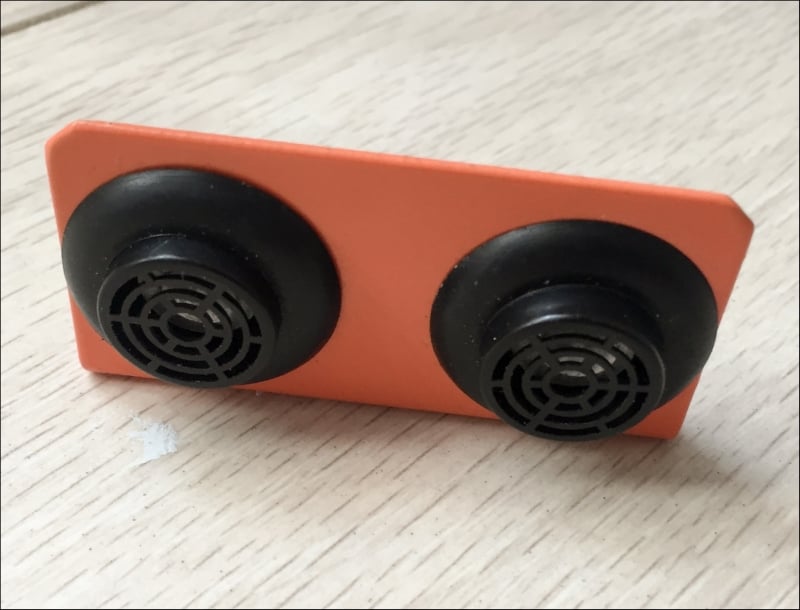
The first thing you need is, of course, an ultrasonic sensor. For this project, I used an URM37 ultrasonic sensor from DFRobot:

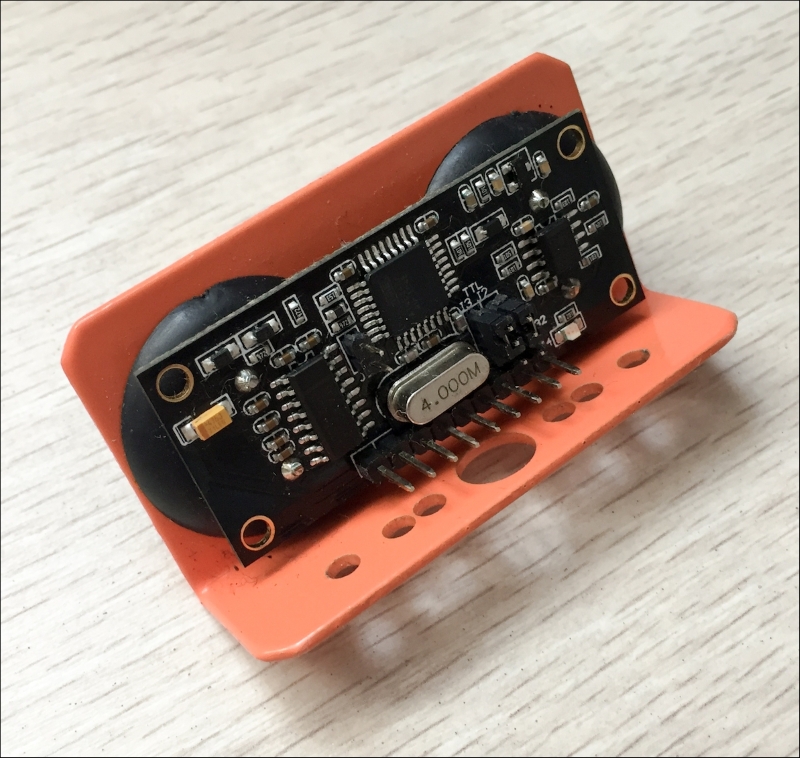
This is the back of the sensor, showing all the pins:

You can now mount the sensor on the robot's chassis, putting the sensor in front of the robot.

Then, you can refer to the documentation at http://www.dfrobot.com/wiki/index.php?title=URM37_V4.0_Ultrasonic_Sensor_(SKU:SEN0001) to find the pins of the sensor.

Basically, you need to connect the VCC pin to the VCC pin of the Arduino board, GND to GND, and pin number...