Book Image

Building Smart Homes with Raspberry Pi Zero

By : Marco Schwartz
Book Image

Building Smart Homes with Raspberry Pi Zero

By: Marco Schwartz

Overview of this book

The release of the Raspberry Pi Zero has completely amazed the tech community. With the price, form factor, and being high on utility—the Raspberry Pi Zero is the perfect companion to support home automation projects and makes IoT even more accessible. With this book, you will be able to create and program home automation projects using the Raspberry Pi Zero board. The book will teach you how to build a thermostat that will automatically regulate the temperature in your home. Another important topic in home automation is controlling electrical appliances, and you will learn how to control LED Lights, lamps, and other electrical applications. Moving on, we will build a smart energy meter that can measure the power of the appliance, and you’ll learn how to switch it on and off. You’ll also see how to build simple security system, composed of alarms, a security camera, and motion detectors. At the end, you will integrate everything what you learned so far into a more complex project to automate the key aspects of your home. By the end, you will have deepened your knowledge of the Raspberry Pi Zero, and will know how to build autonomous home automation projects.
Table of Contents (17 chapters)
Building Smart Homes with Raspberry Pi Zero
Credits
About the Author
About the Reviewer
www.PacktPub.com
Preface
Index

Making a motion sensor that sends text messages


For the first project of this chapter, we are going to attach a motion sensor to the Raspberry Pi board and make the Raspberry Pi Zero send us a text message whenever motion is detected. For that, we are going to use IFTTT to make the link between our Raspberry Pi and our phone. Indeed, whenever IFTTT will receive a trigger from the Raspberry Pi, it will automatically send us a text message.

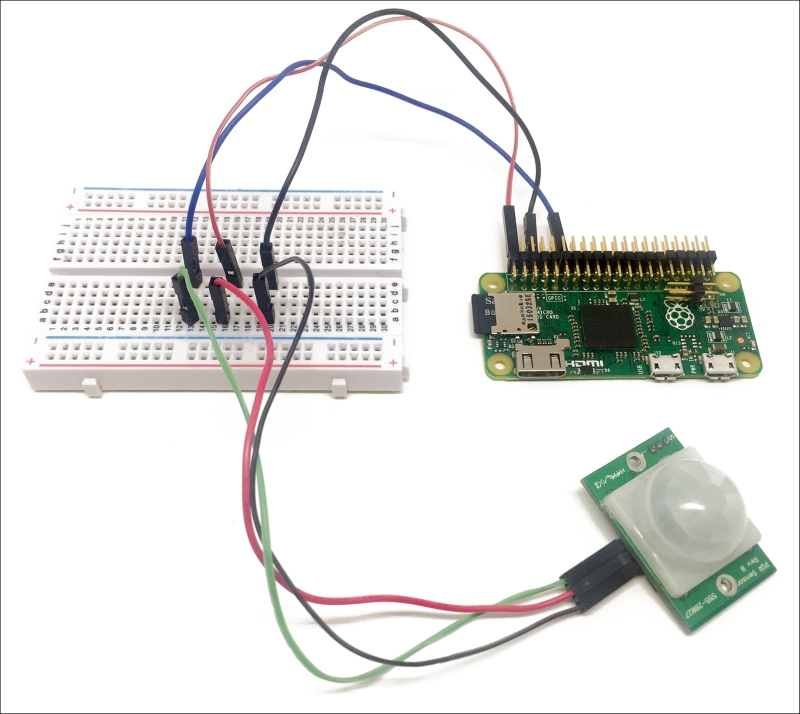
Lets first connect the PIR motion sensor to the Raspberry Pi. For that, simply connect the VCC pin of the sensor to a 3.3V pin of the Raspberry Pi, GND to GND, and the OUT pin of the sensor to GPIO18 of the Raspberry Pi.

This is the final result:

Let's now add our first channel to IFTTT, which will allow us later to interact with the Raspberry Pi and with web services. You can easily add new channels by clicking on the corresponding tab on the IFTTT website. First, add the Maker channel to your account:

This will basically give you a key that you will need...