To get the best sound, you need a good microphone. But let's keep this in perspective. It is your first time using Audacity and creating a podcast, right? So our project doesn't need to be professional in its quality of sound. Any microphone will do the trick, including any internal microphone that your computer may have. However, it is worth recommending some microphone options that will make editing and cleaning up the vocal tracks easier. For any future projects, you may want to upgrade your equipment—because a better microphone, sound card, and audio setup will record your audio with much less degradation up front. When you compress your recording to create an MP3, your recording will sound better, and will also require less of your time for post-production.
Generally, here's what you'll need:
A computer (or laptop) with a sound card
A microphone
A microphone stand, or something to secure the microphone while you are recording, may be useful, so that you can avoid any additional interference
The sound card allows your computer to record audio. There are hundreds of sound card varieties, some with many "lines in" for recording multiple items at once (say, if you're part of a band and want each instrument to have an individual microphone) or just one input. Others have microphones bundled with the product, and there are even a few that include additional useful software packages, including Audacity. Again, for our project, any sound card will do, as long as it has a line-in and is functional. For ongoing projects, you should research the best sound cards for the best recording quality, depending on what will best fit your needs.
For the microphone option, there are several different types to consider in the long run, depending on what you are recording, your other equipment, and the purpose that your audio track will serve. Your range of choices is as follows:
The most inexpensive option is to use your computer's internal microphone (if it has one). This is definitely enough to get you started on our sample project.
The next least-expensive option is a simple headset of the kind that are easily available in most big department stores, and are used commonly by computer gamers. The headphone portion uses your computer's sound card and lets you listen to stereo sound from music, games, movies, and more. The microphone, is usually incorporated into the headset, is often noise-canceling, and generally offers decent quality sound recording. With a headset, no microphone stand or other equipment is required to get started.

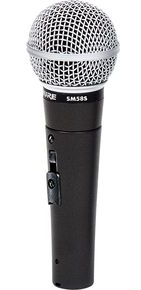
The next best choice is a dynamic microphone. They are durable, with few moving parts, and are ideal for someone who wants that little bit of extra quality when recording vocals. No additional power source is needed, but a microphone stand is recommended.

In addition to these basic options, there are several other varieties of microphones that vary in both price and the quality of sound that they record. However, many of these will require even more equipment to work effectively. Hence, sticking to the basics will get you through your project.


